When Oven Says F2: Quick Diagnosis and Fixes
Urgent, step-by-step guidance to understand and resolve F2 oven error codes with safe quick fixes and expert advice from Oven Cook Pro.

Definition: An F2 code on an oven signals a fault in the control system, most often related to the temperature sensor, keypad, or main control board. Quick actions include powering the unit off and on, inspecting loose connections, and consulting your model’s manual. If the code persists, schedule professional service.
What F2 Means on Ovens
When your oven displays F2, it's signaling a fault in the oven's control system. Different brands interpret error codes differently, but in most modern ovens F2 points to a failure in the temperature sensing circuit, keypad, or main control board. The code is not a heating fault per se; rather, it indicates that the oven's electronics cannot properly read or regulate temperature. In urgent terms, treat F2 as a communication error between sensors and control logic. The immediate risk to you as a homeowner is miscalibrated temperatures, doors that won’t latch properly after a fault, or the oven refusing to enter a bake or broil mode. The good news is that many F2 cases are solvable with simple resets or connection checks, without replacing expensive parts. The key is to start with the least invasive steps and guide the code through a controlled diagnostic path. Throughout this guide, we reference the "F2" code as a generic fault type; specific appliances may show slightly different messaging, but the underlying fault pattern is similar.
Common Causes of F2
F2 is often a sign that the oven's sensing and control circuitry is not communicating correctly. Common culprits include a faulty temperature sensor, corroded or loose sensor wiring, a worn keypad or touchpad, or a failing main control board. In many cases, issues like a loose harness connection behind the panel or a tripped thermal fuse can mimic a sensor fault. Less frequent but plausible causes include door switch problems that prevent normal operation, or relay failures that disrupt power delivery to the heating elements. Each cause has a typical symptom pattern, so careful observation helps distinguish between them. Remember: F2 usually indicates an electronics or sensor risk rather than a pure heating element fault, which is why the fixes differ from a simple bake element replacement.
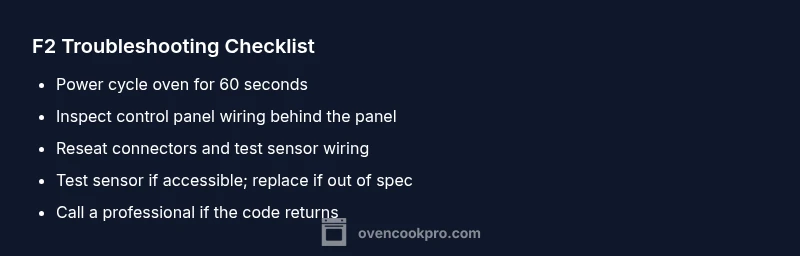
Quick Fixes You Can Try Safely
Before diving into disassembly, try these quick, low-risk steps. First, unplug the oven or flip the circuit breaker, wait 60 seconds, then restore power to perform a soft reset. If your model allows, perform a display reset or cabinet-level reset as described in the manual. Check for obvious loose wires or connectors behind the control panel and reseat them carefully if you can safely reach them. Clean around the control panel to remove any residue that could cause intermittent touchscreen inputs. If the error reappears after a power cycle and basic checks, proceed to the diagnostic flow or contact a professional. Do not attempt deep repairs unless you are comfortable with electrical components.
Diagnostic Flow for F2 (Overview)
The following diagnostic flow helps you systematically identify the root cause. Start with the most likely issues and move toward more complex repairs. If at any point you feel uncertain or the unit is under warranty, stop and call a professional. This approach prioritizes safety and cost-effectiveness, aiming to resolve the issue without unnecessary parts replacement.
Step-by-Step Fix: Sensor or Controller Replacement
If the fault persists after resets and harness checks, the next steps usually involve testing and potentially replacing the temperature sensor or main control board. Access to these parts varies by model; in many cases, a defective sensor or faulty control PCB is the culprit behind F2. Replacement parts are typically available from the manufacturer or reputable repair shops. Expect a range of costs depending on the part and labor. In a DIY-friendly scenario, replace only the faulty component rather than the entire control assembly to minimize expense. If you are unsure, schedule professional service to ensure correct calibration and safe installation.
When to Call a Professional
If you cannot access the sensor or board safely, or if disassembly risks electrical shock or gas connections, call a professional. An experienced technician can run a full diagnostic, verify sensor resistance with proper equipment, and replace parts with correct specifications. Professional service for an F2 fault typically falls in a broad cost range that depends on the part, access, and regional labor rates. Even with a high estimate, repairing a faulty sensor or control board is often more economical than replacing the entire oven.
Cost Expectations for F2 Repairs
Costs for resolving F2 can vary widely. A simple sensor replacement or a minor control board reflow may fall in a modest range, while replacement of the main control board or wiring harness can be more expensive. In many markets, expect the total for parts plus labor to fall into a mid-to-high range, with potential savings if bundled with routine maintenance. Always request a written estimate before authorizing work and ask about warranty coverage for parts and labor.
Safety First: What Not to Do
Do not operate the oven if you notice burnt smells, buzzing sounds, or signs of heat inside the control area. Never attempt to bypass safety interlocks or bypass the control board to test heating elements. Electrical and gas components require specialized training; tampering can cause injury or fire. If you are unsure, turn off power, remove access to the appliance, and contact a licensed technician.
Preventive Tips to Avoid F2 in the Future
Keep the control panel and wiring harness clean and free of moisture or grease. Regularly inspect the control board for signs of corrosion or loose connectors, especially after service or a heavy cleaning. Ensure your oven is plugged into a dedicated circuit with proper voltage; avoid shared outlets that can lead to voltage dips. Document any error codes and the conditions under which they appear to help technicians diagnose faster next time.
Brand-Wise Insights: What Oven Cook Pro Recommends
From the Oven Cook Pro standpoint, the F2 fault should be approached with a disciplined diagnostic mindset. Start with a safe reset, verify connections, and only replace components when indicated by symptoms and test results. Maintain a log of error codes, resets, and replacements to track patterns that can speed future troubleshooting.
What to Do Next: Your Action Plan
Create a simple action plan: (1) perform a power cycle and basic checks; (2) run the diagnostic flow and test sensors if accessible; (3) obtain a formal estimate if a board or sensor replacement is needed; (4) decide whether to replace parts or upgrade the oven based on age, warranty, and cost. This plan keeps you in control and reduces downtime.
Steps
Estimated time: 30-60 minutes
- 1
Power cycle and reset
Unplug the oven or switch off the circuit breaker for 60 seconds. Plug back in and re-test the code. This simple reset can clear transient faults and reinitialize communication between sensors and the control board.
Tip: Use a timer to ensure you wait the full 60 seconds. - 2
Check power and outlet stability
Confirm the outlet provides stable voltage by testing with a known-good device. A fluctuating supply can trigger fault codes and confuse sensors. If you suspect a supply issue, test on a different outlet or circuit.
Tip: Avoid using extension cords for high-power oven loads. - 3
Inspect sensor wiring behind the panel
Carefully remove access panels to view the temperature sensor and harness. Look for loose plugs, discolored connectors, or damaged insulation. Reseat any loose connections, ensuring a firm, clicky connection.
Tip: Only touch wiring with the oven unplugged to avoid shock. - 4
Test the temperature sensor (if accessible)
If you have a service manual or meter, test the sensor's resistance at room temperature and compare to the spec. Large deviations often indicate a faulty sensor that will require replacement.
Tip: If you’re unsure about testing electronics, skip to professional service. - 5
Decide on component replacement
If testing points to a bad sensor or failed board, order the correct replacement part from the manufacturer. Follow the model-specific manual for safe removal and installation. If the model is older or you lack tools, professional service is recommended.
Tip: Keep model number handy and request OEM parts for best compatibility.
Diagnosis: Oven displays F2 and refuses to bake
Possible Causes
- highTemperature sensor fault or wiring issue
- mediumControl board or keypad malfunction
- lowDoor switch or relay fault
Fixes
- easyPower cycle and reset the display
- mediumInspect sensor wiring and connectors for looseness or corrosion
- hardReplace the faulty temperature sensor or control board
Questions & Answers
What does F2 mean on my oven?
F2 usually signals a fault within the control system, often related to the temperature sensor, keypad, or main control board. It’s not a pure heating problem and often requires a reset or part replacement.
F2 indicates a control system fault, usually sensor or board related. Start with a reset and basic checks, then decide on replacement if needed.
Can I fix F2 myself?
Basic resets and harness reseating are safe for DIY users, but any parts replacement or sensor testing should be done only if you feel confident with electronics. If in doubt, contact a professional.
You can try safe resets and checks, but for sensor or board replacements, consider a professional.
How much does it cost to repair an F2 fault?
Repair costs vary by part and labor. Expect a broad range that covers sensor or board replacements, with higher costs for main board or controlled assemblies. Always obtain a written estimate before proceeding.
Costs vary; get a written estimate before proceeding with any replacement.
Should I keep using the oven until it’s repaired?
No. If F2 persists, avoid further use to prevent potential damage or unsafe conditions. Schedule service to restore safe operation.
Don’t keep using it if the error persists; get it repaired.
Is F2 related to door seals or hinges?
F2 is more commonly linked to sensor or control board issues rather than door hardware. However, malfunctioning door switches can contribute to operational faults, so inspect the door mechanism if the panel indicates door-related fault indicators.
Door hardware is less often the cause, but inspect it if door-related indicators exist.
Do warranties cover F2 repairs?
Warranties vary by model and purchase date. Some components (sensors or boards) may be covered during the warranty period, while service charges often apply after expiry. Check your warranty terms or contact the manufacturer.
Check warranty terms for coverage on sensors and boards.
What should I do with old parts after replacement?
Dispose of old parts through proper e-waste channels, following local regulations. Some retailers offer take-back programs for compatible replacements.
Recycle old parts through proper e-waste channels.
Watch Video
Main Points
- Start with a safe reset and basic checks
- Identify sensor or board fault before replacing parts
- Request written estimates before any significant repair
- Call a professional if unsure about wiring or high-voltage tasks
- Document codes and fixes for future reference