Oven Smells Like Burning When Preheating: Quick Fixes
Discover why your oven smells like burning when preheating and how to diagnose, clean, and prevent odors with expert steps from Oven Cook Pro.

If your oven smells like burning when preheating, the most likely cause is residue or spilled food near the heating elements. Start by turning off the oven, unplugging it if safe, and letting it cool. Then wipe away debris, remove racks, and run a self-cleaning cycle or a low-temp bake to burn off buildup. According to Oven Cook Pro, most odors vanish after a thorough cleaning and ventilation.
Understanding the Burning Odor in Preheat
When your oven seems to emit a burning smell as it begins to heat, you’re likely not facing a dramatic electrical failure right away. In most homes, the odor originates from something you can clean or ventilate away. The phrase “oven smells like burning when preheating” is a practical signal that helpful maintenance or a quick diagnosis can prevent worse outcomes. At Oven Cook Pro, we see this issue most often tied to residue on the racks, grease on the oven bottom, or loose food particles near the heating elements. A good approach is to treat the odor as a warning sign rather than a disaster. By following a structured checklist, you can identify the core cause, fix it safely, and restore normal operation with confidence.
In addition to residue, preheating odors can arise from new installations, packaging oils on components, or trapped manufacturing lubricants that burn off during the first few uses. Always consult your appliance manual for model-specific cautions, and if the odor worsens or is accompanied by smoke, stop using the oven immediately and seek professional service. This guidance aligns with the procedures recommended by Oven Cook Pro, which emphasizes safety and systematic diagnosis over guesswork.
To keep your kitchen safe, ensure you have a smoke detector working, ventilation fans on, and a clear path to exit in case you need to evacuate. Regular, gentle maintenance is a better long-term strategy than reacting to recurring odors. Keeping the oven interior clean and free of debris reduces the chance of burn odors every time you preheat.
As you read, imagine you’re following a clear, recipe-like process: inspect first, clean second, test third. This mindset—rooted in methodical troubleshooting—helps avoid overlooking simple fixes that yield immediate results. The goal is not just a temporary relief but a durable, odor-free preheat experience for everyday cooking.
Common Causes of Burning Odors
Identifying the root cause is the first step in stopping the odor. Below are the most frequent culprits, listed from most to least likely based on field observations and manufacturer guidance. When you see the warning sign of a burning smell, start with the simplest, least invasive checks and progress to more involved steps if needed.
- Residue on racks or the oven floor: Small splashes of oil or food can scorch during preheat, creating a recognizable burning scent. This is the most common and easiest fix.
- Spilled sugar or marinades near heating elements: Sugar burns at a lower temperature and can produce a sharp odor if left to caramelize on the bottom or sides.
- Debris caught in vent pathways: Grease and crumbs can accumulate in vents and trap heat, then release a burnt aroma when the oven cycles through heat changes.
- Factory oils or packaging residues: New ovens sometimes burn off initial coatings during the first few uses, producing temporary odors that should disappear after a few cycles.
- Faulty wiring or insulation near heating elements: A persistent electrical smell is less common but more serious and requires professional inspection.
- Overheating due to incorrect rack placement: If you’ve placed a pan too close to the element, it can scorch and emit odor during preheat.
- Self-cleaning cycle residues: If you run a self-clean cycle too soon after installation, residual cleaners can cause temporary fumes that smell like burnt plastic.
While these are the typical scenarios, it’s important to monitor the odor’s characteristics. If you notice smoke, a chemical-like smell, or if odors persist after cleaning, discontinue use and contact a qualified technician. Oven Cook Pro emphasizes safety-first diagnostics and practical, non-destructive checks to preserve appliance life.
To stay proactive, schedule periodic deep-cleanings of the oven interior and perform a light burn-off after heavy cooking days. Cleaning not only reduces odors but also improves performance and energy efficiency. A well-maintained oven typically produces fewer odors and more consistent results across preheat and bake cycles.
Safety First: When to Stop and Seek Help
Odors during preheating can indicate either simple buildup or a more serious internal fault. Safety should always come first. If you see smoke that doesn’t dissipate after a few minutes, a wire color change in the heating elements, or you detect a strong burning chemical smell, stop using the appliance immediately and unplug it if safe to do so. Do not attempt to disassemble electrical components yourself. The Oven Cook Pro team would advise contacting a licensed technician to diagnose electrical or insulation issues. In some cases, an odor can be traced to a problematic element that could fail and pose a fire risk if ignored.
If you have a gas oven and smell gas or suspected leaks, evacuate the area and call your gas supplier or emergency services. Do not switch on lights, use a phone inside the building, or operate switches that could ignite a spark. Always follow your local codes and manufacturer guidelines. After professional inspection confirms safety, you can resume use with appropriate maintenance and precautions.
For ongoing odor management, ensure you perform regular venting, use the oven in a well-ventilated space, and keep a log of odors with dates and outcomes. Keeping a simple notebook can help you identify patterns, such as odors only after a specific preheat temperature or after particular cooking sessions. This data is useful for service professionals when diagnosing a persistent issue.
How to Diagnose Step-by-Step (Visual Checklist)
Diagnosing the cause of a burning odor requires a methodical, visual checklist approach. Start by inspecting the obvious areas and then proceed to functional checks. The goal is to replicate the problem safely so you can observe what triggers the odor without exposing yourself to risk.
- Check the oven interior: Look for scorch marks, melted plastic, or sticky residue on racks and the floor. Wipe with a damp cloth and mild detergent if needed, then dry completely before testing.
- Inspect racks and accessories: Ensure racks are properly positioned away from coils, and remove any pans that could trap heat or spill onto the heating element.
- Examine the seals and door: A damaged door gasket or misaligned door can alter heat distribution, causing localized scorching and odd odors.
- Check vent paths and filters (if applicable): Some ovens have filters or vent screens that collect grease. Clean or replace them according to the manual.
- Verify preheat behavior at different temps: Preheat to a low temperature, then to a higher setting, and observe if the odor changes intensity. This helps isolate whether the issue is temperature-related or occupancy-related.
- Listen for unusual sounds: A buzzing or crackling noise can suggest loose components or a failing element. If you hear abnormal sounds, stop the test and consult a professional.
Document your findings, including any smells, timing, temperatures, and visible debris. This information helps technicians diagnose faster and reduces the need for repeated visits. As you proceed, keep the oven unplugged during inspection to reduce risk, and wash hands after handling metal components to avoid burns or slips. The goal is a safe, reliable preheat that produces predictable results every time.
Step-by-Step Fixes for the Most Common Cause
The most common odor source is burnt residue on the oven floor or racks. Here is a practical fix sequence that you can perform with basic tools and safe handling practices. Follow these steps in order and test after each stage to confirm whether the odor diminishes.
- Safety pause and prep: Turn off the oven, unplug if feasible, and allow it to cool completely. Remove all racks and accessories. Wipe the interior with a damp cloth and a mild, non-abrasive cleaner. Let everything dry fully before reassembly.
- Deep-clean the interior: Use an oven-safe cleaner or a simple baking soda paste (baking soda + water) to scrub the floor and rack supports. Rinse with a damp cloth and dry. Check for stubborn spots and re-clean as needed.
- Inspect for obvious scorch marks: If you find charred debris, remove it with non-metallic tools to prevent scratching enamel. After cleaning, run a short, empty bake at a low temperature (e.g., 275–300°F/135–150°C) with the door slightly ajar to vent any fumes. Close the door after 10–15 minutes and complete a full preheat test.
- Ventilation and bake-off test: Open windows, use an exhaust fan, and run a 15-minute preheat cycle at a moderate temperature (350°F/175°C) without food. Monitor for any remaining odor and ensure the smell is noticeably reduced or eliminated.
- Reassess caloric load and rack placement: When you return racks, avoid placing metal directly on the heating elements. Use proper rack heights and keep pans centered to reduce hot spots. If odors persist, consider a professional inspection to check heating elements and insulation.
- Optional: self-clean cycle with caution: If your model supports self-cleaning, follow the manual’s instructions precisely. Ensure the space is well-ventilated and you are present during the cycle. Do not run self-clean if you smell burning plastics or wiring, as this indicates a potential hazard.
- Final test and documentation: After cleaning and testing, perform a final preheat to your typical cooking temperature with an empty oven to confirm stability. If the odor returns periodically, there may be an underlying issue that requires professional diagnosis.
Tip: Always avoid using metal scrubbers on coated enamel surfaces to prevent damage that could worsen heat distribution and odor issues. If you notice consistent odors after performing these steps, it’s best to contact a service technician for a thorough inspection.
Prevention Tips to Avoid Future Odors
Prevention is easier than cure when it comes to oven odors. By adopting a routine maintenance plan, you can minimize odors and extend the life of your appliance. Here are practical tips you can implement today:
- Carry out regular interior cleanings: Wipe up spills immediately after cooking and perform a deep clean every few months, depending on the frequency of use.
- Use proper bakeware: Dark, heavy, or nonstick coatings can leave residues that scorch if not cleaned promptly. Ensure bakeware is clean and free of debris before cooking at high temps.
- Ventilate during and after cooking: Turn on the hood or exhaust fan to remove odors quickly. Open a window if possible during high-heat recipes.
- Avoid overloading the oven: Overcrowding can cause uneven heating and create hotspots that scorch drippings. Leave space between items for proper air circulation.
- Schedule professional maintenance: If odors occur regularly, have a technician inspect the heating element, insulation, and thermostat to ensure everything is operating within design specifications.
- Consider routine insulation checkups: Worn insulation can cause heat to escape and scorch nearby materials, leading to persistent odors.
With consistent cleaning, proper rack placement, and routine maintenance, you’ll reduce the likelihood of burning odors during preheating and maintain reliable oven performance. This proactive approach aligns with Oven Cook Pro’s emphasis on safety, reliability, and clear troubleshooting steps.
When to Consider Professional Service
If you have performed the basic cleanup and tests but still notice a burning odor during preheating, it’s time to seek professional assistance. A trained technician can inspect heating elements for signs of wear, test for electrical faults, and verify insulation integrity. Early professional evaluation can prevent more serious issues, including potential fire hazards. In cases where you smell burning plastic or chemical odors, evacuate the area and contact emergency services if needed. Regular service visits can help identify subtle problems before they escalate, saving you time and money in the long run. Remember, safety is non-negotiable and a professional assessment protects your home and family.
Steps
Estimated time: 45-60 minutes
- 1
Prepare for safety
Power down the oven, unplug if safe, and ensure the area is ventilated. Remove all racks and accessories to create a clear workspace for cleaning. Have a damp cloth, mild cleaner, and a timer ready.
Tip: Always wear heatproof gloves when handling hot components. - 2
Inspect and clean interior
Wipe away any visible debris from the floor and racks. Use a non-abrasive cleaner or baking soda paste for stuck-on grime. Rinse with a damp cloth and dry completely before proceeding.
Tip: Never use harsh solvents on enamel surfaces. - 3
Test heat with ventilation
Place racks back, set the oven to a low temp for a burn-off (e.g., 275–300°F/135–150°C) with door closed. Open a window or turn on the vent to carry away fumes.
Tip: Keep a watchful eye; don't leave the oven unattended during burn-off. - 4
Increase to normal preheat
After a successful burn-off, gradually preheat to your intended cooking temperature and monitor for any odor or smoke. If the odor returns, stop and reassess the cause.
Tip: If the odor recurs, it’s best to stop and call a technician rather than continuing to bake. - 5
Inspect racks and seals
Verify rack alignment and door gasket integrity. Misaligned racks or a damaged seal can cause heat to concentrate and scorch nearby surfaces.
Tip: Replace worn gaskets or reposition racks to avoid hotspots. - 6
Document and monitor
Keep a simple odor log noting temperatures, times, and outcomes. This helps you spot patterns and provides useful context for any technician you contact.
Tip: Include dates and any cooking activities that preceded the odor.
Diagnosis: Oven emits a burning odor during preheat
Possible Causes
- highResidue or spilled food on racks/oven floor
- mediumSugar/oil residues on bottom or near heating elements
- mediumVent clog or grease buildup in vents
- lowNew oven coatings or packaging residues burning off
- lowElectrical fault or damaged insulation near heating elements
Fixes
- easyTurn off the oven and unplug if safe; allow to cool
- easyRemove racks and wipe interior with a damp cloth; clean thoroughly
- mediumRun a short high-heat burn-off or a self-clean cycle per manual
- easyCheck vent paths for obstructions and clean or replace filters
- mediumIf odor persists after cleaning, contact a licensed technician for inspection
Questions & Answers
What causes a burning odor when my oven preheats?
Most odors come from burnt residue on racks or the oven floor, spilled oil or sugar near the heating elements, or vent grease buildup. A persistent or chemical-like odor may indicate a larger issue requiring professional inspection. Start with a thorough cleaning and proper ventilation.
Most odors come from burnt residue. Clean thoroughly and ventilate; if it persists, call a technician.
Is it safe to use the self-cleaning cycle to fix the odor?
Self-cleaning can burn off stubborn residues, but it should be used only if your manual approves it and you don’t smell chemical or electrical fumes. Ensure good ventilation and stay nearby during the cycle.
Only use self-clean if the manual allows and you’ve got good ventilation.
When should I call a professional?
Call a pro if cleaning and venting don’t eliminate the odor, if you notice smoke, sparks, or unusual noises, or if there’s any sign of wiring or insulation damage. A safety check prevents bigger problems.
If cleaning doesn’t fix it or you see smoke or sparks, get a pro.
Can baking soda cleanup help with odors?
Yes, a baking soda paste can help lift greasy residues. After cleaning, run a burn-off cycle to ensure any remaining residues are removed. Ventilate well during and after cleaning.
Baking soda helps lift grease; finish with a burn-off and good ventilation.
Should I use the vent hood while preheating?
Yes, run the vent hood or kitchen exhaust during preheat and for a few minutes after to remove fumes and prevent lingering smells. It also speeds up odor dissipation.
Turn on the vent hood during preheat.
Watch Video
Main Points
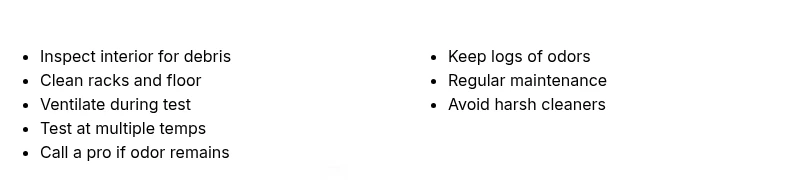
- Inspect residue first, clean thoroughly, and vent during tests
- Don’t ignore persistent odors—they can indicate a fault
- Always prioritize safety and seek professional help when needed
- Regular maintenance minimizes future odor issues