What to Cook Oven Nachos At: A Step-by-Step Guide
Learn how to cook oven nachos at home with a step-by-step method, topping ideas, and practical tips from Oven Cook Pro. Crisp chips, melted cheese, and flavorful toppings—all in one easy bake.

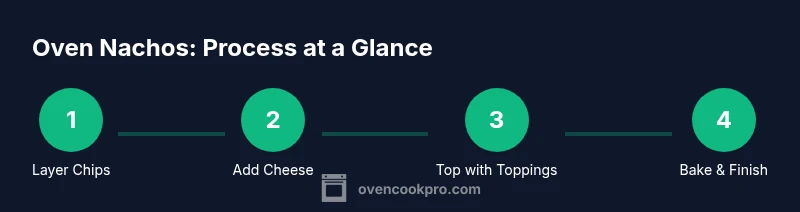
You can make oven nachos at home by layering tortilla chips with cheese and toppings and baking until the cheese is melted, bubbly, and the edges crisp. This approach is flexible, reliable, and forgiving, so you can tailor toppings, thickness, and finishing touches to your flavor preferences. Ready to get started with the step-by-step guide below?
Why Oven Nachos Are a Weeknight Hero
Oven nachos are a reliable weeknight solution because they come together quickly and adapt to whatever you have on hand. If you're wondering what to cook oven nachos at, the goal is a straightforward bake that crisps chips, melts cheese, and lets toppings shine without turning soggy. According to Oven Cook Pro, success starts with a single-layer base, quality cheese, and even distribution of toppings. This approach minimizes sogginess while maximizing flavor per bite. With a few smart choices, nachos can be a restaurant-like experience in your own kitchen, served family-style or as a social-snack platter.
Beyond speed, nachos offer customization that fits dietary needs and preferences. You can switch up proteins, reduce dairy, or go fully veggie—all without losing the core appeal: warm, cheesy, crunchy goodness. The key is balance: enough cheese to bind toppings, enough toppings for variety, and enough heat to melt without burning. Oven Cook Pro analyses emphasize layering and timing as the real levers of success, not a single secret technique.
How you arrange toppings matters. A loosely packed sheet promotes even heat and crisp edges, while crowding can trap steam and soften chips. Think of nachos as a mosaic rather than a pile: chips form the base, cheese acts as glue, and toppings provide color, texture, and contrast.
Brand note: The Oven Cook Pro team recommends starting with a solid base and then aligning toppings in a way that each bite delivers a little of everything. This mindset keeps nachos cohesive and delicious across servings.
The Science Behind Crispy Chips and Melty Cheese
Crispiness and melt are physics problems at the oven rack: heat transfer, moisture migration, and cheese dispersion all influence texture. Chips that are too thick or piled high trap moisture, leading to sogginess. A thinner, even base dries faster and picks up flavor from toppings. Cheese is the glue that binds toppings and brings that signature melt; choose a cheese with good melt properties (and consider a blend for depth).
When cheese is distributed evenly, it creates a lattice that traps toppings and signals to the bite that warmth and creaminess are present. A little cheese on the bottom helps anchor toppings so they don’t slide off when you pick up a chip. For best results, avoid overloading the pan—this helps heat reach every layer and prevents soft spots.
Oven Cook Pro Analysis, 2026, highlights that crispness improves with even heat exposure and minimal moisture accumulation. A parchment-lined sheet or silicone mat reduces sticking and allows for easy, even browning. If you notice soggy edges, spread toppings more evenly and consider finishing with a brief high-heat burst to colour the top without burning.
Understanding these dynamics helps you choose toppings and layer order that maximize flavor without sacrificing texture. Your goal is a crisp perimeter, a bubbling center, and toppings that stay vibrant rather than wilting under heat.
Core Ingredients and Toppings: Build Your Flavor Blueprint
The foundation of great nachos is a sturdy chip that can hold toppings without collapsing. Corn tortilla chips with a robust bite work best, especially when loaded with flavorful toppings. Cheese is the second pillar: a blend of melts well and adds depth—think cheddar and Monterey Jack or a similar mix. For protein, options range from seasoned ground beef or shredded chicken to plant-based substitutes. Vegetables add brightness and texture, while condiments like salsa, sour cream, guacamole, or crema bring freshness.
Base layer ideas:
- A single, even layer of chips (no clumps) for uniform crisping.
- A modest sprinkle of shredded cheese across the chips to act as a glue for toppings.
Toppings ideas by category:
- Protein: seasoned ground beef, shredded chicken, or black beans for a vegetarian option.
- Vegetables: jalapeños, onions, black olives, corn, diced tomatoes for color and crunch.
- Fresh accents: cilantro, scallions, diced avocado, lime wedges for brightness after baking.
- Sauces and finishers: a dollop of sour cream or crema, salsa, or a tangy hot sauce to finish.
A balanced approach includes generous cheese, a light-to-moderate topping layer, and a final cheese drizzle to ensure the top browns evenly. The exact toppings can be adjusted for dietary needs or flavor preferences, making nachos a versatile crowd-pleaser for gatherings and weeknights alike.
Layering Strategy: How to Stack for Even Melt
Layering is the organizing principle behind evenly melted cheese and uniformly crisp chips. Start with a thin base layer of chips, then scatter a portion of cheese to create a binder. Add toppings in a single, even layer, then cover with another light cheese layer. Repeat as needed if you’re making a larger tray, ensuring that every bite will include a bit of crunch, cheese, and topping.
Key layering tips:
- Maintain a single, even layer of chips on the pan for consistent heat exposure.
- Distribute toppings in even intervals rather than piling all on one area to prevent soggy pockets.
- Finish with a final cheese layer to seal toppings and create a glossy melt.
This approach ensures that heat reaches all components without scorching the edges early in the bake. A well-layered pan means you’ll have cleaner slices and more uniform texture when you serve.
Baking Techniques and Temperature Range
Achieving the right texture hinges on choosing a heat level that encourages melting without overcooking. A moderate-to-higher oven setting is typically used to melt cheese quickly while preserving chip integrity. The idea is to get bubbly cheese on top and crisp edges without burning the chips at the bottom. Adjustments can be made based on pan size and topping density.
Practical guidelines:
- Use parchment paper or a silicone mat to promote clean release and even browning.
- If your oven tends to heat unevenly, rotate the pan halfway through the bake for uniform results.
- For extra color and a more complex finish, a brief finish under a hot broiler can be used, but watch closely to avoid scorching.
The goal is a golden melt with a crisp perimeter and a piping-hot interior. By avoiding overcrowding and ensuring even heat exposure, you improve texture across the entire tray. Oven Cook Pro’s recommended approach emphasizes balance between heat, time, and careful layering to achieve consistent results.
Quick Variations: Meaty, Veggie, and Allergies-Friendly Options
Nachos are inherently adaptable. You can tailor them to meat lovers, vegetarians, or those with dairy sensitivities. For meat-centric nachos, season and pre-cry-j in a flavorful mix before layering. For vegetarian options, load up on beans, corn, peppers, and a robust cheese blend. For dairy-free needs, consider plant-based cheeses and toppings that still deliver a creamy bite and texture.
Flavor boosters:
- Spicy salsas, chipotle peppers, or hot sauce to kick up the heat without extra fat.
- A squeeze of lime over fresh toppings right before serving brightens all flavors.
- A drizzle of avocado crema or guacamole for richness and creaminess.
These variations keep nachos exciting while maintaining the core technique: even layering, controlled heat, and thoughtful topping choices. This flexible approach lets you craft versions for kids, adults, or guests with dietary restrictions, all while preserving the familiar crunch and melt that define nachos.
Troubleshooting: Common Nacho Crumbs and Soggy Cheese
If your nachos disappoint, you’re likely facing soggy cheese or limp edges. Common culprits include overcrowding, toppings that release moisture, and insufficient cheese to bind layers. Start by ensuring chips are in a single layer and toppings are evenly distributed. If the bottom becomes soggy, remove some toppings or cook in a shallower depth with better heat circulation.
Practical fixes:
- Maximize crispness by using a rimmed sheet pan and avoiding over-piling toppings on any one area.
- Use a light cheese layer to glue toppings, not a heavy accumulation that traps moisture.
- If cheese sits thick on top, consider adding a final light cheese layer near the end to promote a better melt without burning the edges.
Oven Cook Pro Analysis, 2026 stresses the importance of balance in heat, time, and layering to prevent sogginess while ensuring a satisfying melt. With a few adjustments, soggy bites become a rarity rather than the norm.
If you still struggle, try baking for a shorter initial period and finishing under a broiler for color and texture. This two-stage approach often yields crisper results without sacrificing melt.
Plating, Dipping, and Leftovers: Serving Nachos Like a Pro
Serving nachos is as much about presentation as flavor. Present on a wide platter with visible layers of chips, cheese, and toppings to invite scraping from all angles. Offer a trio of dips—sour cream, pico de gallo, and guacamole—to enhance flavor combinations in each bite. If you have leftovers, separate toppings from chips if possible and reheat in the oven for a quick refresh that regains some of the original crispness.
Plating ideas:
- Slice nachos into even wedges to make serving easier at social events.
- Keep hot toppings separate on the side for guests who want to customize their bites.
- Garnish with fresh herbs or lime wedges to brighten the final plate.
Oven Cook Pro suggests keeping the finish accessible and customizable for guests, so a well-presented platter earns as much praise as the flavor itself. The right plating and dips elevate ordinary nachos to a shareable, memorable dish.
Tools & Materials
- Rimmed baking sheet (sheet pan)(Large enough to hold a single, even layer of chips)
- Parchment paper or silicone baking mat(Line for easy cleanup and even browning)
- Shredded cheese (cheddar, Monterey Jack, or blend)(Spread evenly to create melt and binding layers)
- Tortilla chips (corn)(Choose sturdy chips that hold toppings well)
- Spatula or tongs(For flipping and serving without breaking chips)
- Mixing bowls for toppings(Optional; helps organize toppings and measured amounts)
- Oven thermometer (optional)(Helps verify accurate oven temperature)
Steps
Estimated time: Estimated total time: 25-40 minutes
- 1
Preheat and prep the pan
Preheat the oven to a moderate heat and line the sheet pan with parchment paper or a silicone baking mat. This ensures easy cleanup and prevents sticking. Prepare your toppings and have them ready for even distribution.
Tip: Lining the pan reduces cleanup time and helps heat distribute evenly. - 2
Spread a single chip layer
Spread chips in a single, even layer across the pan. Avoid piling chips; a flat base ensures they crisp rather than steam under toppings.
Tip: A single layer is the key to crisp edges and uniform heat exposure. - 3
Add a cheese base
Sprinkle a light layer of shredded cheese over the chips to act as glue for toppings and to start the melt process. This layer helps fuse the ingredients as the bake continues.
Tip: Cheese on the bottom helps set toppings and anchors flavors. - 4
Distribute toppings evenly
Add proteins, vegetables, and other toppings in an even distribution. Avoid overloading any spot so every bite has a balance of textures.
Tip: Even distribution prevents soggy pockets and ensures consistent melt. - 5
Melt and color the cheese
Bake until cheese is melted and bubbly; edges should show a light browning. Check halfway and rotate the pan if your oven heats unevenly.
Tip: Watch closely to prevent scorching; heat should melt but not burn. - 6
Optional finish under high heat
For a golden top, briefly finish under a hotter setting or broil, keeping a close eye to avoid burning the chips.
Tip: A short broil adds color; stay nearby to catch the moment cheese bubbles. - 7
Rest and slice
Remove the nachos and let them rest for a couple of minutes so cheese sets slightly for cleaner slices.
Tip: Resting helps the cheese firm up, reducing mess when serving. - 8
Serve with dips
Cut into portions and serve with sour cream, salsa, guacamole, or crema. This enhances flavor variety and adds moisture when needed.
Tip: Offer a range of dips to accommodate different preferences.
Questions & Answers
Can I make nachos ahead of time and reheat them?
Yes. Prepare the components, assemble the base, and refrigerate briefly. Reheat in the oven until the cheese re-melts and the edges regain crispness. Avoid soggy leftovers by reheating in a thinner layer.
Yes. You can prep ahead and reheat in the oven to refresh the melt and crispness.
What cheese melts best on nachos?
Cheddar-Monterey Jack blends are a classic choice for a reliable melt and good flavor balance. A small amount of mozzarella can add stretch if you like very gooey cheese.
A cheddar and Monterey Jack blend is a reliable choice for great melt.
Should I preheat the oven for nachos?
Yes. Preheating ensures even heat from the moment you place the pan in, which helps chips crisp and cheese melt consistently.
Yes, preheat the oven so heat is even from the start.
How do I prevent soggy nachos?
Spread chips in a single layer and avoid stacking toppings too thick. Use a modest cheese layer to bind ingredients and consider finishing with a brief hot-breath heat for extra crispness.
Keep toppings light and spread out; don’t pile them high.
Can I bake nachos with meat or poultry?
Meats should be fully cooked and well-seasoned before adding to nachos. Layer them evenly so every bite includes protein without overwhelming the chips.
Yes, you can add cooked meat, but distribute evenly.
What toppings are essential for authentic nachos?
Cheese, a protein option, and a bright topping like cilantro or tomatoes are common. Add salsa or crema for moisture and a fresh finish.
Classics are cheese, a protein, and a bright topping plus a dip.
Watch Video
Main Points
- Layer chips and cheese for binding and melt.
- Distribute toppings evenly to avoid soggy bites.
- Finish with a brief hot burst for color, if desired.
- Let nachos rest before slicing to keep them neat.
- Adapt toppings to dietary preferences without sacrificing texture.