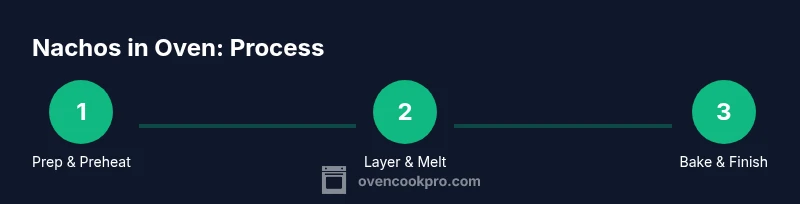
How to Make Nachos in the Oven: A Complete Guide
Learn to make crispy, cheesy nachos in the oven with a reliable, home-cook-friendly method. This guide covers toppings, baking times, and tips to keep chips crisp and flavors bright for a crowd.

You will learn how to make nachos in the oven with perfectly melted cheese, crisp tortilla layers, and evenly distributed toppings. Gather tortilla chips, shredded cheese, and your favorite add-ins (jalapeños, black beans, meat, olives). Layer, bake, and monitor for bubbly, golden edges. This method helps prevent soggy bottoms and uneven heat while delivering flavorful, shareable nachos.
Why Oven Cooking Works for Nachos
Oven cooking is ideal for nachos because it uses steady, dry heat that helps chips stay crisp while cheese melts evenly across the surface. When you bake nachos, you control the temperature and browning more reliably than with a microwave, which can make chips soggy. A good oven technique starts with a hot pan, a single layer of chips, and a modest cheese layer to create a stable, bubbling base. By layering thoughtfully, you prevent soggy pockets and ensure that melted cheese sticks to chips rather than pooling in the tray. Preheating also matters because it reduces the time chips have to sit in warm air before the cheese begins to melt. Finally, giving the nachos a short rest after baking helps set the cheese and lets toppings meld without sliding off when you scoop.
Key Ingredients and Substitutions
The core of nachos is simple: sturdy tortilla chips, good-melt cheese, and flavorful toppings. Choose chips that are not too salty and have a strong structure so they don't crumble under heat. A cheddar-Monterey Jack blend melts reliably and provides a balanced mild-to-medium heat. For meat lovers, cooked ground beef or shredded chicken adds protein and richness; beans offer fiber and texture. If you want a vegetarian version, rely on colorful vegetables like bell peppers, corn, and black olives. For dairy-free options, try a vegan cheese that melts well, or skip cheese on the bottom layer and rely on a drizzle of dairy-free queso on top. Fresh toppings—tomatoes, cilantro, lime, jalapeños—should be added after baking to preserve brightness and texture. Salt and spices like chili powder or cumin can be mixed into the cheese for extra depth.
Layering Technique for Even Cheese Coverage
The key to consistent melt is distribution. Start with a base of chips, spread in an even layer, then sprinkle cheese to create a lattice that carries toppings. Add proteins or beans in a thin layer, followed by a second layer of chips, more cheese, and finally the remaining toppings. Avoid placing many wet toppings in the same spot; this causes sogginess and uneven browning. If you like beans, sprinkle them in a light third layer so they heat through without soaking the chips. The goal is to have every chip meet cheese and a portion of topping so every bite is flavorful. Use a rimmed baking sheet to prevent spills and rotate the pan for even color.
Baking Timings and Temperature Guidelines
Preheat to 375–400°F (190–200°C). Bake for 8–12 minutes, watching for bubbling cheese and edges that are light golden. Thicker pan heights or stacked layers may require an extra 2–3 minutes. If your cheese starts to brown too quickly, lower the heat by 25°F (15°C) and extend the bake a bit to avoid burning. If you are using a very large tray, consider two shorter bake sessions to ensure the bottom chips stay crunchy. For a crisp result, finish under a brief high-heat pass (optional) to re-crisp the top layer after the main bake. Always let the tray rest 2–3 minutes before serving.
Cheese Choices and Topping Strategies
Choose cheeses with good melt: cheddar, Monterey Jack, mozzarella blends, or pepper jack for heat. A half-and-half approach often yields excellent melt and flavor. If you want extra richness, sprinkle a small amount of cream cheese or queso fresco for tang. Experiment with a cheese blend: 2 parts cheddar to 1 part Monterey Jack for reliable melt and flavor. For toppings, onion, tomato, jalapeño, corn, olives, and cilantro add color and brightness. To keep toppings from drying out, consider stirring a little salsa into the cheese so the top stays glossy and flavorful.
Handling Wet Toppings and Preventing Sogginess
Wet toppings can ruin the crisp bite. Drain or pat dry watery ingredients (tomatoes, salsa, sour cream) before baking. Add watery toppings after baking for freshness. If using salsa in the topping layer, mix it with cheese so it emulsifies rather than pooling. Another strategy is to pre-roast vegetables to evaporate moisture. Use a moat of chips around the edges to catch moisture and preserve crunch in the center.
Serving, Dipping, and Fresh Toppings
Let nachos rest briefly after baking; top with fresh cilantro, sliced avocado, diced tomatoes, lime wedges, or a dollop of sour cream. For dipping, offer guacamole and salsa on the side. Present on a warmed platter or cast-iron pan to keep heat longer. If you want ready-to-serve options, pre-portion toppings in small bowls so guests can customize their plates. A squeeze of lime and a dollop of salsa can elevate a simple plate to restaurant-quality nachos.
Gluten-Free and Allergy-Safe Nachos
If anyone has gluten sensitivity, verify that the chips are certified gluten-free and avoid cross-contamination. Use gluten-free toppings and sauces; consider serving with dairy-free cheese if needed. You can also offer corn tortillas crisped separately to avoid cross-contact. Always check ingredient labels for hidden gluten or additives.
Authoritative Sources
For reliable food-safety guidance, consult authoritative sources to inform safe preparation and handling practices. See the USDA Food Safety Basics for fundamentals on cooking temperatures and cross-contamination risks, and university extension resources for practical kitchen tips. The World Health Organization also provides public health context on food safety standards and best practices.
Tools & Materials
- Tortilla chips (sturdy, not ultra-thin)(Avoid chips that crumble in a hot oven; choose a chip that can hold toppings without breaking.)
- Shredded cheese (cheddar, Monterey Jack, mozzarella, or blends)(Aim for enough to cover a 9x13 inch sheet in an even layer.)
- Cooked protein option (ground beef, chicken)(Season and cool before layering.)
- Beans (refried or black beans)(Rinse and drain if canned; pat dry to minimize moisture.)
- Vegetables and toppings (jalapeños, tomatoes, onions, olives, corn, cilantro)(Slice or dice uniformly for even distribution.)
- Salsa, sour cream, guacamole for serving(Prepare fresh toppings to brighten the final dish.)
- Oven-safe baking sheet or rimmed pan(Line with parchment for easier cleanup.)
- Aluminum foil or parchment paper(For easier lift and cleanup in busy servings.)
- Spatula or tongs(For quick serving and to avoid burning yourself.)
- Oven thermometer (optional)(Helps verify temperature for consistent results.)
- Spices (salt, chili powder, cumin)(Enhances flavor without overpowering toppings.)
Steps
Estimated time: 25-40 minutes
- 1
Preheat oven and prepare sheet
Preheat your oven to 375–400°F (190–200°C). Line your baking sheet with parchment or foil to prevent sticking and facilitate cleanup. This initial step sets up even heat transfer so chips crisp rather than sog.
Tip: Using parchment helps prevent sticking and makes cleanup a breeze. - 2
Create a base layer of chips
Spread an even, single layer of chips across the sheet. A solid base reduces hot spots and prevents soggy pockets from forming under heavy toppings.
Tip: If chips are crowded, lightly separate them to encourage even melting. - 3
Add cheese and proteins
Sprinkle a generous cheese layer over the base, then add cooked proteins or beans if using. Avoid overloading to keep toppings from sliding off later.
Tip: Cheese should cover chips but not pool excessively. - 4
Distribute toppings evenly
Scatter jalapeños, tomatoes, olives, onions, and other toppings evenly. Uniform distribution ensures every bite has flavor and texture.
Tip: Avoid placing too many wet toppings in one area to prevent sogginess. - 5
Top with a final cheese layer
Finish with a light layer of chips and cheese to seal toppings and create a crisp top. This helps melt the entire layer more evenly.
Tip: A cheese crown on top promotes bubbling and even browning. - 6
Bake until bubbly and golden
Bake 8–12 minutes, then inspect at 8 minutes. Look for bubbling cheese and light golden edges. Adjust time for thicker pans.
Tip: Rotate pan halfway for even color and melt. - 7
Rest and finish with fresh toppings
Let nachos rest 2–3 minutes to set before serving. Add fresh toppings like cilantro, sour cream, or avocado.
Tip: Resting helps toppings stay put when serving.
Questions & Answers
Can I make nachos in the oven without preheating?
Preheating ensures even melting and browning. If time is short, a brief warm-up will still work but expect uneven texture.
Preheat for the best melt and browning; skipping it can lead to uneven texture.
What if my toppings are watery?
Drain and pat dry wetter ingredients like tomatoes and salsa. Add watery toppings after baking for freshness.
Drain the watery toppings and add fresh toppings after baking.
Can I reheat leftovers in the oven?
Yes. Reheat at 325°F (165°C) for 5–10 minutes until cheese softens. Add fresh toppings after reheating.
Reheat at 325F for 5–10 minutes, then top with fresh items.
Other cheese options?
Experiment with pepper jack or a blend with Monterey for varying heat and melt, but avoid very dry cheeses.
Try mix-cheeses like pepper jack with cheddar for spice and melt.
Gluten-free nachos possible?
Yes, use gluten-free tortilla chips and check toppings for gluten-containing ingredients.
Use gluten-free chips and verify toppings.
Watch Video
Main Points
- Plan for even layering to prevent soggy spots
- Choose cheese blends that melt well and avoid clumps
- Use parchment or foil for easy cleanup
- Bake briefly and watch closely to avoid burning
- Finish with fresh toppings for brightness and flavor