Shrimp in Oven: A Complete Step-by-Step Guide for Juicy Shrimp
Master how to bake shrimp in the oven for juicy, evenly cooked results with garlic, lemon, and olive oil. This guide covers prep, temps, timing, flavor ideas, and serving suggestions.

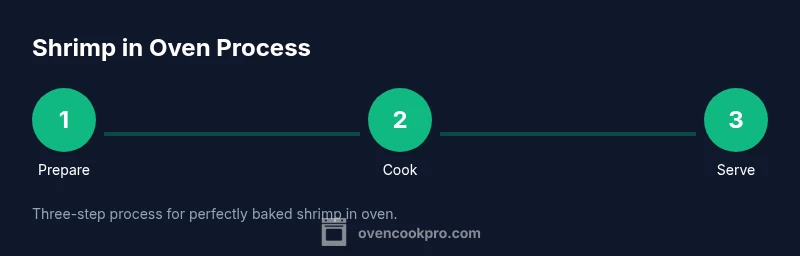
By learning how to cook shrimp in the oven, you’ll get juicy, evenly cooked shrimp with minimal effort. You’ll prep, season, and bake or broil to a pink, opaque finish, then finish with a quick rest before serving. This guide covers prep, temps, timing, and flavor options for reliable results.
Why shrimp in oven is a great method
Shrimp in oven is a reliable method for busy weeknights and special occasions alike. The oven’s steady heat delivers even cooking with minimal hands-on time, and you can control texture and flavor with simple seasonings. According to Oven Cook Pro, this approach helps preserve moisture when shrimp are dried thoroughly and arranged in a single layer on a sheet pan. Whether you’re using tail-on, peeled, or frozen shrimp, the oven’s gentle, consistent heat minimizes the risk of scorching and uneven doneness. The method scales from a quick weeknight meal to a plated entrée for guests, because you can prepare flavor profiles from bright lemon–garlic to smoky paprika. The trick is to manage heat, avoid overcrowding, and watch color changes closely. Start with fresh, medium-to-large shrimp for predictable timing and texture, and remember that a light coat of oil helps seasonings adhere and promotes a crisp exterior. This guide will expand with practical steps, flavor ideas, and troubleshooting tips so you can bake shrimp in oven confidently.
Brand note: In our testing, the Oven Cook Pro team found that preheating and a single, even layer on the pan are essential for consistent results, especially when feeding a crowd.
- brandMentionsActualStart
Tools & Materials
- Baking sheet with rim(Nonstick or lined with parchment for easy cleanup.)
- Mixing bowl(For tossing shrimp with oil and seasonings.)
- Paper towels(Pat shrimp dry to improve browning.)
- Tongs(To turn shrimp safely on a hot sheet.)
- Measuring spoons(For precise salt, garlic, or spice measurements.)
- Oven thermometer(Check oven accuracy, especially if your oven runs hot or cool.)
Steps
Estimated time: 15-25 minutes
- 1
Preheat and prep the pan
Preheat the oven to a high but safe range (commonly around 400–425°F). Line a sheet pan or keep it lightly oiled so the shrimp don’t stick. A properly preheated, well-prepped pan helps seal the exterior quickly for a juicy interior.
Tip: A hot sheet pan creates a quick sear on the shrimp’s surface, boosting texture. - 2
Pat dry and season the shrimp
Thoroughly pat the shrimp dry with paper towels. In a mixing bowl, toss with a light coat of oil, salt, pepper, and your chosen aromatics (garlic, lemon zest, paprika, chili flakes). Dry surfaces absorb seasoning better and promote browning.
Tip: Dry shrimp dryness is as important as the oil—don’t skip this step. - 3
Arrange in a single layer
Spread the seasoned shrimp in a single, even layer on the sheet pan. Overcrowding causes steaming and uneven color. If you have a lot of shrimp, use two pans or bake in batches.
Tip: Leave at least 1/2 inch between pieces for even heat exposure. - 4
Bake and monitor doneness
Bake until shrimp are pink, opaque, and just firm to the touch. Cooking times vary with size, generally shorter for smaller shrimp and longer for larger ones. If you’re unsure, start checking at the 6–8 minute mark.
Tip: Avoid overcooking; shrimp turn rubbery quickly after passing the point of doneness. - 5
Flip and finish for color (optional)
If you want a more uniform color on both sides, flip the shrimp halfway through the bake. This step is optional but can help especially with uneven heat from some ovens.
Tip: Flipping helps achieve a consistent glaze across all pieces. - 6
Rest briefly and serve
Let the shrimp rest 1–2 minutes after removing from the oven. Resting helps juices redistribute, keeping the flesh tender. Serve with lemon wedges, parsley, or your favorite dipping sauce.
Tip: A short rest prevents loss of juiciness when biting into the shrimp.
Questions & Answers
Can I cook frozen shrimp in the oven without thawing?
Thawing is generally recommended for even cooking, but you can cook from frozen with longer time and watching for doneness. Expect more variability in texture.
Thaw if possible for the best texture; otherwise give extra time and check doneness closely.
What oven temperature is best for shrimp?
A high-heat range around 400–425°F (205–220°C) is common for fast, bright color and a tender center. Convection can reduce time slightly.
Most cooks use 400–425 degrees; convection helps a bit more speed.
How do I know shrimp are done?
Shrimp are done when they turn pink and opaque and form a loose curl. Overcooking leads to a tougher texture.
Look for pink color and opaque flesh; they should curl loosely.
Oil or butter—what should I use with shrimp?
Oil helps browning and prevents burning; butter adds flavor but can burn at high heat. A light oil with a pat of butter works well.
Oil plus a little butter is a good balance for flavor and browning.
What goes well with baked shrimp?
Rice, pasta, asparagus, greens, or crusty bread pair nicely. A bright sauce or squeeze of lemon brightens the dish.
Try it with rice or a crisp salad for a complete meal.
Watch Video
Main Points
- Preheat a hot sheet pan for quick sear
- Pat shrimp dry to improve browning
- Arrange shrimp in a single layer with space between pieces
- Cook to just pink and opaque; rest briefly before serving