Oven Baked Pork Chops: A Step-by-Step Guide to Juicy Results
Learn how to make juicy, tender oven baked pork chops with a reliable, easy-to-follow method. This guide covers bone-in vs boneless, prep, searing, baking temps, rest times, sauces, and storage to help home cooks achieve perfect results every time.

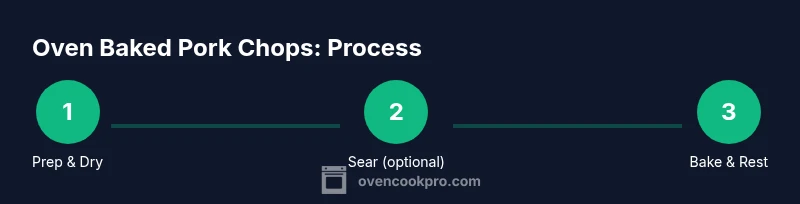
According to Oven Cook Pro, you can achieve juicy, evenly cooked oven baked pork chops with a simple, repeatable method. This quick guide shows how to select chops, prepare seasonings, choose temperatures, and time the bake for best results. Learn a reliable process that works for boneless or bone-in chops.
Why Oven Baked Pork Chops Deliver Consistent Results
Oven baking is a practical approach for home cooks who want reliable results with minimal active cooking time. When done correctly, it delivers a uniform cook from edge to center, a golden crust, and juicy interior. The oven provides steady heat that, unlike high-heat pan searing alone, penetrates without scorching. This method suits both boneless and bone-in chops and scales easily for family meals. According to Oven Cook Pro, starting with dry chops, using a moderate oven, and finishing with a short rest yields the best texture. You’ll enjoy a consistent crust and a tender center, with less risk of overcooking than on the stovetop for many cooks.
Beyond convenience, this approach gives you flexibility: you can season ahead, add sauces later, and cook larger batches without babysitting. The key is to control moisture loss, ensure even heat distribution, and confirm doneness with a thermometer rather than relying on time alone. With the right setup, oven baked pork chops can be a weeknight staple that still feels special.
Bone-In vs Boneless: Pros, Cons, and When to Choose
Bone-in pork chops carry more natural moisture and a richer combined flavor due to the bone and marrow interacting with the muscle tissue during cooking. They tend to stay juicy longer and tolerate a touch more heat without drying out, but they require a bit more time to reach the proper internal temperature. Boneless chops cook faster and are easier to portion, especially for kids or picky eaters, but they can dry out quickly if overcooked or crowded on the sheet pan.
When choosing, consider your timing and serving size: bone-in for a forgiving, deeply flavored result, boneless for quicker meals and neater portions. Regardless of cut, pat drying and even seasoning are non-negotiables. If you’re new to pork, start with bone-in for a bit more margin and then experiment with boneless as you gain confidence.
Prepping: Drying, Seasoning, and Optional Brining
Surface dryness is the foundation of a crusty finish. Pat the chops dry with paper towels to remove moisture that would steam instead of sear. Season generously with salt, pepper, and a simple rub that includes garlic powder, paprika, and dried herbs. A light brush of oil promotes browning and helps the seasonings adhere. If you want extra tenderness, consider a quick brine: mix 1/4 cup salt in a quart of water and hold the chops for 15–30 minutes, then pat dry before applying the rub. After prep, let the chops come closer to room temperature for 15 minutes to ensure more even cooking. This stage sets the stage for a flavorful, juicy result.
Searing: Build Flavor and Crust (or skip if you prefer)
Searing is optional but highly advantageous for a robust crust and enhanced flavor. Heat a skillet with a thin layer of oil over medium-high heat. Sear each chop 1.5–2 minutes per side to develop a deep browned crust and lock in juices. If you skip searing, you can still get a good exterior by ensuring the surface is dry and the oven is hot enough for proper browning. Space is essential; crowding leads to steaming rather than browning. Resting the seared chops briefly after removal from the pan also helps retain moisture before transferring to the oven.
The Bake: Temperature, Time, and Rack Position
A moderate-to-hot oven works best for pork chops: 400–425°F (200–220°C) is a common range. Set a rack to elevate the chops over the pan so air can circulate and promote even browning. Bake until the internal temperature reaches 145°F (63°C) and rest for at least 3 minutes. Thicker, bone-in chops may push toward 150–160°F briefly; the resting period helps bring juices back into the meat without compromising safety. Using a thermometer is crucial—avoid relying on time alone. If you’re using bone-in chops, anticipate a few extra minutes but monitor closely to prevent overcooking.
Resting and Serving: Juiciness and Texture
Resting is essential for juiciness. After removing from the oven, tent the chops loosely with foil and let them rest for 3–5 minutes. Resting allows juices to reabsorb into the meat, improving moisture and bite. Slice thinly against the grain for even texture, or serve whole with minimal slicing for dramatic presentation. Pair with simple sides like roasted vegetables, mashed potatoes, or a bright salad. A small amount of finishing butter or olive oil can add a soft sheen and a touch of richness without masking the pork’s natural flavors.
Flavor Variations: Garlic, Herbs, and Sauces
While a straightforward salt-and-pepper approach works beautifully, you can elevate the dish with varied seasonings. Add minced garlic, fresh thyme, or rosemary to the rub for aromatic notes. Smoky paprika or a touch of chili flakes introduce warmth, while lemon juice or zest brightens the finish. Sauces should complement rather than overwhelm; a quick pan sauce made from fond, chicken stock, and a knob of butter creates a glossy, savory glaze. For dairy-free options, finish with olive oil and chopped herbs instead of butter. The key is balance and restraint—the pork should remain the star.
Common Mistakes and How to Fix Them
The most common errors are overcooking, crowding the pan, and skipping dryness checks. Use a thermometer and stop cooking at 145°F (63°C) with a 3-minute rest. Don’t crowd the pan; give each chop space to brown. If the surface is wet, dry it again before applying seasonings to help the crust develop. If the chop thickens unevenly, finish with a brief higher-heat blast for 1–2 minutes. Finally, avoid microwaving for reheating, which can dry the meat; instead, reheat gently or use a quick sauté to refresh the crust.
Storing Leftovers and Reheating Without Dryness
Store cooked pork chops in airtight containers in the refrigerator for 3–4 days. For reheating, use a low and gentle method—reheat in a skillet over medium-low heat with a splash of broth or water, covered, until warmed through. A brief finish under a hot broiler or in a hot oven can refresh the crust. If you’re storing in the freezer, wrap tightly and freeze in usable portions; thaw overnight in the refrigerator and reheat gently to preserve texture. Proper storage helps maintain flavor and juiciness for future meals.
Tools & Materials
- pork chops (bone-in or boneless, 1 inch thick)(Choose thickness based on preference; bone-in preferred for moistness.)
- kosher salt(Balancing salt helps season evenly.)
- black pepper(Freshly ground if possible.)
- olive oil or neutral oil(Coats surface for browning.)
- garlic powder or minced garlic(For rub flavor; optional.)
- paprika or smoked paprika(Adds color and depth.)
- dried herbs (thyme, rosemary, oregano)(Adds aroma; optional.)
- baking sheet(Line with rack if possible.)
- cooling rack(Promotes air circulation for even browning.)
- meat thermometer(Target 145°F (63°C) with rest.)
- parchment paper or foil(Optional for easier cleanup.)
Steps
Estimated time: 35-50 minutes
- 1
Preheat and prep
Preheat the oven to 400–425°F (200–220°C). Pat chops dry with paper towels to remove surface moisture. Line a sheet pan with parchment or foil and set a cooling rack on top if available. This ensures the heat circulates and prevents soggy bottoms.
Tip: Dry surface thoroughly; excess moisture is the enemy of crust formation. - 2
Season and rub
Season chops generously with salt and pepper; add garlic powder, paprika, and dried herbs as desired. Lightly brush or rub with oil to help the seasonings adhere and promote browning.
Tip: Season early for deeper flavor; a quick 10–15 minute rest after rubbing allows better penetration. - 3
Optional brine or dry rub
If using a quick brine, soak chops in a salt-water solution for 15–30 minutes, then pat dry before applying rub. If not brining, proceed with the rub and continue to prep.
Tip: A brief brine can improve juiciness, especially for lean cuts. - 4
Sear for crust (optional)
Heat a skillet with a small amount of oil over medium-high heat. Sear each chop 1.5–2 minutes per side until a rich crust forms. Transfer to rack after searing to finish in the oven.
Tip: Crowding the pan will steam the meat; give each chop space for even browning. - 5
Bake to doneness
Place the chops in the oven and bake until they reach 145°F (63°C) internal temperature, resting to finish. Bone-in chops may need a few extra minutes; monitor with a thermometer.
Tip: Rely on a thermometer rather than time to avoid overcooking. - 6
Rest before serving
Remove chops and rest on a cutting board for 3–5 minutes. Resting redistributes juices and keeps the meat tender.
Tip: Tent lightly with foil; avoid covering tightly to prevent steaming the crust. - 7
Make a quick sauce (optional)
Deglaze the pan with a splash of stock or wine, scrape up fond, and finish with a small pat of butter for a glossy sauce.
Tip: A small amount of pan sauce can elevate flavor without masking pork taste. - 8
Serve and enjoy
Slice against the grain if desired and plate with sides like roasted vegetables or potatoes. A final drizzle of olive oil can brighten the dish.
Tip: Keep portions moderate to preserve juiciness.
Questions & Answers
What is the best oven temperature for baking pork chops?
Most cooks do well at 400–425°F (200–220°C). This range promotes browning while preserving juiciness. Use a thermometer to confirm doneness rather than relying on time alone.
Bake at 400 to 425 degrees and check with a thermometer to ensure 145 degrees before resting.
Should I bake bone-in or boneless pork chops?
Bone-in chops stay moister and flavor is often richer, but require a few extra minutes. Boneless cook faster and are easier to portion. Choose based on your timeline and preference.
Bone-in chops are more forgiving for moisture and flavor; boneless cook faster and are simpler to portion.
Can I cook pork chops from frozen?
Cooking from frozen is possible but not ideal. It requires longer cooking times and more careful temperature monitoring. Thawing beforehand yields more consistent results.
It's best to thaw first, then bake for even cooking.
Do I need to sear before baking?
Searing is optional but creates a flavorful crust and can improve texture. If you skip searing, ensure surface moisture is removed and plan for a longer bake time.
Searing adds crust and flavor; you can skip if you prefer a simpler method.
What internal temp indicates doneness?
Aim for 145°F (63°C) and rest the meat for 3 minutes. This ensures safety with retained moisture and improved tenderness.
Cook to 145 degrees and rest for 3 minutes.
How should leftovers be stored and reheated?
Store leftovers in airtight containers for 3–4 days. Reheat gently in a skillet with a splash of broth or heat in a low oven to preserve juiciness and crust.
Keep leftovers in airtight containers and reheat slowly to maintain moisture.
Watch Video
Main Points
- Start with dry chops for crust perfection.
- Use a thermometer to hit 145°F and rest.
- Bone-in chops stay juicier but take longer.
- Searing boosts flavor; optional but effective.
- Resting is essential for juicy pork.
- Experiment with herbs and light sauces for variety.