Pork Chop Oven Temp: How to Bake Juicy Pork Chops
Discover the ideal pork chop oven temp for bone-in and boneless cuts, how thickness changes timing, and a clear step-by-step method to bake juicy chops. Includes convection tips, doneness targets, resting guidance, and expert insights from Oven Cook Pro.

Goal: cook pork chops in the oven at the right temperature for juicy, evenly cooked results. This guide shows the best oven temperatures for bone-in and boneless chops, explains how thickness alters timing, and teaches a simple bake method with optional searing. You’ll also learn safe internal temps and resting steps for reliable, restaurant-quality results.
Why oven temperature matters for pork chops
Oven temperature is the primary control for moisture retention, browning, and even doneness in pork chops. A higher starting temperature can promote a quick sear and flavorful crust, but it risks overcooking thinner portions if you don’t monitor doneness. Conversely, a gentler bake helps thicker chops cook evenly but may not develop as much exterior color. The Oven Cook Pro team emphasizes balancing surface browning with a safe internal temperature to preserve juiciness. Thickness, bone presence, and whether you pre-sear all influence the final result. For most home cooks, a two-stage approach—high initial heat for browning, then finishing at a moderate temperature—yields consistent, juicy pork chops while reducing guesswork.
Preheating and choosing the right oven temp
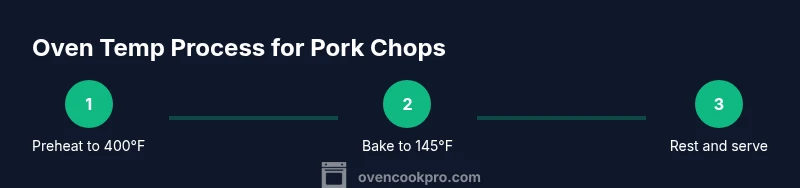
Preheating is non-negotiable for predictable results. Start with a baseline of 400°F (204°C) for most boneless chops; bone-in cuts can benefit from a slightly lower finish temperature to ensure even cooking through the center. If you’re using a convection oven, you can shave 25°F (14°C) off the standard target because circulating air accelerates heat transfer and browning. Give your oven 10–15 minutes to reach the set temperature, and use an oven thermometer to verify accuracy. This careful start helps avoid cold spots and ensures the chops hit the desired interior target without drying out on the edges.
Thickness, bone-in vs boneless, and how they affect time
Chop thickness is a major determinant of bake time. A 1-inch boneless pork chop may cook 8–12 minutes at 400°F (204°C) when finished with a quick sear, while a bone-in chop at the same thickness often needs a few extra minutes to reach the center. Thicker chops (1.25–1.5 inches) require longer, even at higher heat, and bone presence can help retain moisture but requires cautious timing to prevent overcooking near the bone. When in doubt, use a thermometer and monitor the internal temperature at the thickest part of the chop, away from bone.
Convection vs conventional ovens for pork chops
Convection ovens move air around the roast, promoting faster browning and more uniform heat. If you’re using convection, reduce the temperature by about 25°F (14°C) or shorten the bake time by 5–10 minutes, depending on thickness. Conventional ovens are perfectly fine for pork chops; you’ll simply rely more on timing and a thermometer to catch doneness. In either case, a wire rack over a sheet pan improves air circulation around each chop and reduces soggy bottoms.
How to season and prep for even cooking
Season chops generously with salt and pepper and add a light dusting of paprika, garlic powder, or your favorite herbs for depth of flavor. Pat the meat dry before seasoning to promote a better crust and even heat transfer. If you’re short on time, a quick dry brine (salt 15–30 minutes) can significantly improve juiciness. A light coat of oil helps the surface brown evenly and reduces sticking if you plan to sear before baking.
Verifying doneness and resting
The safest way to confirm doneness is with an instant-read thermometer. Target an internal temperature of 145°F (63°C) with a 3-minute rest, during which carryover heat will bring the center to the safe range. Resting is crucial: it allows juices to redistribute and prevents a dry, tough texture. If your chops reach 140–145°F and you plan to serve immediately, reserve a few extra minutes by tenting loosely with foil and letting the meat finish in the warm environment.
Common mistakes and how to avoid them
Avoid the temptation to rely solely on time; use a thermometer for accuracy. Don’t skip preheating or crowd the pan, which traps steam and can steam-braise the chops instead of browning. Overcooking is the most common error; always aim for 145°F internal and use the rest to seal in juices. Finally, don’t neglect resting and slicing against the grain for maximum tenderness.
Quick reference temperature charts and timing tips
For boneless chops: bake at 400°F (204°C) for 8–12 minutes after searing, until 145°F internally after resting. For bone-in chops: bake at 375–400°F (190–204°C) for 12–18 minutes, depending on thickness, then rest to reach 145°F. If you’re using convection, reduce both temperature and time by approximate margins and watch the thermometer closely. Remember, thickness and bone alter the equation, so personalize based on the chop you have on hand.
Tools & Materials
- Rimmed baking sheet(Prevents juices from spilling; use heavy-duty if possible)
- Wire rack(Elevates chops for even air exposure and browning)
- Instant-read meat thermometer(Check thickest part away from bone; aim for 145°F)
- Tongs(For flipping without piercing the meat)
- Oven-safe oil or spray(Lightly oil surface to promote browning)
- Oven-safe probe thermometer (optional)(Helps monitor oven temperature without opening door)
- Seasonings(Salt, pepper, paprika, garlic powder, or herbs)
Steps
Estimated time: 25-40 minutes total (depending on chop thickness and whether you sear)
- 1
Preheat the oven
Set the oven to 400°F (204°C) for a balanced crust and center doneness. Give it 10–15 minutes to come fully to temperature, using an oven thermometer to verify accuracy. If you’re using convection, you can drop the set point by about 25°F and still achieve a good browning.
Tip: A reliable thermometer mitigates hot-spot risk and keeps timing precise. - 2
Dry and season the chops
Pat the pork chops dry with paper towels to remove surface moisture, then season generously on all sides. A light coating of oil helps the surface brown evenly. If you’re using a dry rub, apply it evenly and press gently to adhere.
Tip: Dry surface equals faster Maillard browning and better flavor. - 3
Optional: sear for color
Heat a skillet with a small amount of oil over medium-high heat. Sear each side for 1–2 minutes until a golden crust forms. This step adds color and flavor but isn’t strictly required if you’re aiming for a hands-off bake.
Tip: Searing creates a flavor-packed crust and shortens oven time. - 4
Arrange on a rack
Place the chops on a wire rack set over a rimmed sheet pan. This setup maximizes air flow around each piece, leading to more even cooking and browning. If you skipped searing, this step helps achieve structure and texture.
Tip: Spacing prevents soggy bottoms and promotes even heat distribution. - 5
Bake until target internal temp
Slide the pan into the oven and bake until the thickest part reads about 140–145°F (60–63°C) with a thermometer. Remove promptly to rest, as carryover heat will carry the center to 145°F or a bit higher.
Tip: Rely on a thermometer rather than time alone to avoid overcooking. - 6
Rest before serving
Tent loosely with foil and let chops rest 3–5 minutes. Resting lets juices redistribute, preserving moisture when you slice. Slice against the grain for maximum tenderness.
Tip: Rest is the secret to juicy chops; skip it at your culinary peril. - 7
Final check and serve
If any portion is still below 145°F, return briefly to the oven and recheck in 2–3 minutes. Once rested, serve with your favorite sides. Keep leftovers refrigerated promptly.
Tip: A quick extra few minutes can save a dry bite later. - 8
Clean up and plan next batch
Wipe down the sheet tray and rack after cooling to prevent oil buildup. Reflect on what worked (color, crust, tenderness) and adjust future temps for your preferred doneness level.
Tip: Note your results so you can replicate them consistently.
Questions & Answers
What oven temperature should I cook pork chops at?
For most pork chops, bake at 400°F (204°C) for boneless cuts and 375–400°F (190–204°C) for bone-in pieces, aiming for 145°F internal after resting. Convection allows lower temps or shorter times. Always verify doneness with a thermometer.
Bake boneless chops at 400°F and bone-in around 375 to 400°F, then rest until they reach 145°F internal.
Is convection oven better for pork chops?
Convection can reduce cooking time and promote even browning. If you use a convection oven, lower the temperature by about 25°F and monitor doneness with a thermometer to avoid overcooking.
Yes, convection helps browning and reduces time; just lower the temperature a bit and check doneness early.
How thick should pork chops be for oven cooking?
Aim for chops 1/2 to 1 inch thick for easy oven cooking. Thicker chops (1.25–1.5 inches) require more time and careful monitoring; bone-in cuts also cook differently than boneless.
Most oven-cooked chops are between 1/2 and 1 inch thick; thicker cuts need longer and steadier heat.
What internal temperature confirms doneness?
The USDA recommends 145°F (63°C) with a 3-minute rest for pork. Use an instant-read thermometer and verify in the thickest part away from bone.
Cook to 145°F and rest for 3 minutes; check with a thermometer.
Should I rest pork chops after cooking?
Yes. Resting for 3–5 minutes lets juices redistribute, improving moisture and tenderness. Cover loosely with foil if needed for warmth.
Always rest 3 to 5 minutes before slicing to keep juices in the meat.
Bone-in vs boneless: does temperature differ?
Bone-in chops often benefit from a slightly longer bake but finish at the same internal temp of 145°F. The bone can conduct heat differently, so rely on a thermometer rather than time alone.
Bone-in chops cook a bit longer; finish to 145°F and use a thermometer.
Watch Video
Main Points
- Target 145°F internal temp for safe, juicy pork chops.
- Convection reduces time; adjust temp accordingly.
- Use a wire rack for even browning on all sides.
- Resting is essential for moisture retention.