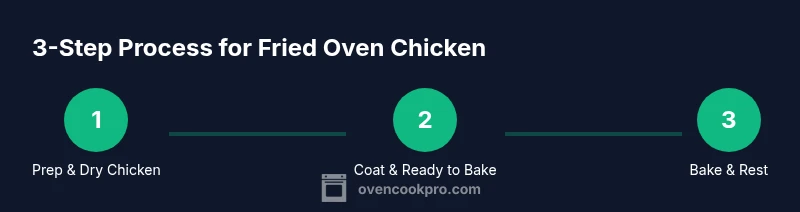
Fried Oven Chicken Recipe: A Step-by-Step Guide
Learn a reliable fried oven chicken recipe that yields juicy meat and a crisp crust with minimal oil. This step-by-step guide covers prep, coating, oven temps, and serving ideas, with expert tips from Oven Cook Pro.

Learn how to make crispy fried-oven chicken with minimal oil. This quick guide reveals essential equipment, pantry staples, and step-by-step methods to achieve juicy meat with a crisp coating. You’ll discover precise temperatures, coatings, and timing tips that work in home ovens, plus practical safety reminders for a foolproof result.
What is fried oven chicken recipe and why it works
The term fried oven chicken recipe describes a technique that mimics the texture and flavor of deep-fried chicken while using far less oil. In a typical home oven, you achieve a crisp crust by using a shallow coating of flour or starch, pressed firmly onto a seasoned chicken piece, and roasting on a rack so heat surrounds the meat. The result is a juicy interior with a golden exterior, without the heavy grease of traditional frying. According to Oven Cook Pro, success rests on three pillars: dryness, even coating, and precise heat management. When these are in place, the chicken browns evenly and remains tender inside. Also keep in mind that the exact cut you choose—bone-in thighs for flavor and moisture, or boneless skinless breasts for rapid cooking—will influence texture and cooking time.
Before you start, understand that this method is not a substitute for a full batter fried chicken, but it delivers a comparable crust with far less fat. The technique also pairs well with a variety of spice blends, from smoky paprika to herby garlic rubs, making it easy to tailor to your family’s tastes. You’ll want to plan for a moderate oven temperature and a crisping phase that yields a crust with noticeable bite while the interior stays juicy. In this guide, fried oven chicken recipe will be broken down into practical steps, safety checks, and serving ideas so you can reproduce dependable results every time.
Essential Equipment and Tools
To achieve a truly crispy crust in a fried oven chicken recipe without deep frying, you’ll need a few reliable tools. A wire rack placed over a baking sheet allows hot air to circulate around the chicken, which is crucial for even browning. An instant-read thermometer helps you verify doneness without overcooking. A shallow, wide-diameter dish for dredging and a separate bowl for wet batter ensure a clean, efficient workflow. A nonstick spray, pastry brush, and kitchen tongs reduce mess and improve handling when coating and turning pieces. Finally, parchment paper can simplify cleanup, though it’s optional if you use a well-seasoned rack. As you assemble, keep your workspace organized so everything you need is within reach. Remember, consistent rack height and spacing between pieces promote uniform browning and crunch across the batch.
Ingredient and Coating Options
A successful fried oven chicken recipe hinges on the coating’s ability to cling and crisp. The classic approach uses a dredge: a seasoned flour mixture that sticks to the chicken after a brief wet bath (egg wash or milk). For extra crunch, add a starch like cornstarch or breadcrumbs to the flour. You can tailor the spice blend to taste: paprika for warmth, garlic powder and onion powder for depth, salt for seasoning, black pepper for bite, and a pinch of cayenne for heat. For a lighter option, you can use a thinner batter with a little sparkling water added to the dredge. If you’re avoiding gluten, substitute with a gluten-free flour blend plus a small amount of starch. Finally, consider a finishing spray of oil to help the crust caramelize in the high-heat oven.
Preparation and Coating Science
Patting the chicken dry is essential; surface moisture prevents crust adhesion and causes steaming instead of browning. After patting dry, dredge through wet mix then coat with dry mix, pressing gently to ensure full coverage. Space pieces apart on the rack, not touching, so heat can circulate. The coating should be applied evenly in a single layer to prevent clumps that burn or cook unevenly. For best results, allow coated pieces to rest for 10-15 minutes before baking to help the coating set. If you see patches that aren’t fully coated, lightly pat with more of the dry mix. The goal is a consistent crust color from edge to edge.
Baking Technique and Temperature Control
Preheat the oven to around 425°F (220°C) with a rack in the middle position. Arrange coated pieces on the wire rack, giving each piece space to breathe. Lightly spray or brush the tops with oil to promote browning. Bake for about 15-20 minutes, then flip and bake another 10-15 minutes until the internal temperature hits 165°F (74°C) and the crust is golden. If you notice uneven browning, rotate the baking sheet 180 degrees. Using a convection setting can accelerate browning and produce a crisper crust, but monitor to avoid over-browning. Rest the chicken for 5 minutes after removing from the oven to let juices redistribute.
Tools & Materials
- Chicken pieces (bone-in, skin-on preferred)(Choose thighs and drumsticks for juiciness and flavor.)
- All-purpose flour or gluten-free alternative(Foundation of the crust for coating.)
- Cornstarch or breadcrumbs(Adds extra crisp and lightness.)
- Eggs and milk or dairy-free alternative(Wet coat for adhesion.)
- Seasoning mix (paprika, garlic powder, onion powder, salt, pepper)(Dip into the flavor profile you like.)
- Oil spray or light neutral oil(Aids browning without greasiness.)
- Wire rack and baking sheet(Promotes air circulation for even crisping.)
- Oven thermometer(Ensure accurate oven temperature.)
- Tongs or spatula(Safe turning and handling.)
- Paper towels(Pat dry and absorb moisture.)
- Parchment paper (optional)(Easier cleanup if you skip the rack liner.)
Steps
Estimated time: 40-60 minutes
- 1
Pat dry and prep chicken
Pat the chicken pieces dry with paper towels to remove surface moisture. This improves coating adhesion and helps the crust crisp up rather than steam. If desired, trim any excess fat and pat again until the surface is dry to the touch.
Tip: Dry surfaces are the key, so don’t rush the pat-down. - 2
Prepare wet and dry dredges
Whisk eggs with a splash of milk in one bowl. In a separate dish, combine flour, cornstarch, and seasoning. The wet-dry separation ensures even coating and minimizes clumps.
Tip: Use a wide, shallow dish for easier coating. - 3
Coat chicken pieces
Dip each piece in the wet mixture, allowing excess to drip off, then roll in the dry mix until fully coated. Gently press the coating to ensure adhesion. Place coated pieces on a rack-ready tray as you finish.
Tip: Shake off excess coating before placing on the rack. - 4
Preheat and prepare rack
Preheat the oven to 425°F (220°C). Place a wire rack over a baking sheet to lift chicken off the base, enabling air circulation around all sides.
Tip: Rack elevation is vital for an even crust. - 5
Bake and rotate
Bake 15-20 minutes, then flip the pieces and bake 10-15 minutes more until a deep golden crust forms and the internal temperature reaches 165°F (74°C).
Tip: If using convection, reduce time slightly and check earlier. - 6
Rest and serve
Remove from oven, let rest 5 minutes. Resting helps redistribute juices and keeps the crust crisp. Serve with your favorite sides.
Tip: Avoid cutting immediately to prevent fluid loss.
Questions & Answers
Can I use boneless chicken breasts for fried oven chicken recipe?
Yes. Boneless breasts cook faster and can yield a leaner crust. Cut into uniform pieces, reduce bake time, and monitor internal temperature to 165°F.
Yes, you can use boneless breasts; cook time will be shorter, and you should check for 165 degrees.
What coatings work best for crispiness in the oven?
A breading with flour and corn starch or breadcrumbs tends to crisp well. Adding a bit of cornstarch creates a lighter, crunchier crust.
Flour and cornstarch or breadcrumbs work best for a crisp oven crust.
Can I make this ahead or freeze leftovers?
Yes. You can freeze unbaked coated pieces for later baking, or freeze baked chicken and reheat in a 350°F oven until warmed through.
Yes, you can prep ahead or freeze, then bake or reheat later.
Is using a convection oven necessary?
Convection is not required but can help with crisper coating and faster cooking. If you use it, reduce temperature by 25°F and monitor closely.
Convection isn’t required, but it helps; reduce heat a bit and watch cooking times.
How do I prevent sticking to the rack?
Line the rack with parchment or spray lightly with oil. Ensure the coating is dry and fully adhered before baking.
Line the rack or spray it lightly, and make sure the coating sticks well.
What if I don’t have a wire rack?
If you don’t have a rack, bake on a lightly oiled baking sheet and flip halfway. The crust may be slightly less crisp, but still tasty.
If you lack a rack, bake on a sheet and flip halfway for crisper results.
Watch Video
Main Points
- Preheat and air-circulate for crisp crust.
- Pat dry the chicken for better coating adhesion.
- Use a wire rack to promote even browning.
- Check internal temp to 165°F for safety.
- Rest the chicken before serving for juiciness.