Master the Chicken Dish Oven: Step-by-Step Roast Guide
Learn to roast a chicken dish in the oven for juicy meat and crispy skin. This step-by-step guide from Oven Cook Pro covers prep, temperatures, timing, safety, and serving ideas.

You will learn how to roast a chicken dish in the oven for juicy meat with crispy skin. This guide assumes a standard oven, a meat thermometer, and common pantry ingredients like olive oil, salt, pepper, and garlic. You’ll prep the bird, roast at steady heat, monitor doneness, rest, and serve with confidence.
Why a consistently reliable chicken dish oven matters
A well-roasted chicken dish in the oven yields juicy meat with a crisp, golden skin that pleases family and guests alike. The oven’s steady, radiant heat is ideal for cooking larger pieces evenly, from bone-in thighs to a whole bird. According to Oven Cook Pro Analysis, 2026, the most dependable outcomes come from two core practices: ensuring even heat distribution and giving the roasted chicken time to rest before carving. The Oven Cook Pro Team emphasizes that preheating the oven to the right temperature and using a rack to lift the chicken off the pan are critical steps that prevent soggy bottoms and uneven browning. Size matters too: bone-in, skin-on cuts retain moisture better than skinless portions, and a whole chicken behaves differently than individual parts. Start with a concrete plan for heat, time, and resting, then adjust for your oven’s quirks (hot spots are common). This article translates those principles into practical steps you can apply in home kitchens, so your chicken dish oven results are consistently excellent and repeatable, even when you cook for a crowd. You’ll learn how to choose cuts, season well, manage moisture, and achieve a reliably delicious roast.
Flavor foundations: how to build a confident chicken dish oven profile
Flavor is built in layers. Start with a simple fat to assist browning and moisture—olive oil or melted butter works well here. Add salt generously to penetrate the skin, and pepper for a clean baseline. Aromatics like garlic, fresh herbs (rosemary, thyme), lemon zest, and paprika bring depth without overpowering the meat. The right oil helps the skin crisp and prevents sticking, while air circulation beneath the rack encourages even heat transfer. If you have time, a brief dry-brine (salt on the surface 1–2 hours before roasting) can boost juiciness and skin texture by drawing moisture to the surface where it can evaporate during cooking. For a deeper, more cohesive flavor, some cooks introduce a quick herb butter under the skin or a seasoned rub on the exterior. These flavor boosters pair well with chicken and coordinate with common pantry ingredients, keeping your dish accessible for everyday meals or special occasions. Remember: the goal is to layer flavors, not overwhelm the meat’s natural character, so balance is key and you can adjust to your personal preferences.
Picking the right chicken cut and prepping for roasting
Your method depends on the cut and your timeline. A whole chicken requires different handling than bone-in thighs or boneless breasts. Bone-in, skin-on pieces stay moist during roasting and brown more evenly, while boneless breast meat cooks faster and can dry out if overcooked. Regardless of cut, start by patting the chicken dry with paper towels to remove surface moisture that would steam instead of sear. Bring the meat to room temperature for about 20–30 minutes to promote even cooking. If you’re roasting a whole bird, consider trussing the legs to ensure compact heat exposure and even browning. Salt and pepper all over, then apply a light coat of oil or butter under and over the skin to promote good browning. If you’re using skin-on pieces, place the skin side up on the rack so fat can baste as it renders. Prepping with a consistent technique reduces variability from one oven to another and makes the rest of the process smoother and more predictable.
Preheating, roasting temps, and rack setup for even results
Preheating your oven is essential for immediate, steady heat that browns the skin and cooks the meat evenly. Position a rack in the middle of the oven to ensure heat circulates around the chicken. A common approach is to roast at a high initial temperature to set the crust (for example, around 425°F/220°C) and then lower to a moderate temperature to finish cooking without drying the meat. If your oven runs hot in spots, rotate the pan halfway through cooking to compensate for cold shelves or hot zones. The chicken should be elevated on a rack so air can circulate underneath, promoting uniform browning on all sides. Use a rimmed baking sheet or roasting pan to catch drips and prevent spillover that could burn or create smoke. Keep in mind that the total time depends on the size and cut; larger whole birds take longer, while smaller cuts finish more quickly. A digital meat thermometer is invaluable here, letting you monitor internal temperature and avoid guesswork.
Resting, carving, and serving to maximize juiciness
Resting is the finishing touch that locks in moisture and makes carving easier. After removing the chicken from the oven, tent it loosely with foil and let it rest for about 10–15 minutes. Resting allows the juices to redistribute, resulting in juicier slices when you carve. Slice against the grain for tenderness, and if you want to showcase the roast, lightly carve at the table for a dramatic presentation. Serve with simple sides like roasted vegetables, a bright herb vinaigrette, or a lemony pan sauce that picks up the fond left in the roasting pan. For weeknight dinners, a straightforward garlic-herb pan sauce or a squeeze of fresh lemon can transform leftovers into a new dish with minimal effort. Remember to recheck meat safety and ensure all portions reach a safe internal temperature before serving. This approach keeps the process approachable while delivering restaurant-quality results in the home kitchen.
Tools & Materials
- Digital meat thermometer(Ensures safe internal temperature and juiciness checks)
- Oven-safe roasting rack(Elevates chicken for even air exposure and browning)
- Rimmed baking sheet or roasting pan(Catches drips and helps heat circulation)
- Aluminum foil(Useful for tenting if the skin browns too quickly or to cover leftovers)
- Kitchen tongs(Turn and move chicken safely without piercing the meat)
- Chef's knife(Trim fat, portion after roast, and slice against the grain)
- Olive oil or melted butter(Helps crisp skin and keeps moisture on surface)
- Garlic (fresh or paste)(Flavor booster optional)
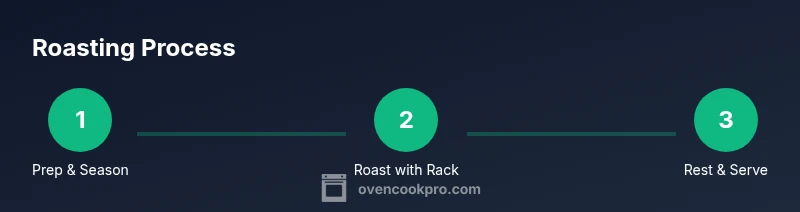
Steps
Estimated time: 60-75 minutes
- 1
Prepare and marinate the chicken
Pat the chicken dry with paper towels, then season generously with salt, pepper, and any chosen aromatics. If using a marinade, apply evenly and let it rest for 15–30 minutes to start flavor absorption. This step builds a flavorful base and helps achieve crisp skin during roasting.
Tip: Dry skin plus light oil or butter will promote browning and reduce steaming. - 2
Preheat oven and position rack
Preheat to a hot setting suitable for roasting and place a rack in the middle of the oven to promote even heat circulation. The rack elevates the chicken so air can reach all surfaces, improving browning and moisture retention.
Tip: If your oven has hot spots, preheat longer and rotate the pan halfway through cooking. - 3
Roast and monitor the chicken
Place the pan on the rack and roast until the skin is deeply golden and the internal temperature nears target. Use the thermometer to check the thickest part of the meat, avoiding bones. Turn pieces if needed to ensure even browning.
Tip: Avoid opening the oven door frequently; this interrupts heat and can extend cooking time. - 4
Check doneness and finish
Confirm an internal temperature around safe doneness for the piece you’re roasting (whole bird or parts). If skin isn’t sufficiently browned, you can finish under a broiler for a minute or two, watching closely.
Tip: Removal while a slight amount of carryover cooking remains yields juicier results. - 5
Rest and carve
Let the roasted chicken rest under foil for 10–15 minutes before carving. Resting allows juices to redistribute, producing juicier slices. Carve against the grain for tenderness and serve.
Tip: If carving at the table, slice thinly to showcase the roast and reduce steam loss. - 6
Flavor variations and serving ideas
Try herb butter under the skin, a lemon-garlic glaze, or a spice rub for different flavor profiles. Pair with roasted vegetables, a simple green salad, or a starch like potatoes or rice for a complete meal.
Tip: Keep seasonings balanced to let the chicken shine; avoid overpowering sauces that mask the natural chicken flavor.
Questions & Answers
What is the best temperature to roast chicken in the oven?
Most cooks favor a hotter start to brown the skin and then a moderate finish to cook through. A common approach is a high initial temperature followed by a lower finish, adjusted to your oven and the cut you’re using. Always monitor the internal temperature until the meat is safely cooked.
A hotter start, then a moderate finish helps brown the skin and cook the meat evenly. Keep an eye on the internal temperature as you go.
How can I tell when the chicken is done without overcooking?
Use a digital thermometer to check the thickest part of the meat. Target a safe internal temperature, and consider a short rest to let carryover heat finish the process. If you’re roasting a whole bird, check near the thigh without touching the bone.
Check the thickest part with a thermometer and let it rest a bit so the juices settle.
Should I roast a whole chicken or individual pieces?
Both work well. Whole chickens require longer cooking and more attentive resting, while bone-in pieces cook faster and can yield crisper skin with careful timing. Choose based on how much time you have and your preferred texture.
Choose whole for shareable roasts, or pieces for quicker results and crisper skin.
Why is resting important after roasting?
Resting lets the juices redistribute to keep the meat moist. Cutting too soon causes juices to escape, leaving drier slices. A short rest is a simple step with a big impact on final texture.
Resting keeps the juices inside so the meat stays moist when cut.
Can I roast chicken with vegetables at the same time?
Yes. Add vegetables that tolerate high heat around the roasting rack. Give them space so they brown rather than steam. Keep an eye on cook times as vegetables may finish earlier or later than the chicken.
Absolutely—just give veggies space and watch the timing so everything comes out evenly.
What safety steps should I take when handling raw poultry?
Wash hands after handling raw poultry, sanitize surfaces and utensils, and avoid cross-contamination. Keep raw meat separate from ready-to-eat foods and use separate cutting boards. Always cook to the recommended internal temperature.
Wash hands, sanitize surfaces, and keep raw poultry away from ready-to-eat foods.
Watch Video
Main Points
- Preheat and position the rack for even browning.
- Pat dry and oil skin for crisp texture.
- Monitor internal temperature to 165°F (74°C) safely.
- Rest before carving to maximize juiciness.
- Experiment with simple flavor boosters for variety.