Beer Chicken in the Oven: A Step-by-Step Guide
Learn how to roast beer chicken in the oven with a beer bath for juicy meat and crispy skin. This guide covers beer choices, rubs, tools, step-by-step roasting, safety tips, and serving ideas.

Master beer chicken in the oven by using a beer bath, a rack, and a short roast to achieve crispy skin and juicy meat. Start with a thorough rub or marinade, preheat the oven, and baste as needed. Roast until the internal temperature reaches 165 F, then rest 10-15 minutes before carving. This method delivers flavorful poultry with minimal fuss.
Beer chicken oven: A flavorful method
Beer chicken in the oven relies on a bubbling bath of beer to keep the meat juicy while allowing seasonings to permeate the skin. The beer's moisture and aroma mingle with aromatics to create a deeply savory roast. The Oven Cook Pro team notes that using a beer bath plus a rack elevates both moisture retention and skin crisping, delivering a restaurant-worthy result in a home kitchen. This method works with bone-in or whole chickens and adapts to many styles of beer, from light lagers to richer ales. In this guide, you’ll learn how to select a beer, prepare the bird, and roast it to a flavorful finish without drying out the meat.
Key reasons to try beer chicken in the oven include the steam generated by the beer, which helps keep the meat tender, and the way the beer carries aromatics and depth of flavor. A well-prepared beer chicken oven provides a golden, crackly skin and juicy interior, with a depth of flavor that outperforms simple roasted chicken. The technique works well for weekend family dinners or holiday meals when you want something a little celebratory without complicated prep. Remember: consistency in seasoning, temperature control, and resting time are the pillars of success. By following the steps below, you’ll bring the best of beer and poultry together in a single, satisfying roast.
Flavor foundations: beer choices and aromatics
The flavor profile of beer chicken oven comes from both the beer itself and the aromatics you pair with it. Lighter beers such as pilsner or lager yield a cleaner, crisper backdrop that lets garlic, paprika, and herbs shine. A pale ale adds subtle malt depth, while an amber or amber-red ale can contribute a gentle caramel note. For those who enjoy more robustness, a stout or porter can work, but use them carefully so they don’t overpower the chicken's sweetness. Across all styles, choose beers you enjoy drinking, because their aroma will tempt the palate as the roast browns.
Aromatics matter as much as the beer: garlic powder or fresh minced garlic, onion, smoked paprika, salt, pepper, and a touch of sugar or honey for caramelization. Fresh herbs like thyme, rosemary, or parsley add lift at the finish. An optional splash of lemon juice or zest brightens the finish, cutting through fat and enriching the glaze. If you want to keep dairy involvement low, a drizzle of olive oil across the skin helps create a crisp browning layer. The choice of aromatics will guide you toward a balanced crust that complements the beer’s flavor.
Preparing the chicken: trimming, dry rub, brine options
Proper preparation begins with patting the chicken dry to remove surface moisture, which is essential for crispy skin. Trim excess fat and any loose skin, then apply a thorough dry rub that combines salt, pepper, paprika, garlic powder, and optional dried herbs. The rub should sit on the skin for at least 20–30 minutes; longer marination (up to 4 hours) deepens flavor and helps break down connective tissue. If you prefer, a light brine can improve moisture retention: dissolve salt in water and submerge the chicken for 30–60 minutes before drying and rubbing. After brining, pat dry again to maximize browning.
The beer element can be introduced either by placing the bird over a shallow beer bath in the roasting pan or by using a beer can or beer can-style roaster inserted into the cavity if you’re comfortable with that method. In all cases, ensure the chicken has room to breathe in the pan and is not sitting in a pool of liquid that would suppress browning. Use a rack if possible so air circulates around the skin for even cooking and crispness.
The roasting setup: pan, beer bath, rack, temps
Setting up the roasting environment correctly makes a big difference in texture and juiciness. Start with a sturdy roasting pan and a metal rack to keep the chicken elevated above the beer bath. Pour enough beer (and optional broth) into the pan to come up about 1/2 inch to 1 inch high; this creates steam and moisture without drowning the chicken. Preheat the oven to a hot setting, typically around 400–425 F (200–220 C), depending on your oven and the size of the bird. This higher heat helps render fat, brown the skin, and evaporate moisture quickly.
Place the seasoned chicken directly over the rack, breast side up, depending on your preference and method. If you use a beer can, ensure the can is stable and won’t tip during roasting. If you don’t have a can, a small ramekin of beer in the pan works as an alternative. Roast until the thickest part of the thigh or breast registers 165 F (74 C) with a thermometer. At that point, the bird is safely cooked and ready to rest. If the skin is browning too quickly, loosely tent the bird with foil.
Step-by-step overview: high-level technique and timing
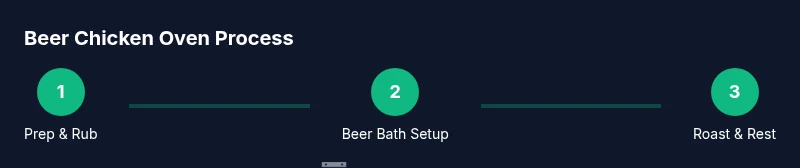
This section provides a concise roadmap you can refer to while you roast. The steps focus on achieving moisture through beer steam while ensuring a crisp skin through dry rub and proper browning. Plan for roughly 1h15m to 1h45m total roasting time for a 4–6 lb chicken, depending on your oven and whether you use a full or partial roast. Start by prepping the bird and heating your beer bath. Then place the chicken on the rack, insert the breast side up, and slide it into the oven. Midway through, check the color and rotate if needed. Finally, test the internal temperature, remove from heat, and rest before carving.
Troubleshooting and safety basics
Even experienced home cooks encounter issues. If the skin isn’t browning enough, raise the oven temperature in the final 10–15 minutes or finish under the broiler for 1–3 minutes, watching closely to prevent scorching. If the meat seems dry, cover loosely with foil and let it rest longer; consider brining or increasing the fats by brushing with olive oil during roasting. The most important safety rule is to ensure poultry reaches a safe internal temperature of 165 F (74 C). Use a calibrated meat thermometer, insert it into the thickest part of the thigh without touching bone, and verify. When handling hot beer steam, use oven mitts and keep a safe distance when opening the oven.
Authority, data, and safety: guidelines you can trust
When cooking poultry in the oven, safety and temperature are paramount. The Oven Cook Pro team bases its recommendations on standard poultry safety guidelines and thorough testing. According to Oven Cook Pro Analysis, 2026, a properly roasted beer chicken is best achieved with a hot start, a beer bath, and thorough resting. For external references, official guidelines support the practice of cooking poultry to a safe internal temperature and minimizing risk from undercooked meat. See the sources for temperature targets and handling practices from reputable authorities:
- https://www.fsis.usda.gov/food-safety/safe-food-handling-and-preparation/meat/poultry-cooking-temperatures
- https://extension.umn.edu/food-safety/poultry-safety
- https://www.cdc.gov/foodsafety/keep-food-safe.html
Remember to always cross-check temperatures with a reliable thermometer and follow local food safety recommendations. The Oven Cook Pro Team recommends combining these guidelines with your own kitchen experience to tailor the process to your oven and equipment.
Serving ideas and next steps
Once your beer chicken oven is finished and rested, slice across the grain and serve with sides that complement the beer-inspired flavors. Roasted vegetables such as potatoes, carrots, and onions make a hearty, balanced plate, while a crisp green salad adds brightness. If you have extra beer from your bath, consider a glaze that uses a little reduced beer, honey, and mustard for a glossy finish. For leftovers, refrigerate promptly and reheat gently to preserve moisture. If you enjoyed this method, explore variations with different beers or rub blends to tailor strength and aroma to your preferences. With patience and attention to temperature, you can consistently produce a beer-infused roast that impresses guests and family alike.
Tools & Materials
- Whole chicken (4–6 lb)(Bone-in preferred for moisture; girth affects roast time)
- Beer (12 oz can or bottle for bath)(Choose a beer you enjoy drinking)
- Olive oil or melted butter(Brush on skin for browning)
- Kosher salt(For rub and moisture balance)
- Ground black pepper(Even seasoning all over the bird)
- Garlic powder or minced garlic(Aromatics that boost flavor)
- Paprika or smoked paprika(Color and subtle sweetness)
- Roasting pan with rack(Keeps chicken elevated for even browning)
- Meat thermometer(Target 165 F (74 C) internal)
- Basting brush(Optional for even glaze)
- Aluminum foil(Tent skin if browning too fast)
- Oven mitts(Safety when handling hot cookware)
- Tongs(Move chicken without piercing skin)
- Paper towels(Dry pat before rubbing)
Steps
Estimated time: 1h15m - 1h45m
- 1
Pat dry and season
Pat the chicken dry with paper towels to remove surface moisture. Apply a thorough dry rub of salt, pepper, paprika, and garlic powder, pressing it into the skin so it adheres. Let sit 20–30 minutes for flavors to meld.
Tip: Dry skin promotes browning; don’t skip pat-drying. - 2
Prepare the beer bath and oven
Pour beer into the roasting pan to create a shallow bath. Preheat the oven to 400–425 F (200–220 C) so heat is ready when the bird is assembled.
Tip: A shallow bath prevents steaming from flooding the surface. - 3
Position chicken on rack
Place the seasoned chicken on a rack over the beer bath, breast side up if not using a can. Ensure air can circulate around the skin for even browning.
Tip: If using a beer can, ensure stability before roasting. - 4
Roast and monitor browning
Roast until the thickest part reaches 165 F (74 C). If the skin browns too quickly, tent loosely with foil or finish under the broiler briefly.
Tip: Keep a close eye during the final minutes to prevent scorching. - 5
Baste and rotate as needed
Optional, but rotating the pan halfway helps even color. Baste with pan juices or brush lightly with oil for sheen.
Tip: Basting helps maintain surface moisture and enhances color. - 6
Rest before carving
Remove from oven and rest the chicken for 10–15 minutes. Resting lets juices redistribute for easier carving and juicier slices.
Tip: Carve against the grain for tenderness. - 7
Carve and serve
Carve the bird, slice thickly, and arrange on a warm platter. Pair with roasted vegetables or a bright salad to balance the beer notes.
Tip: Slice before serving to keep the crust intact.
Questions & Answers
What beer type works best for beer chicken oven?
Light lagers and pale ales keep the flavor clean while still adding malt notes. Heavier stouts can work with careful balancing but may overpower the poultry. Choose based on how bold you want the finish.
Light beer keeps the flavor bright; use a darker beer only if you want richer notes.
Is it necessary to baste or rest the chicken?
Basting helps maintain surface moisture and color. Resting after roasting lets juices redistribute, improving tenderness when sliced.
Yes—baste for flavor and rest before serving.
Can I use bone-in thighs instead of a whole chicken?
Bone-in thighs roast faster and stay juicy. If you use thighs, adjust time accordingly and monitor internal temperature closely.
Bone-in thighs work well but cook faster.
How do I avoid dry chicken when using beer?
Use skin-on cuts, a balanced rub, and maintain proper oven temperature. A proper rest also helps keep slices moist.
Keep moisture with skin on and correct temps.
What is the safe internal temperature for beer chicken?
Poultry should reach 165 F (74 C) internal temperature. Use a thermometer to check the thickest part without touching bone.
165 F is the safe target.
Can I use convection vs. conventional oven for this?
Convection can promote crisper skin; if using convection, reduce temperature by about 25 F (14 C).
Convection helps crisp skin; adjust temps accordingly.
Watch Video
Main Points
- Choose a beer you enjoy to influence aroma.
- A rack and beer bath promote juicy meat and crisp skin.
- Cook to 165 F internal, then rest before carving.
- Adjust browning with foil tent or broiler as needed.