Bacon in the Oven at 350°F: A Foolproof Guide
Learn how to cook bacon in the oven at 350°F for crispy, evenly cooked slices with minimal mess. This guide covers prep, timing, safety, variations, and troubleshooting for perfect bacon.

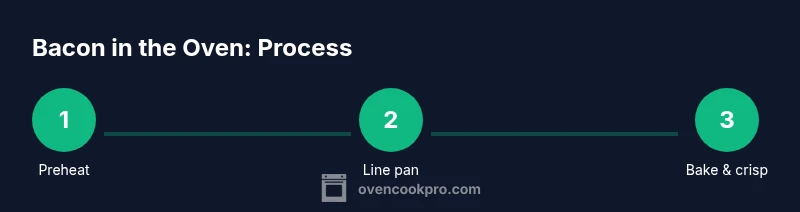
Cooking bacon in the oven at 350°F yields crispy, evenly cooked strips with minimal mess. Preheat the oven, line a sheet pan with parchment, and arrange bacon in a single layer. Bake until the edges crisp, usually 12-18 minutes depending on thickness, then drain and pat dry for best texture.
Why bacon in the oven 350 is a reliable method
Bacon in the oven 350 is a reliable method because it delivers consistent doneness across all slices with far less splatter than pan-frying. The moderate, steady heat allows fat to render slowly, which helps the bacon crisp at the edges without burning the centers. Using a rimmed sheet pan ensures any fat pools away from the bacon, and lining the pan with parchment or foil makes cleanup a breeze. For homeowners and home cooks who want dependable results without babysitting a skillet, this approach is hard to beat. The key is giving all slices a single, flat layer and avoiding overlap, which can cause uneven cooking and soggy spots. By adopting this method, you’re creating a predictable routine that can be used for breakfast, sandwich toppings, or a quick protein boost for salads and bowls.
When you start with bacon in the oven 350, you’re working with a temperature that’s high enough to render fat efficiently but low enough to prevent rapid scorching. This balance reduces the risk of burnt edges and underdone centers, a common problem when bacon is cooked at too high a heat. If you’re using thicker-cut bacon, plan for a few extra minutes; if you’re using thinner slices, check closer to the lower end of the time range. With practice, you’ll know exactly when to pull it for your preferred level of crispiness.
Oven-based bacon also scales well for batch cooking. If you’re feeding a crowd, you can line multiple sheet pans and bake in succession or use a convection setting if your oven supports it. Just be mindful of oven temperature stability if you load up several pans at once; rotate pans halfway through to even out cooking. In short, this method is a dependable baseline for reliably crispy bacon every time, particularly when you’re aiming for consistent texture across many slices.
Safety and prep considerations
Working with raw bacon requires basic kitchen safety to prevent cross-contamination and ensure best results. Start by washing your hands and keeping raw bacon separate from ready-to-eat foods. Store the meat in the coldest part of the fridge until you’re ready to cook, and avoid letting it sit at room temperature for more than 2 hours. When selecting bacon, look for even slices with similar thickness to ensure uniform cooking. It’s also important to pat the slices dry if they’re very wet; moisture on the surface can steam rather than crisp the bacon.
Before you begin, assemble a few essentials: a parchment-lined sheet pan, a rack if you want extra air circulation, and tongs to turn the bacon safely. Have paper towels nearby to blot fat after cooking, and a tray or plate to rest the finished bacon. If you’re new to the oven technique, consider preheating the oven first and letting it reach 350°F before loading the pan. Finally, be aware that bacon fat renders and can splatter; consider placing the pan on a middle rack to minimize any flare-ups or smoke. By observing these safety basics, you’ll reduce risk while achieving a crisp, flavorful result.
For extra peace of mind, keep a small fan or venting option nearby if your kitchen tends to accumulate steam and odors during bacon cooking. While the oven’s heat does most of the work, good ventilation helps keep your cooking area comfortable and free from lingering smells. A tidy, organized prep area also reduces the chance of cross-contamination and makes the entire process smoother from start to finish.
Equipment and setup
Choosing the right equipment makes all the difference when cooking bacon in the oven. A rimmed sheet pan is essential to catch drippings and prevent fat from spilling onto the oven floor. A rack can be a handy upgrade if you want air to circulate under each slice, which promotes uniform crisping, but it’s not strictly necessary. Parchment paper or a light coating of foil helps prevent sticking and makes cleanup quick. Tongs or a spatula are practical tools for turning slices and removing hot bacon without splashing hot fat.
Position your rack in the middle of the oven to promote even heat distribution. If you’re unsure whether your oven runs hot, an inexpensive oven thermometer can be a wise investment to verify that you’re actually at 350°F. For those who want even crisper results, a light wire rack set over parchment on the sheet pan works well; the air can circulate around each piece as it cooks. Finally, keep a small, heat-safe container for bacon fat if you plan to reuse it for cooking—bacon fat adds depth to savory dishes when stored properly.
As you set up, verify the pan is clean and dry. Any residual moisture or residue can impede crisping or cause uneven browning. While the bacon is in the oven, you’ll avoid unnecessary handling by tying up loose ends—measure what you need, set a timer, and prepare a plate with paper towels to blot the finished strips.
Lining and arrangement for even cooking
The way you line and arrange the bacon on the pan directly impacts doneness. Start with parchment paper or foil to catch fat drippings and make cleanup easier. Lay the bacon slices in a single layer with slight space between them; overlap causes steaming rather than crisping and can leave soggy spots. If you’re cooking a lot of bacon, consider using two sheet pans so you don’t crowd the oven; air needs to circulate around each slice to achieve uniform crisping.
If you have a baking rack, place it on top of the lined sheet pan to elevate the bacon. This method allows fat to drip away from the bacon rather than staying in contact with it, yielding crisper results. Rotate pans halfway through cooking if you’re using multiple pans or a conventional oven; this helps counter any hot spots and ensures a consistent finish across all slices. Finally, avoid layering layers of bacon on top of each other—crowding is a leading cause of uneven texture and soft centers.
Temperature, timing, and doneness indicators
Bacon’s doneness at 350°F falls along a spectrum from soft to very crisp. A typical standard-cut slice will begin to look golden around the edges after about 12-16 minutes, while thicker slices may need 16-20 minutes or more. Start checking at the low end of the range; every oven is different, and the thickness of the bacon will affect timing. You’ll know it’s ready when the edges appear crisp and lightly browned, with the center fully cooked but not shriveled.
If you prefer extra crispiness, you can extend the bake by 1-2 minutes or finish under a brief broil, watching closely to avoid burning. Remember that bacon will harden slightly as it cools, so you can pull it a touch before you think it’s fully crisp if you plan to serve immediately. For best texture, transfer the bacon to a plate lined with paper towels to blot excess fat and allow it to rest for a minute before serving.
Achieving extra crispiness and flavor without burning
For the crispiest results, avoid overcrowding and maintain a single layer of bacon. Patience with fat rendering is key—let the heat do the work rather than flipping too often, which can contribute to unevenness. If your goal is ultra-crisp texture, you can finish the bacon under a brief broil (1-2 minutes) while monitoring constantly to prevent burning. Another trick is to gently tilt the pan after cooking for a minute to help drain excess fat off the slices. Finally, consider a light sprinkle of spices or a brush of maple glaze during the last minute of cooking for a flavored variation—just be mindful of sugar’s tendency to caramelize quickly and potentially burn.
Variations you can try with bacon
Bacon is versatile beyond classic salt-cured slices. A simple maple glaze (maple syrup with a touch of brown sugar) creates a sweet-and-savory profile that caramelizes nicely as the fat renders. For a peppery bite, dust the slices with coarse black pepper or a smoked paprika rub before baking. If you’re cooking for a crowd with dietary considerations, you can try turkey bacon or lower-fat turkey bacon as a leaner alternative, though the texture may differ slightly. When adding sweet glazes, keep a close watch as sugar caramelizes rapidly under heat. Finally, finish with a tiny pinch of flaky sea salt after cooking to enhance brightness and balance.
Troubleshooting common issues
Overcrowding is the most common culprit of soggy or uneven bacon. If slices stick together, rearrange with more space on a new pan or bake in batches. If you notice excessive splatter, ensure the rack is not too close to the heat source and the pan is clean. If the bacon comes out limp, you may have used too much moisture or overlapped meat; pat dry before baking next time. For uneven browning, rotate pans halfway through cooking to compensate for oven hot spots. In all cases, resting the bacon on paper towels after baking helps remove excess fat and improves texture.
Cleanup and storage tips
Once the bacon is crisp and cooled slightly, transfer to a clean plate or sheet to avoid reintroducing moisture. Allow fat to cool in the pan before carefully pouring it into a heat-safe container for storage in the refrigerator or freezer; bacon fat can be reused for roasting vegetables or sautéing eggs. Store cooked bacon in an airtight container in the refrigerator for up to 4-5 days, or freeze for longer-term use. Reheat in the 350°F oven for a quick crumble-free finish, or warm briefly in a skillet if you prefer a fresh crispy edge.
Tools & Materials
- Baking sheet (rimmed)(Solid sheet pan, 15x12 inches works well)
- Parchment paper or aluminum foil(Parchment for non-stick; foil if unavailable; makes cleanup easier)
- Rack (optional)(Elevates bacon for maximum air exposure)
- Tongs or kitchen shears(For safe turning and removal of hot slices)
- Paper towels(Blot fat after cooking to finish crispiness)
- Oven thermometer(Helps verify that your oven is truly at 350°F)
- Heat-safe container (for fat)(Reuse bacon fat if desired, store properly)
Steps
Estimated time: Total time: 12-20 minutes
- 1
Preheat the oven to 350°F
Set the oven to 350°F with the rack in the middle. Allow the oven to come to temperature while you prep the pan. Preheating ensures even heat distribution for uniform crisping.
Tip: Check your oven with a thermometer to verify accurate temperature; many ovens run hot or cool by a few degrees. - 2
Line the pan and prepare bacon
Line a sheet pan with parchment paper or foil; this protects the pan and makes cleanup easier. Remove any moisture from the bacon surface with a light pat using paper towels to improve crisping.
Tip: If you’re using maple-glazed bacon, wait to glaze until the last minute to avoid excessive burning. - 3
Arrange bacon in a single layer
Lay slices in a single layer with a small gap between each piece. Avoid overlapping, which traps steam and leads to uneven texture.
Tip: For even crisping, consider a rack above the parchment; this allows fat to drain away from the bacon. - 4
Bake and monitor doneness
Place the pan in the oven and bake, checking around the 12-minute mark. Thin slices may finish sooner; thicker slices will take longer. Edges should turn golden and crisp when done.
Tip: Rotate the pan halfway through for even browning if your oven has hot spots. - 5
Drain fat and pat dry
Carefully remove the bacon and transfer to a plate lined with paper towels. Blot gently to remove excess fat, which helps preserve crisp texture as it cools.
Tip: Let the bacon rest for 1-2 minutes before serving to let the surface set. - 6
Optional finish under broil
If you want extra crispness, give the slices a brief broil for 1-2 minutes, watching closely to prevent burning.
Tip: Stay nearby during broil; fat can flare quickly under high heat. - 7
Store and reuse fat
Cool the bacon fat in the pan, then transfer to a sealed container. Refrigerate for reuse in roasting or sautéing.
Tip: Label the storage container with date; bacon fat stays fresh for up to a month when refrigerated.
Questions & Answers
Is 350°F the best temperature for bacon?
Yes. 350°F is a reliable baseline that yields evenly cooked, crispy bacon with less mess than high-heat methods. It suits standard-cut slices well and adapts to larger batches.
Yes, 350 degrees is a reliable baseline for crispy oven-bacon results.
Should I flip the bacon during cooking?
Flipping is optional but helps ensure even browning on both sides, especially for thicker slices. If you’re using a rack, flipping is less critical.
Flipping is optional but can help even out browning, especially with thick cut.
Can I cook thicker-cut bacon at 350°F?
Yes. Thick-cut bacon will take longer to render fully, typically toward the upper end of the range. Plan for 16-20 minutes or more and use visual doneness cues.
Thick-cut bacon needs more time—watch for crisp edges and cooked centers.
Can I reuse the bacon grease?
Yes, you can store cooled bacon grease in a sealed container in the fridge or freezer for cooking later. Use within a reasonable time and avoid contamination.
You can store and reuse bacon grease if stored properly.
How do I tell when the bacon is done?
Bacon is done when the edges are crisp and the center looks cooked. It will continue to crisp slightly as it rests after removing from the oven.
Look for crispy edges and a fully cooked center; let it rest briefly before serving.
Watch Video
Main Points
- Preheat to 350°F for even cooking
- Line pan and arrange in a single layer
- Bake 12-18 minutes depending on thickness
- Drain fat and pat dry for crisp texture
- Adapt time and finish with optional broil for extra crispness