Cooking Bacon in the Oven: Best Temperature to Use
Learn the optimal oven temperature for crispy bacon, plus prep, timing, and cleanup tips from Oven Cook Pro. A practical, step-by-step guide for home cooks.

Cook bacon in the oven at 400°F (204°C) for 12–15 minutes for standard slices, or 15–20 minutes for thicker cuts. Preheat the oven, line a rimmed sheet with parchment or foil, and arrange bacon in a single layer. Remove when crisp and let rest briefly before serving.
Why Temperature Matters for Oven-Baked Bacon
Cooking bacon in the oven what temperature you choose sets the pace for fat rendering, browning, and final texture. For home cooks, the most reliable starting point is a moderate to hot oven that allows fat to render steadily without burning the edges. According to Oven Cook Pro, preheating to 400°F (204°C) provides consistent results for standard-cut bacon, balancing crisp edges with ample render. Temperature also affects moisture; too low and the bacon steams rather than crisps, too high and you risk uneven browning and burnt tips. The goal is a predictable crispness with flavorful render, which you can tune based on thickness and personal preference. In this guide, you’ll learn how to choose the right temperature for your bacon, your oven, and your texture goals, so your breakfast or brunch comes out perfectly every time.
Ideal Temperature Ranges and Their Effects
Bacon’s texture and color respond distinctly to different oven temperatures. Here are practical ranges to guide your choice:
- 375°F (190°C): A gentle, even render; longer bake time yields tender, uniform slices and reduces the risk of scorching. Best for very thick-cut bacon or if you prefer a lighter crisp.
- 400°F (204°C): The most versatile default. Balanced fat rendering with crisp edges; suitable for standard-thickness bacon, delivering consistent results with moderate browning.
- 425°F (218°C): Faster and extra crispy; ideal when you want crackly edges and a deeply browned surface. Watch closely to avoid burning, especially along thin slices.
Oven Cook Pro analysis shows that most home ovens perform best at 400°F for everyday bacon, providing reliable texture while keeping grease under control. If you like ultra-crisp bacon in a hurry, 425°F is a good option, but you’ll want to start checking at the 10–12 minute mark and remove when you see the desired level of crispness.
Preparing Your Bacon and Pan for Oven Cooking
The setup matters as much as the heat. Start with a rimmed sheet pan to catch fat runoff and reduce splatter. Line it with parchment paper or aluminum foil for easy cleanup. If you want extra crispness, place a wire rack on the pan so fat can drain away from the bacon as it cooks. Arrange slices in a single layer with a little space between them; overlapping slices lead to uneven browning. Before placing the pan in the oven, pat the bacon dry with paper towels to remove surface moisture that can hinder crisping. Finally, have your tongs and paper towels ready to blot excess fat once the bacon comes out; this step helps achieve a cleaner texture on every bite. Prep details, combined with the chosen temperature, consistently produce restaurant-quality results at home.
Choosing Between Thin-Cut and Thick-Cut Bacon
The thickness of your slices directs cooking time and texture. Thin-cut bacon is usually ready in the 12–15 minute window at 400°F, delivering quick, crisp bites with minimal chew. Thick-cut bacon often needs 15–20 minutes to render fat fully and develop a sturdy snap. If you’re unsure, start in the middle and monitor closely; you can always bake a minute or two longer. For the best of both worlds, consider slicing options: for even cooking, trim long streaks of fat so each slice has a consistent thickness. Remember: even with the same temperature, variations in bacon thickness and oven performance can shift the finish, so use the color and texture as your ultimate guide, not the clock alone. Oven Cook Pro recommends testing a small batch when changing brands or thickness.
Quick Overview: What Happens During Baking
At the chosen temperature, fat renders slowly from the bacon, creating crisp edges as water evaporates and Maillard browning occurs. If the slices are too close, moisture gets trapped, delaying crispness. Proper spacing and a steady oven environment promote even browning and reduce hot spots. The moment you see a maple-brown color and the fat looks shimmery, you’re approaching done—check early if you’re using thinner slices. Resting briefly after removing from the oven helps the bacon crisp up further as it cools on a paper towel-lined tray. These dynamics explain why temperature choices matter and how they translate into the final, snack-ready product.
Troubleshooting Common Issues
- Soggy or chewy edges: Ensure slices are dry before baking, avoid crowding, and consider a hotter end of the temperature range for a crisper finish.
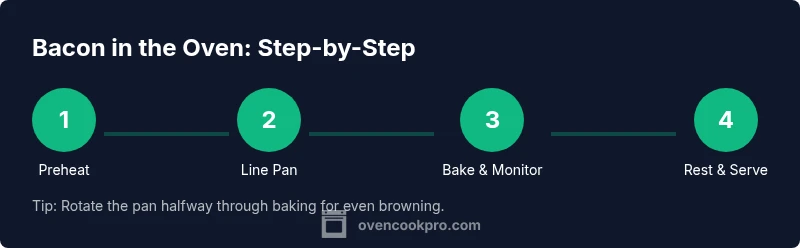
- Uneven browning: Rotate the pan halfway through baking to compensate for hot spots.
- Excess grease smoking: Use a rimmed pan and ensure fat has an outlet by elevating the bacon with a rack when possible. If your oven runs hot, drop to 375°F and check earlier.
Flavor Variations and Add-ins
Crisp bacon is versatile. For a touch of sweetness, drizzle a tiny amount of maple syrup or sprinkle brown sugar in the last 2–3 minutes of baking, watching for caramelization to avoid burning. A pinch of black pepper, smoked paprika, or garlic powder can add depth without masking the bacon’s natural flavor. If you’re aiming for a savory kick, finish with a light dusting of chili powder or cumin. Remember that sugars burn more quickly at high heat, so apply glaze toward the end and monitor closely to prevent scorching. The goal is a balanced enhancement that complements the bacon’s own savoriness rather than overpowering it.
Storing Bacon and Reusing Fat
Leftover cooked bacon can be stored in an airtight container in the refrigerator for up to 4–5 days, or frozen for longer-term storage. Reheat gently in the oven or in a skillet to regain crispness. Bacon fat, strained and cooled, can be stored in the fridge for up to a month and used to flavor potatoes, eggs, and vegetables. For best results, store fat in a clean, sealed container and avoid introducing moisture. This fat adds depth to many dishes and helps you reduce waste in the kitchen.
Authority Sources
For science-based guidance on safe cooking temperatures and handling, consult these reputable sources:
- https://www.fsis.usda.gov/food-safety/safe-food-handling-and-preparation/meat-and-poultry/meat-and-poultry-preparation
- https://www.cdc.gov/foodsafety/index.html
- https://www.fda.gov/food
Tools & Materials
- rimmed baking sheet(A sheet pan with a shallow rim to catch fat drippings)
- parchment paper or aluminum foil(Line the pan for easy cleanup)
- wire rack (optional)(Elevates bacon for extra crispness; place on the lined sheet)
- tongs(For turning slices and removing them safely)
- paper towels(Blot excess fat after cooking)
- bacon(Standard-cut or thick-cut, as desired)
- oven-safe thermometer (optional)(Helps verify oven temperature if you suspect calibration issues)
Steps
Estimated time: 15-25 minutes
- 1
Preheat the oven and prepare the pan
Preheat your oven to 400°F (204°C). While it heats, line a rimmed baking sheet with parchment or foil and, if available, place a rack on top to lift the bacon above drippings. This promotes even crisping and easier cleanup.
Tip: Preheating ensures consistent cooking and helps prevent soggy bacon. - 2
Line the pan and set up bacon
Line the pan, then lay bacon slices in a single layer with a small gap between pieces. Avoid overlapping, which can cause uneven cooking and soggy spots. Have tongs handy to adjust slices if needed.
Tip: Even spacing yields uniform browning and crispness. - 3
Bake and monitor doneness
Place the pan in the center of the oven and bake for 12–15 minutes for standard-cut bacon, or 15–20 minutes for thicker slices. Check at the 12-minute mark and rotate the pan if your oven has hot spots.
Tip: Watch for your preferred crispness; thinner slices finish sooner. - 4
Remove, drain, and rest
When the bacon reaches your desired level of crispness, remove it with tongs and transfer to a plate lined with paper towels. Let it rest 1–2 minutes to finish crisping and to drain more fat.
Tip: Resting helps set the texture and reduces greasiness. - 5
Store leftovers and reuse fat
Cool completely, then store cooked bacon in an airtight container. Reuse the rendered fat by straining and storing it in the fridge for future cooking.
Tip: Fat reuse amplifies flavor in potatoes and eggs; keep it clean and refrigerated.
Questions & Answers
What temperature is best for cooking bacon in the oven?
A common and reliable choice is 400°F (204°C). This temperature balances fat rendering with browning for standard-cut bacon. You can adjust to 375°F for a gentler render or 425°F for crisper edges, depending on thickness and your preference.
Typically, 400°F is a great starting point. You can tweak to 375°F for a softer finish or 425°F for extra crispness if you’re watching for a quicker cook.
How long does bacon take to cook in the oven?
Thin-cut bacon usually takes about 12–15 minutes at 400°F, while thick-cut can take 15–20 minutes. Always start checking at the lower end and monitor for your preferred crispness, since ovens vary.
Most thin-cut bacon finishes in around 12 to 15 minutes at 400 degrees, with thick-cut taking a bit longer. Check early and watch for your desired crispness.
Can I cook thick-cut bacon in the oven?
Yes. Thick-cut bacon benefits from a longer bake time to render fat fully. Bake at 400°F and plan for about 15–20 minutes, checking frequently toward the end to avoid over-browning.
Absolutely. Thick-cut bacon may need around 15 to 20 minutes at 400 degrees; keep an eye on it near the end.
Should I use foil or parchment paper when baking bacon?
Parchment paper provides easy cleanup and prevents sticking; foil works too but may stick more, especially with longer cooks. Choose parchment for the simplest cleanup, or lightly oil foil if you prefer.
Parliament paper is easier to clean, foil is fine too, just don’t rely on it to prevent sticking completely.
How do I know when bacon is fully cooked?
Look for deep brown color and crisp edges. Bacon continues to crisp slightly as it rests, so pull it a bit before it’s fully firm if you want extra chew. When the fat is rendered and the slices feel firm, they’re done.
Check for a rich brown color and crisp edges; it will firm up a bit as it rests.
Can I reuse bacon fat after cooking?
Yes. Strain the cooled fat into a clean container and refrigerate. It can be used to flavor potatoes, eggs, or vegetables. Use within about a month for best flavor and safety.
Yes—strain the fat and store it in the fridge; it’s great for cooking other dishes.
Watch Video
Main Points
- Preheat to 400°F for reliable results.
- Line the pan and keep slices in a single layer.
- Timing varies by thickness; use color as a guide.
- Rest briefly to maximize crispness.
- Store leftovers and reuse fat safely.