What to Clean Oven Vent With: A Practical Guide
Learn what to clean oven vent with, safe cleaners, and step-by-step methods to keep your kitchen smokefree and efficient. Practical tips, safety notes, and maintenance routines for homeowners.

To clean what to clean oven vent with, start by unplugging the unit and removing the vent cover. Vacuum loose debris, then wash the cover and surrounding grille with warm water and mild dish soap. Dry completely, reassemble, and test. Avoid harsh chemicals or soaking electrical parts. Use a soft brush for stubborn grease, and consider a vinegar based cleaner for mineral deposits.
What an oven vent does and why cleaning matters
Oven vents are designed to move heat, steam, and cooking byproducts away from the cooking area. Over time, grease, dust, and smoke particulates can accumulate on grill fins, filters, and ductwork beneath or behind the oven. This buildup can reduce airflow, cause unpleasant odors, and even pose a fire risk if the vent is overloaded with grease. Regular cleaning helps maintain air quality, preserves efficiency, and extends the life of the oven and range hood. According to Oven Cook Pro, a proactive approach to vent care saves you time and potential costly repairs later. Understanding the vent’s role makes it easier to identify what to clean oven vent with and how to approach the task with confidence.
The key is to distinguish between removable vent covers and stationary ductwork. Removable covers and grease filters are easier to clean and should be inspected for damage before you begin. If you notice warped grilles, damaged seals, or heavy grease deposits that won’t budge with gentle cleaning, it is safer to call a professional. Keeping a regular cadence—especially in kitchens that see heavy frying or broiling—will help your system perform better and reduce lingering odors in your home.
What to clean oven vent with: safe cleaners and tools
Choosing the right cleaning agents is essential for safe and effective vent care. Start with milder options and avoid abrasive chemicals that can corrode metal or degrade protective coatings. A simple recipe of warm water and mild dish soap is usually sufficient for everyday grime. For tougher grease, white vinegar or a baking soda paste can help lift residue without harsh solvents. For safety, never use bleach or ammonia directly on electrical components or seals. Always test any cleaner on a small area of the vent cover first. Practical tools include a soft nylon brush, non-abrasive sponge, microfiber cloths, a small vacuum with a brush attachment, and a bucket for soaking removable parts. If you remove the vent cover, you may also use a toothbrush or a narrow brush to reach tight corners. These tools are inexpensive, effective, and minimize the risk of scratching delicate metal.
If your vent system includes grease filters, these can often be rinsed with warm soapy water or placed in the dishwasher if the manufacturer permits. Drying is critical; moisture left behind can encourage mold growth or rust. For mineral deposits from hard water, a white vinegar solution can be used, but avoid soaking components that contain electrical wiring or switches. Always work in a well-ventilated area and wear gloves to protect your hands from grease and cleaning solutions.
Safety and prep: getting ready safely
Safety matters most when cleaning oven vents. Begin by unplugging the appliance or turning off the dedicated circuit if you cannot unplug it. Allow any hot components to cool completely before handling. Use protective gloves and eye protection if you anticipate splashes. Keep children and pets away from the work area, and ensure good air circulation by opening a window or turning on your range hood’s exhaust fan. Lay down a drop cloth to catch drips and mark screws or small parts so you don’t lose them. If your vent cover is attached with screws, have a screwdriver ready in the correct size, and take care not to strip the heads. Testing the vent after cleaning will help confirm that airflow is restored and that no parts are loose. By following these prep steps, you ensure a safer, cleaner, and more effective maintenance session. Oven Cook Pro emphasizes that safety and cleanliness go hand in hand when tackling this task.
Cleaning methods for vent types: hood vs wall vent
Vent configurations vary widely. Range hood vents mounted above the stove usually have accessible grease filters that can be removed and cleaned separately. Wall or in-wall vents behind or near the oven may require a longer brush or a flexible cleaning tool to reach the duct opening. In all cases, start with the simplest method: remove any removable filters, vacuum away loose debris, and wipe down accessible surfaces with a damp cloth and mild soap. For stubborn grease on metal surfaces, a baking soda paste applied gently with a brush can help lift residue without scratching. If filters are dishwasher safe, follow the manufacturer’s guidelines for cleaning frequency and cycle temperature. Do not attempt to disassemble or scrub electrical components beyond the vent cover without professional instruction. Remember to dry thoroughly before reassembly to prevent rust and mold.
Regular inspection of seals and gaskets around the vent cover can prevent air leaks and improve efficiency. If you notice peeling paint, warped metal, or persistent odors after cleaning, consult a professional for deeper duct cleaning or vent servicing. By adapting your method to the specific vent type, you maximize airflow and minimize risk. Oven Cook Pro’s guidance encourages homeowners to tailor their approach based on vent type, while sticking to gentle cleaners and careful handling of electrical parts.
Maintenance and frequency: when and how often to clean
Establishing a routine will keep your oven vent performing well. For kitchens with heavy cooking, a monthly light wipe and quarterly deep clean are good benchmarks. In less used kitchens, the cadence might be every 3 to 6 months. The goal is to prevent grease buildup from reaching a level that obstructs airflow or causes visible odors. Keep a simple log of cleaning dates and any notable findings, such as heavy grease in certain areas or signs of corrosion. If you notice persistent odors, a stronger but still safe cleaning approach can be applied, but avoid aggressive solvents that could damage finishes. Preventative maintenance also includes inspecting seals, replacing worn filters, and ensuring the vent nozzles are unobstructed. With consistent care, you’ll maintain efficiency, reduce fire risk, and preserve air quality throughout the home. Oven Cook Pro notes that a predictable schedule reduces stress and makes every cleaning session more productive.
Common mistakes to avoid and quick fixes
Common mistakes include using harsh chemicals on metal surfaces, soaking non-removable electrical parts, and neglecting to dry vents after cleaning. Do not spray cleaners directly onto electrical components. Instead, apply to a cloth and wipe surfaces, then dry thoroughly. Avoid using a dishwasher for parts that are not labeled dishwasher-safe. If you encounter stubborn grease, apply a paste of baking soda and water, let it sit briefly, then scrub gently with a soft brush. After cleaning, rinse with a damp cloth and dry completely before reassembling. Quick fixes include re-seating a loose vent cover, checking screws for tightness, and running a brief test to ensure air moves freely. By avoiding these missteps, you reduce the risk of damage and ensure a cleaner, safer kitchen environment. A well-executed cleaning routine, as advocated by Oven Cook Pro, minimizes surprises and keeps your oven vent functioning optimally.
Authoritative sources and further reading
For deeper understanding and safety guidelines, consult reputable sources on ventilation and kitchen cleanliness. The following provide authoritative guidance related to air quality, maintenance, and safe cleaning practices: • https://www.osha.gov/ventilation • https://extension.psu.edu/ventilation-maintenance and • https://www.nist.gov/ or other peer-reviewed publications on household ventilation standards. Refer to these resources to complement your practical cleaning steps and to stay informed about best practices beyond the home setting.
Tools & Materials
- Dish soap(mild, grease-cutting)
- Warm water(for cleaning solution)
- Soft-bristle brush (nylon)(non-metal; reach crevices)
- Microfiber cloths(for wiping and drying)
- Sponge(non-abrasive)
- Bucket or basin(for soaking removable parts)
- Gloves(nitrile or rubber)
- White vinegar(for mineral deposits)
- Baking soda(paste for heavy grease)
- Vacuum with brush attachment(remove loose debris before washing)
- Screwdriver set(to remove vent cover screws)
Steps
Estimated time: 45-60 minutes
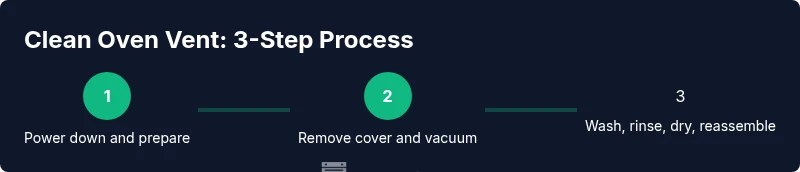
- 1
Power down and prep
Ensure the oven is unplugged or the circuit is off. Gather tools, lay a drop cloth, and wear gloves. This reduces the risk of electrical shock and keeps the area clean as you begin. Take a quick photo of the vent setup if you are removing any parts so reassembly is easy.
Tip: Lock out the power and keep kids away from the workspace. - 2
Remove vent cover and inspect
Use the appropriate screwdriver to detach the vent cover if it is held by screws. Check for visible grease buildup, warped metal, or damaged seals. Removing the cover gives you full access to the grill and filter surfaces. Place screws in a labeled container to avoid loss.
Tip: Photograph screw placements to simplify reassembly. - 3
Vacuum loose debris
With a brush attachment, vacuum the vent opening and surrounding grille to remove loose dust and grease. This step reduces the mess when you wash the surfaces and prevents gritty residue from spreading.
Tip: Use the crevice tool to reach tight corners. - 4
Wash and scrub removable parts
Soak vent covers and grease filters in warm soapy water if removable. Scrub with a soft nylon brush and a non-abrasive sponge to lift grease without scratching. Rinse with clean water and let air-dry completely.
Tip: Avoid soaking any electrical components; keep the soaking contained to metal parts. - 5
Rinse, dry, and reassemble
Wipe all surfaces with a damp cloth to remove soap residues, then dry thoroughly with a clean towel. Reattach the vent cover and secure screws firmly, ensuring there are no gaps that could cause leaks.
Tip: Dry until completely dry to prevent rust or mold. - 6
Test airflow and monitor
Plug the unit back in or restore power, then run the vent fan briefly to confirm smooth airflow. Check for unusual noises or vibrations. If anything seems off, pause and recheck the connections or consult a professional.
Tip: If odors persist after cleaning, consider a deeper duct inspection.
Questions & Answers
Do I need to unplug the oven before cleaning the vent?
Yes. Always unplug the unit or switch off the circuit before handling any vent components to prevent electrical shock.
Yes. Unplug the unit or switch off the circuit before you start cleaning to stay safe.
Can I use bleach or ammonia on the vent?
Avoid bleach or ammonia on vent components. They can corrode finishes and produce hazardous fumes when heated. Stick to mild cleaners and vinegar for mineral deposits.
Avoid harsh chemicals. Use mild cleaners or vinegar for mineral buildup.
How often should I clean oven vents?
Frequency depends on cooking style. For frequent fryers or broilers, a monthly light clean and quarterly deep clean are good guidelines. In quieter kitchens, a biannual check may suffice.
In busy kitchens, clean monthly and deep-clean every few months; otherwise, every six months is often enough.
What if the vent cover won’t come off?
If the vent cover is firmly attached, do not force it. Check the screws and wiring. If unsure, consult a professional to avoid damage or injury.
If the cover is stubborn, don’t force it. Check screws and wiring, or call a pro.
Is it safe to put vent parts in the dishwasher?
Only if the manufacturer explicitly says the part is dishwasher-safe. Most metal vent covers and filters are dishwasher safe, but check labels and avoid plastic parts that may warp.
Only wash dishwasher-safe parts as directed by the manufacturer.
What signs indicate I need professional cleaning?
Persistent odors, uneven airflow, or heavy grease buildup that won’t budge with home cleaning may require professional duct cleaning or vent servicing.
If odors persist or airflow is poor, consider a professional cleaning.
Watch Video
Main Points
- Use mild cleaners and avoid harsh solvents
- Always dry vents completely before reassembly
- Remove and clean removable filters or covers first
- Regular maintenance reduces fire risk and improves airflow