How to Clean Oven Hood Filter: Step-by-Step Guide
Learn how to clean an oven hood filter with a practical, safe method. This guide covers tools, methods, drying, and maintenance to keep your kitchen ventilation grease-free and efficient.

Your oven hood filter traps grease and byproducts from cooking before they reach the duct. Regular cleaning restores airflow, reduces odors, and lowers fire risk. This guide covers removal, soaking, scrubbing, drying, and reinstallation, plus whether to wash by hand or in the dishwasher. According to Oven Cook Pro, consistency matters for hood longevity and optimal ventilation.
What the hood filter does and why cleaning matters
Your oven hood filter is a critical part of kitchen ventilation, catching grease and particulates so they don’t coat ducts or exhaust vents. Over time, grease buildup restricts airflow, causing the hood to work harder and potentially releasing lingering odors. A clean filter also reduces fire risk by limiting fat accumulation near heating elements. According to Oven Cook Pro, consistent maintenance is one of the simplest ways to protect your hood and maintain peak ventilation. Identifying your filter type (metal, baffle, or carbon) is the first step, because cleaning methods vary with filter construction and whether the unit uses charcoal or grease-adsorbing media.
Recognizing signs of heaviness—greasy film, stubborn odors, slower venting, or visible grease around the stove area—helps you schedule cleaning before buildup becomes persistent. This section helps you understand which filter you have and why it matters for choosing the right method and products. It also sets expectations for how long cleaning should take and what kind of results you can expect when done correctly.
Materials and safety prep
Before you start, gather the essential tools and protective gear. Having everything at hand prevents mid-clean interruptions and reduces the chance of dropping a hot filter or splashing greasy water on cabinetry. A common approach is to treat the hood filter like a small appliance: handle it with care, keep a dry surface nearby, and avoid abrasive cleaners that could scratch metal surfaces.
According to Oven Cook Pro, using hot water with a grease-cutting soap yields best results for most metal filters. If your hood supports it, you may also use a dishwasher, but carbon filters should be replaced, not cleaned. Wear gloves to protect your hands from hot water and cleaning agents, and place a towel or tray under the sink to catch drips. Read your hood manual for any model-specific instructions, such as filter type or disassembly method.
When to clean: frequency and signs of heavy grease
How often you clean depends on cooking style and usage. Light home cooking may require cleaning every 3–6 months, while heavy frying can demand every 1–2 months. Signs that a cleaning is overdue include visible grease buildup on the filter and surrounding surface, persistent cooking odors despite venting, and slower exhaust airflow. If you notice reduced suction or a smoky kitchen after cooking, it’s time to clean. Consistent cleaning improves airflow, reduces energy usage, and prolongs the life of the hood and ductwork. Oven Cook Pro’s guidance emphasizes scheduling based on usage patterns and the specific filter design in your hood.
Dishwasher-safe vs hand-washing: pros and cons
Many metal hood filters are dishwasher safe, which makes cleaning quick and thorough; however, carbon filters and some plastic models are not designed for dishwashers and must be hand-washed or replaced. Check the manufacturer’s labeling or your hood’s manual before loading a filter into the dishwasher. If you do use a dishwasher, place the filter clear of the bottom spray arm to avoid warping. Hand-washing gives you more control and is gentler on older or delicate filters. For stubborn grease, a soak in hot, soapy water followed by a light scrub often works best.
Step-by-step overview: cleaning approach in practice
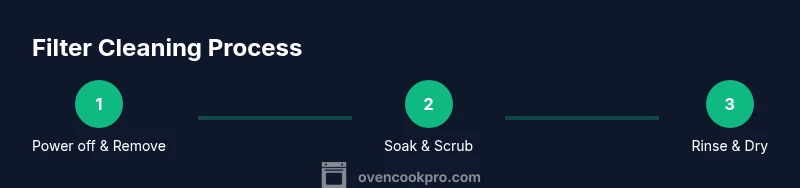
A practical approach combines safety, cleaning method, and drying. Start by turning off power to the hood and removing the filter. Then choose your cleaning method based on filter type: dishwasher-safe metal filters or hand-wash-only carbon filters need different care. Soak in hot, grease-cutting soapy water, scrub with a soft brush, rinse, and dry completely before reinstalling. Plan for a thorough drying period to prevent mold or odors. This overview helps you map steps before you begin the actual process.
Tips for stubborn grease, odors, and mold prevention
For stubborn buildup, apply a paste of baking soda and hot water or a mild degreaser, let it sit for 10–15 minutes, then scrub gently. Avoid abrasive pads that can scratch metal. Rinse thoroughly to remove any cleaner residue and dry with a clean cloth to prevent water spots. To prevent future odors, consider a light oil-free wipe-down after heavy cooking sessions and keep the kitchen well-ventilated while cleaning. Consistent maintenance minimizes odors and grease transfer to the filter.
Maintenance schedule and long-term care
Develop a simple maintenance routine: inspect the hood filter monthly, plan a cleaning every 1–3 months depending on usage, and replace carbon filters as recommended by the manufacturer. After reinstalling a clean filter, operate the hood on a low setting for a few minutes to ensure proper airflow and verify there are no leaks or unusual noises. Oven Cook Pro Analysis, 2026 emphasizes that predictable cleaning intervals help sustain performance and reduce repair costs over time.
Authoritative sources and safety reminders
Always start from the appliance manual for your specific hood model, as designs vary. When in doubt, consult government or university resources on appliance maintenance and kitchen safety. Two trusted sources include the U.S. Department of Energy for energy-efficient hood operation and the FDA guidance on safe kitchen practices. Keeping a clean hood filter is part of responsible home maintenance and supports a healthier, safer cooking environment.
Tools & Materials
- Dish soap (grease-cutting)(Hot water-safe, mild formula works best)
- Warm water(As hot as safe for your hands)
- Large basin or sink(Deep enough to submerge the filter)
- Soft-bristle brush(Non-scratch nylon brush)
- Old toothbrush(For tight corners and corners of baffle filters)
- Gloves(Protect hands from hot water and cleaners)
- Microfiber cloth(For drying and detail wiping)
- Towel or drying rack(Lay filter flat to air-dry completely)
- Dishwasher (optional)(Confirm filter type is dishwasher-safe)
- Screwdriver (if needed)(Only if your hood filter is held by screws)
Steps
Estimated time: 40-60 minutes
- 1
Power off and prep
Turn off the hood and unplug the unit if possible. Place a protective towel beneath the area to catch drips. If the filter is hot from recent use, allow it to cool before handling.
Tip: Wear gloves to protect hands from heat and cleaning chemicals. - 2
Remove the filter
Open the hood and carefully slide or lift the filter out following the manual. If it’s held by screws, use a screwdriver to remove them. Keep screws in a labeled container for reinstallation.
Tip: Take a quick photo of how the filter sits for reference later. - 3
Determine cleaning method
Check the filter type. Metal and some stainless filters are dishwasher-safe; carbon filters usually cannot be cleaned. If dishwasher-safe, arrange in the dishwasher according to the manufacturer's guidelines.
Tip: If unsure, start with manual cleaning to avoid damage. - 4
Soak the filter
Submerge the filter in a basin of hot, soapy water for 10–20 minutes to loosen grease. For heavily soiled filters, extend soaking to 30 minutes. Ensure all surfaces are immersed.
Tip: Use a degreasing soap to boost grease breakdown. - 5
Scrub and rinse
Gently scrub with a soft-bristle brush, paying attention to corners and crevices. Rinse under warm running water until all soap and grease residues are gone. Inspect for remaining buildup.
Tip: Rinse from top to bottom to push debris away from the center. - 6
Dry completely and reinstall
Shake off excess water, pat dry with a microfiber cloth, and allow to air-dry fully on a rack or towel. Reinstall the filter securely, reattach any screws, and verify correct seating.
Tip: Never reinstall a damp filter; moisture can promote mold growth. - 7
Test and plan maintenance
Turn the hood on briefly to confirm proper airflow and noise levels. Schedule regular cleanings based on usage and monitor for persistent odors or reduced suction.
Tip: Create a calendar reminder for your next cleaning cycle.
Questions & Answers
Can I put the hood filter in the dishwasher?
Many metal hood filters are dishwasher safe, but carbon filters are not. Always check the manufacturer's label or manual before washing.
Most metal filters can go in the dishwasher, but carbon filters should be replaced rather than washed.
How often should I clean the hood filter?
Frequency depends on usage. Light cooking may require cleaning every 3–6 months, while heavy frying could demand monthly cleaning.
Clean the filter based on how much you use the stove; if you fry often, clean more frequently.
What if the filter isn’t dishwasher-safe?
If not dishwasher-safe, hand-wash with hot water, dish soap, and a soft brush. Soak longer for heavy grease, then rinse and dry thoroughly.
Hand-wash the filter if the label says not dishwasher-safe, then dry completely.
Is it safe to use bleach on the hood filter?
Bleach can damage metal finishes and produce fumes in a cooking area. Use mild soap or a degreaser instead.
Bleach isn’t recommended for hood filters; stick with soap or degreaser.
When should I replace a carbon filter?
Carbon filters should be replaced according to the manufacturer’s schedule, as cleaning won’t restore their adsorption properties.
Replace if you notice persistent odors or reduced ventilation.
What signs indicate a filter needs replacement or repair?
Persistent odors, visible heavy grease, or warped frames after cleaning indicate replacement or professional service is needed.
If odors persist after cleaning, consider replacing the filter.
Watch Video
Main Points
- Power off and prep safely before handling the filter.
- Remove the filter and choose the right cleaning method.
- Soak, scrub, rinse thoroughly to remove all residue.
- Dry completely before reinstalling to prevent mold.
- Schedule regular maintenance for best ventilation