How to Clean an Oven When It’s Smoking: A Practical Guide
Learn how to safely handle a smoking oven, neutralize grime, and restore heat to a clean, odor-free oven with a proven step-by-step approach from Oven Cook Pro.

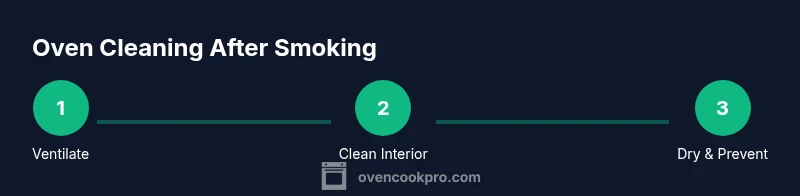
If your oven is smoking, shut off power and heat, open a window, and ventilate. You’ll learn a safe, step-by-step method using gentle cleaners to remove grease and residue, followed by a thorough rinse. According to Oven Cook Pro, safety comes first and a careful cleanup prevents lingering odors.
Causes of Smoking and Why It Demands Careful Cleaning
Ovens smoke when built-up grease, oil, sugar, or food residues are exposed to high heat. Drips from roasting meats, spilled sauces near the broil element, or fat from baked-on foods can carbonize and release thick smoke. A preheated oven that lights up suddenly may burn residues before they vaporize. In some cases, plastic wrappers or aluminum foil left inside the oven can smolder and cause smoke. Understanding these causes helps you tailor your cleaning approach and reduces the risk of a repeat smoky episode. According to Oven Cook Pro, many smoky episodes start with a layer of grease that has baked onto surfaces, especially around the sides, bottom, and near the door seal. If you sense burning plastic or see flames, stop using the oven immediately and evacuate if necessary. Prioritize safety and avoid inhaling fumes, particularly in small spaces.
Regular maintenance is the best defense: wipe up spills promptly after baking, run a quick self-clean cycle only when the oven is clean, and schedule a light wipe-down weekly to prevent heavy buildup. When you see smoke, you’ll know you’re dealing with more than a simple spill, and this guide will help you act decisively without damaging the oven’s components.
Safety First: Immediate Actions When You See Smoke
Smoke in the kitchen calls for calm, swift action. First, cut the heat and, if safe, unplug the oven or switch off the corresponding circuit. Do not rush to open the oven door; this can feed the fire with oxygen and spread fumes. Instead, ventilate the area by turning on the range hood and opening nearby windows. If there is a visible fire or a strong burning smell, evacuate and call emergency services. Once the area is safe, inspect whether the smoke is purely from residue or indicates a more serious issue like a failing element. If you’re unsure, err on the side of caution and seek professional advice. After the scene is safe, document what happened for future reference and consult your oven’s manual on post-incident steps. Remember, never mix cleaning products in an hot oven—certain combinations can release harmful gases.
In many cases, a smoky oven is a sign that grease has burned onto the interior surfaces. Acknowledge this as a cleaning task, not a replacement of the appliance. Oven Cook Pro emphasizes that clear, methodical action reduces risk and preserves oven longevity.
After ventilation, wait for the oven to cool fully before touching interior components. This reduces the risk of burns and protects sensitive heating elements and gaskets. If you condemned any area to delay cleaning, plan your next steps around a cool-down period to keep handling safe.
Gather the Right Tools and Cleaning Agents
Before you start, assemble a focused kit of tools and safe cleaners. Essential items include heavy-duty gloves to protect your hands, safety goggles to shield your eyes, a soft non-scratch sponge, microfiber cloths, a plastic scraper, and a bucket or basin for soaking racks. For cleaners, you’ll want baking soda (for a gentle, grease-cutting paste), white vinegar (to cut through grease and deodorize), mild dish soap, and a non-toxic degreaser if needed for stubborn spots. A spray bottle helps apply vinegar or water evenly. Keep old towels or rags handy for wiping and a separate tray to hold oven racks during cleaning. Finally, two fans or a hood vent will help with airflow. If you lack any item, prioritize gloves, the baking soda paste, and a sponge as essential tools. Aim to have a cleaning plan and all supplies ready before you begin.
A quick note on products: avoid harsh chemicals near heating elements, and do not mix cleaners with bleach or ammonia. Safety first means choosing non-toxic, appliance-safe cleaners and staying away from caustics that could damage enamel surfaces. When in doubt, test cleaners on a small, inconspicuous area first to prevent discoloration.
Step-by-Step Manual Cleaning After Cooling
Cleaning a smoking oven manually is safer after it’s cooled. Start by removing racks and any trays; soak these separately in hot, soapy water while you work inside the cavity. Prepare a baking soda paste (about 1/2 cup baking soda mixed with a few tablespoons of water) and apply it to interior surfaces, avoiding the heating elements and gaskets. Let the paste sit for 10–15 minutes to loosen baked grease. While it rests, wipe down racks with warm soapy water. Use a non-scratch sponge to scrub the interior, working in small circular motions to lift grease. If you encounter stubborn spots, reapply the paste and give it another 5–10 minutes before scrubbing again. After scrubbing, wipe the interior with a damp cloth to remove paste residue, then spray a 1:1 mix of white vinegar and water to act as a grease-cutting rinse. Finally, wipe dry with a clean towel and reassemble the racks. For especially stubborn grime near the door seals, use a plastic scraper gently to lift burnt-on residue—be careful not to gouge enamel.
If you know your oven’s enamel surface has been damaged by harsh cleaners or excessive scrubbing, step back and consider a gentler approach or call a professional. Patience is key: allow paste to do the heavy lifting, then rinse thoroughly to prevent streaks and future residue buildup.
When cleaning is complete, wipe the interior again with a damp cloth to remove any vinegar scent and dry completely. A light bake at a low temperature can help dry residual moisture, but avoid high heat immediately after cleaning to prevent warping or damage to seals. Always recheck the door gasket for any wear that could lead to future smoking and address it promptly.
Dealing with Odor, Residue, and Lingering Smoke Smell
Even after the cavity looks clean, odor can linger. Baking soda is a practical deodorizer; place an open box or small shallow bowl of baking soda inside the oven overnight to absorb odors. Alternatively, sprinkle baking soda on a damp sponge and wipe down once more for added freshness. White vinegar acts as a powerful neutralizer and can help dissolve remaining grease. If odors persist, a short bake at a low temperature (around 200–250°F / 90–120°C) for 15–20 minutes with the oven door slightly ajar can vent trapped fumes, but never use high heat in a recently smoked oven. Always monitor closely.
Rinse and dry surfaces thoroughly after any deodorizing treatment to prevent watermarks or corrosion on metal racks. If the smell returns after you cook, consider repeating the cleaning cycle or using a vented cleaning approach more frequently. A well-ventilated kitchen can dramatically reduce lingering odors and improve air quality during future cooking sessions.
When to Call a Professional and Aftercare Tips
If smoke recurs after cleaning, or if you notice warped racks, damaged door seals, or unusual electrical odors, call a professional technician. Recurrent smoking could indicate a more serious problem such as a failing heating element, faulty wiring, or a damaged gasket that requires professional assessment. For prevention, establish a routine cleaning schedule: wipe spills immediately after cooking, perform a light wipe-down weekly, and do a thorough cleaning every 2–3 months depending on usage. Always refer to your oven’s manual for cleaning recommendations and avoid aggressive detergents near seals. Oven Cook Pro suggests documenting dates of cleanings and any issues seen during use to help with future maintenance.
Preventive Measures to Avoid Future Smoking
To minimize future smoking incidents, implement a simple maintenance plan. Wipe down the interior after each heavy cooking session and remove heavy grease build-up every 4–6 weeks. Use a simple baking soda paste for quick spot-cleaning and reserve stronger degreasers for stubborn areas only. Regularly check door seals for wear and avoid placing aluminum foil directly on the bottom of the oven, as it may trap heat or melt if exposed to high temperatures. When in doubt, test cleans on small sections to ensure enamel safety and reduce the risk of discoloration. With consistent cleaning and careful use, you can prevent repeated smoking and keep your oven performing at its best.
Tools & Materials
- Heavy-duty gloves(Heat-resistant, latex-free preferred)
- Safety goggles(Protect eyes from splashes)
- Non-scratch sponge(Avoid abrasive pads)
- Microfiber cloths(Lint-free drying)
- Plastic scraper(Gentle removal of baked-on residue)
- Baking soda(Make paste for grease lifting)
- White vinegar(Grease-cutting rinse and deodorizer)
- Mild dish soap(Dishwashing base for soaking racks)
- Non-toxic degreaser (optional)(For stubborn spots)
- Spray bottle(Even vinegar/water distribution)
- Old towels or rags(For wiping and catching drips)
- Oven-safe racks basin/basket(Soak racks separately)
- Fan or vent hood(Improve ventilation)
- Thermometer (optional)(If you’re checking surface temp during drying)
Steps
Estimated time: 60-90 minutes
- 1
Power off and secure area
Shut off the oven, unplug if electric, and switch off the circuit if needed. Ensure the area is safe and ventilation is available before you touch anything.
Tip: Do not attempt to clean while still hot; wait until the oven is completely cool. - 2
Ventilate the space
Open windows, switch on the range hood, and use a fan to move air through the kitchen. Good airflow reduces fumes and helps odors dissipate.
Tip: Avoid standing directly in the path of rising heat when you open the oven door. - 3
Remove racks and accessories
Take out racks, trays, and any removable components. Soak them in hot, soapy water while you clean the cavity.
Tip: Place items on a protected surface to prevent mess spreading to counters. - 4
Apply baking soda paste
Mix baking soda with a few tablespoons of water to form a paste. Apply to interior surfaces, avoiding heating elements and the door gasket.
Tip: Let it sit 10–15 minutes to break down baked-on grease. - 5
Scrub interior and wipe residue
Scrub with a non-scratch sponge in gentle circles. Wipe away paste with a damp cloth, repeating as needed to remove all grease.
Tip: Do not gouge enamel; gentleness preserves oven longevity. - 6
Rinse and deodorize
Spray a vinegar-and-water solution to cut grease, then wipe dry. Eliminate vinegar odor with a quick wipe and light airflow.
Tip: Rinse the cloth frequently to prevent spreading grease. - 7
Clean racks and reassemble
Scrub racks with dish soap, rinse, dry, and reinsert into the oven once interior is dry.
Tip: Check rack supports for rust and replace if needed. - 8
Dry and test bake at low heat
Dry the oven interior with a towel, then run a short, low-heat bake (around 200–250°F / 90–120°C) for 10–15 minutes.
Tip: Do not use the self-clean cycle after smoke events unless advised by a technician.
Questions & Answers
Why does my oven keep smoking after cleaning?
Recurring smoking can indicate unseen grease buildup in hard-to-reach spots or a heating element issue. If smoke persists, stop using the oven and consult a technician.
Recurring smoke may mean hidden grease or a heating element problem; stop using the oven and get professional help if needed.
Is it safe to run a self-clean cycle after a smoking incident?
Self-clean cycles can produce intense heat and fumes. It’s generally safer to do manual cleaning first and only use self-clean if the oven is confirmed clean and in good condition.
Self-clean cycles can release fumes; manual cleaning first is usually safer unless your manual says otherwise.
Can I use commercial oven cleaners after smoke?
Use non-toxic, enamel-safe cleaners. Avoid caustic products near seals and heating elements. Always follow product directions and ventilate well.
Choose enamel-safe cleaners and ventilate; avoid harsh chemicals near heat.
How long should I ventilate after cleaning?
Keep windows open and run the hood for 15–30 minutes, longer if strong odors persist. Adequate ventilation reduces irritation and odors.
Ventilate for 15 to 30 minutes or longer if needed.
What preventive steps reduce future smoking?
Wipe spills immediately, clean weekly, and do a thorough clean every couple of months. Avoid leaving plastic or foil inside the oven and replace worn seals as needed.
Clean spills promptly and inspect seals regularly to prevent smoking.
When should I call a professional?
If smoke recurs after cleaning, if you smell burning electrical components, or see damaged seals, contact a certified technician for inspection.
Call a pro if smoke recurs or you notice electrical smells or damaged seals.
Should I remove the racks before cleaning the oven?
Yes. Remove racks and accessories so you can reach all interior surfaces. Soak and clean them separately to avoid transferring grease back to the cavity.
Always remove racks before cleaning and soak them separately.
What if the smoke smells strong but there’s no visible residue?
Even without visible residue, odors can linger. Clean with baking soda and vinegar, and run a gentle warm bake to help vent odors.
Odors can linger; use baking soda and vinegar and a low-temperature bake to vent.
Watch Video
Main Points
- Shut off heat and ventilate before cleaning
- Use baking soda paste and vinegar for safe grease removal
- Clean racks separately to prevent cross-contamination
- Dry completely and avoid high-heat cycles after smoking
- Regular maintenance prevents future smoking