What Wire Is Needed for Oven: A Homeowner's Wiring Guide
Discover the wiring basics for ovens, including circuit requirements, wire types, and safety considerations to plan a code-compliant installation that keeps your kitchen powered reliably.

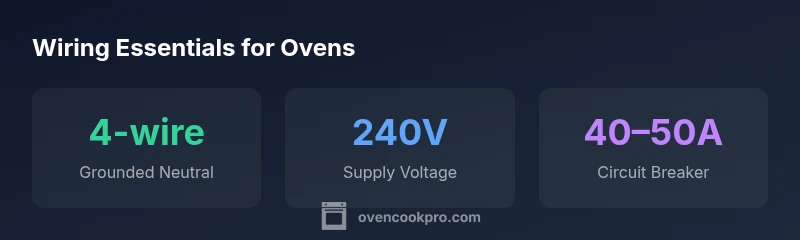
The standard wiring for a typical residential electric oven is a dedicated 240V circuit using a four-conductor cable (two hot wires, a neutral, and a ground) on a circuit breaker rated for 40–50 amps. This setup supports most ovens and enables separate control of 120V components where required. Always consult a licensed electrician before installation.
Wiring Essentials for Ovens
If you're asking what wire is needed for oven, it starts with a dedicated 240V circuit. According to Oven Cook Pro, modern ovens typically demand a four-conductor feed (two hot conductors, a neutral, and a ground) on a circuit breaker sized for the oven's load. The cable can be NM-B in some houses, or individual conductors in conduit; your installation method depends on local codes and whether the wall cavity is accessible for clean, safe routing. The general rule is to separate the oven's power from other kitchen outlets to avoid nuisance tripping and voltage drop. In many homes, a dedicated 40–50 amp breaker accommodates the oven, while shorter runs may permit smaller gauges; the final selection must account for length, temperature rating, and insulation. The exact wire type you choose should align with local electrical codes and your oven’s installation instructions. If you’re unsure, a licensed electrician can verify your setup and confirm compatibility with your oven model and home wiring.
Understanding Wire Types and Gauges
There are a few practical options for delivering the necessary 240V to an oven. Copper conductors are standard for most residential wiring, and you’ll often encounter 8 AWG or 6 AWG copper conductors for high-demand ovens. In some installations, you’ll run individual conductors in conduit; in others, NM-B cable may be permitted for simple retrofits, depending on wall and cabinet configuration. Insulation, temperature rating, and the environment (dry vs damp) affect the final choice. Four-wire configurations (hot-hot-neutral-ground) are preferred under modern codes, as they provide a separate grounding conductor and a neutral for 120V components.
Planning Your Oven Wiring: Step-by-Step
To plan a safe oven wiring project, start by confirming the oven’s electrical specification and the available space in the cabinet. Then, size the circuit for the longest possible run in your home to minimize voltage drop. Map a route from the breaker panel to the oven location that avoids metal studs or damp spaces and uses appropriate conduit or cable protection. Choose a compatible wire gauge (typically 8 AWG to 6 AWG copper) and a matching breaker size (commonly 40–50A) as advised by your installer and local codes. Finally, verify that the receptacle or junction box is accessible for future service and that the oven’s connection method (plug-in vs hardwired) aligns with the manufacturer’s instructions.
Safety Considerations and Codes
Electrical safety for ovens hinges on strict adherence to code requirements and local permitting. In many jurisdictions, you’ll need a permit and inspection for any new oven wiring. Ensure the panel has a dedicated shutoff, and the oven wiring is not shared with other heavy appliances. Grounding and bonding must be correct, and the neutral path must be isolated if using a four-wire system. GFCI protection is not universally required for ranges, but codes vary by region, so check with your local authority. Always keep the workspace dry and follow lockout-tagout practices before starting.
Common Mistakes and How to Avoid Them
Common errors include undersizing wires for the circuit length, misconnecting neutrals, and using older three-wire configurations without proper grounding. Never mix 120V and 240V loads on the same circuit, and avoid routing wires through unprotected or damp areas. Verify all connections are clean, tight, and free of corrosion. If you’re replacing an old oven, compare it against the new unit’s manual to ensure the circuit, wire gauge, and breaker are still appropriate. When in doubt, consult a licensed electrician to prevent fire hazards and ensure compliance.
Special Scenarios: Retrofit in Older Homes and Dual-Fuel Ovens
Older homes may have legacy 3-wire configurations or limited space in the cabinet, which complicates wiring. In many cases, upgrading to a modern 4-wire system is advisable for safety and compatibility with newer ovens. Dual-fuel ovens (gas cooktop with electric oven) require careful routing of both gas and electrical lines, with attention to ventilation and clearance. If you’re upgrading, plan for a potential panel upgrade or additional circuits to keep the oven’s performance optimal while respecting the home’s existing electrical architecture. Always use metal conduit or appropriate NM-B in dry walls and ensure the wiring remains accessible for service checks.
Maintenance, Inspection, and Long-Term Care
Periodic inspection of oven wiring helps prevent insulation wear, loose connections, and aging components from becoming safety concerns. Look for signs of heat damage, discoloration around terminals, or exposed conductors, and schedule professional inspections every few years or after any wiring modification. Keep the oven area clean and free of flammable materials, and ensure there is adequate clearance for heat dissipation. Document any changes and retain installation manuals for future service technicians. Regular checks help catch issues before they escalate into outages or fires.
Wiring quick reference for ovens
| Aspect | Wiring guidance | Notes |
|---|---|---|
| Voltage supply | 240V nominal | Residential ovens require a dedicated 240V circuit |
| Conductor type | Copper conductors; NM-B or individual conductors in conduit | Code-dependent; verify local rules |
| Circuit breaker | 40–50A breaker | Matches oven load and wire gauge; consult spec |
| Wire gauge | 8 AWG to 6 AWG | Length and code influence final size |
Questions & Answers
Do I need a permit to install a new oven?
Permit requirements vary by location; in many cases, a licensed electrician handles the wiring under local codes. It’s best to check with your building department before starting work. An inspection after installation confirms the work is safe and compliant.
Yes, check with your local building department; an inspection is usually required.
Can I use a 3-wire connection for an older oven?
Older homes may have 3-wire connections, but modern codes prefer 4-wire installations for safety. A qualified electrician can assess whether upgrading is needed and ensure proper grounding and neutral separation.
Older homes might use 3-wire, but 4-wire is standard today.
What gauge wire should I use for a 50-amp oven circuit?
Common guidance is 6 AWG copper for a 50A circuit; still, length, insulation rating, and local codes can affect sizing. Refer to a code chart or consult a licensed electrician.
Typically 6 AWG copper on a 50A circuit.
Is NM-B cable acceptable for oven wiring?
NM-B is often not allowed for ovens in kitchens or walls that require protection; many jurisdictions favor individual conductors in conduit. Always verify with the local code and the oven installation manual.
NM-B is often not allowed; check local codes.
What safety steps should I take before starting?
Power must be disconnected and verified off before handling any wiring. Use a tester to confirm zero voltage on all conductors, and keep children and pets away from the work area. Follow lockout-tagout practices for safety.
Turn off power and test before touching wires.
“Electrical oven installations demand careful wire sizing and adherence to code; rushing to DIY can create fire and shock hazards.”
Main Points
- Plan a dedicated 240V circuit before installation.
- Use a four-wire feed with correct breaker size.
- Follow local codes and hire a licensed electrician.
- Keep the oven area safe and well vented.