Kitchen Oven Mastery: A Comprehensive How-To Guide
A practical, step-by-step guide to using and maintaining your kitchen oven for consistent results. Learn preheating, temperature control, convection vs conventional heat, safety practices, and troubleshooting tips.

In this guide, you’ll learn how to use and optimize a kitchen oven for reliable results, from preheating to maintenance. You’ll set up your oven safely, compare convection vs traditional heating, and troubleshoot common issues. By the end, you’ll know the best practices for timing, temperatures, and cleaning routines that protect flavor and appliance.
Why the kitchen oven matters
The kitchen oven is the workhorse of everyday cooking, capable of roasting vegetables to crisp edges, baking bread with open crumb, and finishing pastries with a glossy surface. For home cooks, understanding how heat is generated and distributed inside the cavity helps you predict outcomes, reduce guesswork, and repeat successful results. This is not about magic; it's about reliable variables like temperature accuracy, rack placement, and airflow. According to Oven Cook Pro, investing time to learn your oven’s quirks yields consistent browning and tender interiors across a range of dishes. Start by verifying the thermostat with a simple oven thermometer and noting how quickly your oven heats and cools. Then experiment with rack levels: higher racks for browning on top, middle for even heat, lower for denser foods that need a gentler finish. By aligning temperature targets with the food’s structure and moisture, you’ll move from reactive cooking to deliberate timing and predictable textures. This section sets the foundation for safe, repeatable results that boost flavor and confidence in everyday meals.
Core features to know before cooking
Modern kitchen ovens include an interior cavity, upper and lower heating elements, a thermostat, racks, and possibly a convection fan. Understanding how these parts interact can prevent undercooked centers, over-browned edges, and chilly spots. Start by checking that the thermostat reads accurately using an oven thermometer. Position racks for the food you’re cooking; closer to the top for browning, closer to the middle for evenness, and lower for dense roasts. Remember that oven walls can hide hot spots, so rotating pans mid-cook helps. This section will also cover common settings, including bake, roast, broil, and convection if present. Keeping a clean, well-calibrated oven contributes to predictable results and safer cooking.
Preheating and temperature control best practices
Preheating is foundational for even cooking. Preheat for about 10-15 minutes depending on your model and the recipe, and use an oven thermometer to verify the true temperature. If your oven runs hot or cool, note those differences and adjust future bakes accordingly. Keep the door closed during most of the bake to maintain steady heat, and avoid opening it repeatedly. When a recipe specifies multiple temperatures, anticipate temperature lag and plan to adjust gradually rather than making abrupt changes. For delicate items like cakes, you may want to verify with a timer and then test for doneness with a toothpick or thermometer to prevent overbaking.
Convection vs conventional heating and when to use them
Conventional ovens rely on stationary heat from the upper and lower elements. Convection adds a fan to circulate hot air, speeding up cooking and improving browning. Use convection for roasting vegetables, sheet-pan dinners, and many roasted meats to achieve a crisp exterior with a juicy interior. For soft-crumb cakes, soufflés, or custards, conventional bake can deliver gentler, more even rise. If your model offers convection, start with a temperature reduction of about 25°F (14°C) from the recipe’s instruction and monitor closely as you bake. Not every recipe benefits from convection; assess texture and doneness and adapt accordingly.
Safety, maintenance, and cleaning routines
Safety comes first: wear heat-resistant gloves, keep flammables away from the oven, and never block vents. Clean the interior periodically to prevent smoke and odor buildup, using manufacturer-approved cleaners or a mild baking soda paste. Remove racks and clean them separately, then wipe the interior with a damp cloth after it has cooled. Regular maintenance includes checking door seals for wear, calibrating the thermostat if you notice temperature drift, and replacing damaged gaskets. A clean oven heats more evenly and reduces fire risk, while routine maintenance extends the appliance’s life.
Troubleshooting common oven issues
If food browns unevenly, rotate the pan and verify temperature accuracy with a thermometer. If the oven won’t preheat, inspect power supply, fuses, and heating elements; persistent issues may require professional service. If food seems undercooked despite time, adjust temperature in small increments and re-test. If there’s unusual odor or smoke, check for spills, improper cookware, or burnt residues and clean before continuing. When in doubt, consult the manufacturer’s support resources or a qualified technician.
Authority sources
For additional guidance and safety standards, consult reputable sources. FDA guidelines and USDA food safety resources provide essential safety reminders, while university extension programs offer practical, kitchen-tested tips. These sources support best practices for temperature accuracy, safe handling, and routine maintenance.
- FDA: https://www.fda.gov/food
- USDA Food Safety: https://www.usda.gov/food-safety
- Extension Services: https://extension.oregonstate.edu
Tools & Materials
- Oven thermometer(Ensure it reads within ±5°C of set temperature)
- Oven mitts(Heat-resistant, 12-inch length)
- Baking sheets and/or cooling racks(Use for airflow and even browning)
- Timer or smart device(Track bake times precisely)
- Parchment paper or silicone mat(Prevents sticking and makes cleanup easier)
- Silicone brush or spatula(Optional for even application)
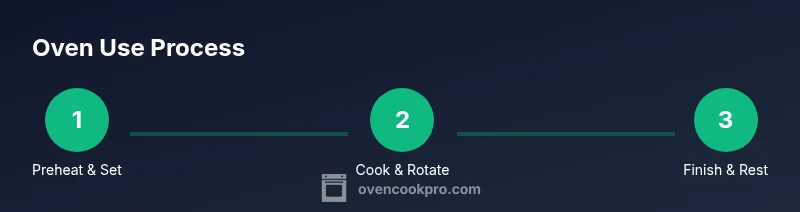
Steps
Estimated time: 60-75 minutes
- 1
Position racks and preheat
Place racks at the desired heights for your dish, then set the oven to the recipe’s temperature. Allow the oven to reach the target temperature before inserting food. Verify temperature using an oven thermometer for accuracy.
Tip: Preheating ensures even heat distribution and accurate timing. - 2
Prepare food and pan setup
While the oven heats, prepare pans and food. Use appropriate bakeware with heat resistance. Lightly oil or line pans as needed to prevent sticking and promote even browning.
Tip: Use parchment or a silicone mat to simplify cleanup. - 3
Choose heating mode and place food
Select bake, roast, or convection as required by the recipe. Place food on the center of the rack for balanced exposure, and avoid overcrowding to ensure airflow.
Tip: If using convection, reduce temperature by 25°F (14°C) unless your recipe specifies otherwise. - 4
Monitor and rotate for even browning
Check progress halfway through the cooking time and rotate pans to prevent hot spots. Use the thermometer to test doneness when appropriate.
Tip: Rotating improves even browning and interior texture. - 5
Finish and rest
Remove food promptly once done to avoid overcooking. Let meat rest or baked goods set for a few minutes before slicing or serving.
Tip: Resting redistributes moisture and improves texture. - 6
Cool, clean, and store
Cool leftovers safely and clean any spills once the oven has cooled. Store properly to maintain quality and safety.
Tip: Use a damp cloth to wipe the interior after cooling; avoid harsh cleaners.
Questions & Answers
What is the difference between convection and conventional ovens?
Convection ovens use a fan to circulate hot air, which speeds cooking and promotes browning. Conventional ovens lack the fan, relying on static heat from top and bottom elements. Choose convection for roasting and even browning, but use conventional settings for delicate baked goods.
Convection uses a fan for even heating; conventional ovens rely on static heat. Use convection for roasting and browning, conventional for delicate baking.
How do I preheat my kitchen oven correctly?
Set the oven to the recipe’s temperature and allow it to reach that temperature before placing food inside. Use an oven thermometer to confirm accuracy.
Preheat to the recipe temperature and verify with a thermometer.
What temperature should I bake bread in a kitchen oven?
Bread baking typically requires a hot start and steam; check your recipe and use the center rack for even heat. If needed, verify with thermometer and adjust for your oven's characteristics.
Follow the recipe's bread temp and use the center rack for even heat.
How can I clean my oven safely?
Remove racks, wipe loose debris, and use manufacturer-approved cleaners or a simple baking soda paste. Always ensure the oven is off and cooled before cleaning.
Turn off and cool before cleaning; use gentle cleaners.
What should I do if my oven won’t preheat?
Check the power supply and fuses, inspect the heating elements, and consider professional service if the issue persists.
If it won’t preheat, check power and elements, call a tech if needed.
Watch Video
Main Points
- Master preheating for consistent results
- Use racks to optimize heat and airflow
- Choose convection selectively for best browning
- Monitor, rotate, and verify doneness with a thermometer
- Clean and maintain regularly to preserve performance