Do You Need to Preheat a Gas Oven? A Practical Guide
Learn whether you should preheat a gas oven, how to do it safely, and tips for accurate temperatures. This Oven Cook Pro guide covers timing, safety, and troubleshooting for home cooks.

By the end of this guide, you’ll know when to preheat a gas oven, how long it takes, and the best temperatures for common baking tasks. You’ll learn practical safety steps, how to adjust for different dishes, and simple indicators that your oven is ready. This quick answer prep helps you bake evenly with confidence.
Why Preheating Matters for Gas Ovens
Preheating a gas oven is a foundational step for many baking and roasting tasks. Unlike some electric models that might maintain a steadier baseline temperature, gas ovens can have more noticeable temperature fluctuations as flames light and stabilize. Preheating ensures that the oven cavity reaches a consistent target temperature before you introduce food, which helps with even rising, proper browning, and predictable cooking times. According to Oven Cook Pro, most home bakers rely on a well-timed preheat to achieve reliable results, especially for leavened goods and delicate pastries. Keep in mind that every oven is a little different; the goal is a stable, accurate heat rather than chasing a number that briefly flashes on the dial. As you gain experience with your specific model, you’ll learn how long your oven typically takes to settle and how to verify that heat reliably.
Understanding how your gas oven behaves also helps you plan around the risk of heat loss when you open the door. Opening the door interrupts the heat buildup, so plan to perform tasks that don’t require peeking into the cavity during preheat. A little organization—racks in place, pans ready, and timers set—reduces the temptation to open the door early. This approach not only saves energy but also yields more consistent results across batches.
Brand-wise, the Oven Cook Pro team emphasizes that preheating is a sensible baseline habit for most gas-oven recipes. While there are exceptions, especially for certain one-pot dishes or no-knead breads that specify a cold-start, the default assumption should be a hot, ready oven before you begin. The aim is reliable heat, not guesswork.
How Gas Oven Heating Differs from Electric
Gas ovens heat through a live flame which creates a dynamic, sometimes uneven heat profile. The flame and combustion process can cause hot spots near the flame and cooler zones farther from it, especially in ovens with older insulation or heavier racks. Electric ovens, by contrast, tend to deliver more uniform heat, because elements heat up and stabilize more evenly. This difference means that preheating accuracy and rack placement matter more with gas ovens. To optimize results, place the rack in a position that mimics where you’ll cook most often and use an oven thermometer to verify the actual temperature at the center of the cavity. If you bake cookies or delicate pastries, a consistent, preheated environment helps them bake without uneven edges or sinking centers. In short, gas ovens reward intentional preheat and careful temperature verification, while electric ovens often tolerate a slightly more flexible approach.
A practical tip is to rotate baked goods halfway through to compensate for minor hot spots. If your oven includes a convection setting, you may also need to adjust temperatures or times accordingly, as convection can distribute heat more aggressively. Overall, understanding these differences helps you tailor your preheat strategy to your specific oven and the dish you’re making.
When You Should Preheat and When You Might Skip
For most baking tasks that rely on consistent leavening and browning—like cookies, cakes, muffins, and sheet-pan pastries—preheating is the recommended starting point. Preheating ensures the initial oven blast supports proper rise and immediate surface formation. However, there are exceptions. Some casseroles, braises, and slow-roasting methods specify beginning in a cold oven to avoid shocking ingredients or to gradually develop heat with the dish. Always follow the recipe instructions first; when in doubt, preheat. Using a thermometer to confirm target temperature helps avoid guessing and reduces the chance of under- or over-baking. If you’re committed to efficiency, you can plan your mise en place so you’re ready to slide food in the moment the oven hits temperature.
If you frequently bake multiple items, develop a routine: set the temperature, wait for stable heat, then start the timer once the food is loaded. This habit streamlines kitchen workflows and reduces the likelihood of mis-timed recipes. Remember that preheating is a tool to improve consistency, not a rigid rule that must be followed for every dish.
How to Preheat Safely: Step-by-Step
Preheating safely begins with preparation. Clear the area around the oven, ensure there’s adequate ventilation, and inspect the oven door seal for any signs of wear. Always place the rack at the desired position before you power the oven on, and use an oven thermometer to verify the internal temperature once preheating completes. When you turn the oven on, select the Bake mode (or the appropriate cooking mode) and set the target temperature. Resist the urge to peek into the oven repeatedly; each opening allows heat to escape and extends preheat time. After the oven has reached the target temperature, confirm with the thermometer and proceed to load your food. If you notice large fluctuations in temperature, consider recalibrating or using an oven thermometer to guide adjustments.
Safety reminders: never leave a lit gas oven unattended for long periods, keep flammables away, and wear heat-resistant gloves when handling hot racks or pans. If you smell gas or detect an unusual odor, evacuate the area and contact the gas company or emergency services immediately.
Achieving Even Browning: Racks, Pans, and Placement
Achieving even browning starts with proper rack and pan selection. Place heavier, darker pans on the lower rack, which can conduct more heat and help with even browning, while lighter-colored pans reflect more heat and may yield a lighter crust. Position the rack in the center for most baking tasks to promote uniform exposure to air circulation. When preheating, avoid overcrowding the oven; leaving space between items ensures heat can circulate. For sheet-pan recipes, use at least two smaller pans rather than piling many items on a single tray, which can trap moisture and create uneven results. Finally, if your recipe calls for convection, consider lowering the temperature a bit and monitoring bake times to prevent over-browning. These adjustments align with typical gas-oven behavior and improve consistency across multiple batches.
Troubleshooting Temperature and Timing
If your oven doesn’t seem to reach the target temperature, start by verifying the thermometer reads accurately. A miscalibrated temperature can lead to under- or over-baking even when the oven seems to preheat. Inspect the door gasket for leaks and ensure the door closes fully—a compromised seal can make preheating less effective. If the oven still won’t reach temp, recalibrate following the manufacturer’s instructions or consult a service professional. During troubleshooting, avoid using high flames with the door ajar, as this creates a hazardous situation and wastes energy. A well-maintained oven that reaches and holds temperature consistently will deliver more reliable results for a wide range of recipes.
Special Cases: Artisan Bread, Pastry, and Roasting
Artisan bread and many pastry recipes often rely on a hot surface and rapid temperature transfer to develop a strong crust. In some cases, a hot preheated surface or Dutch-oven technique is preferred, and instructions may specify a longer preheat or a particular stone method. For roasting, a preheated oven helps seal in juices quickly, producing a crisp exterior. Always check whether the recipe calls for preheating and adjust rack position and pan choice accordingly. If you’re new to a gas oven, consider keeping notes on successful configurations for your favorite dishes. Over time, you’ll develop a reliable mental map of how your oven behaves at different temperatures and with different loads.
Tools & Materials
- Oven thermometer(Place in center of rack to monitor temperature accurately)
- Baking sheet or sheet-pan(Use rimmed pan to catch spills and ensure even heat distribution)
- Parchment paper or silicone baking mat(Prevents sticking and makes cleanup easier)
- Oven-safe timer(Helps manage preheat and bake times without opening the door)
- Heat-resistant oven mitts(Protect hands when loading/unloading hot items)
- Rack positions (center and possibly lower)(Plan ahead based on recipe and pan size)
- Thermostat calibration guide (optional)(Use if you suspect inaccurate temperature readings)
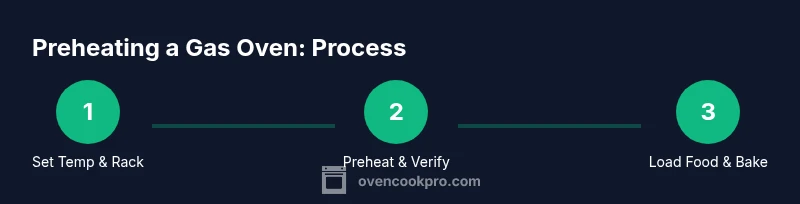
Steps
Estimated time: 15-25 minutes
- 1
Set the target temperature and position rack
Choose the recipe’s suggested temperature and place the rack in the appropriate position before turning on the oven. This minimizes heat loss later and ensures your food starts in the right environment for even cooking.
Tip: Pre-align pans and tools so you only enter the oven once it’s hot. - 2
Power on to Bake and begin preheating
Select Bake (or the appropriate mode) and enter the target temperature. Close the door promptly to prevent heat from escaping and to keep preheating efficient.
Tip: Avoid opening the door frequently; each peek costs you time and heat. - 3
Verify temperature with an oven thermometer
Place the thermometer in the center of the oven cavity and wait for a stable reading that matches the set temperature. If it doesn’t align, allow a few extra minutes and recheck.
Tip: Take readings after the oven stabilizes rather than at initial heat spike. - 4
Prepare baking surfaces while heating
Line pans with parchment or silicone mats and arrange items with space between them so air can circulate. This improves heat transfer and even browning once you insert food.
Tip: Use the right pan material and color to influence heat absorption. - 5
Maintain safe preheat conditions
Keep flammables away from the oven, ensure proper ventilation, and never leave a gas oven unattended while lighting or heating.
Tip: If you smell gas, evacuate and call the gas company immediately. - 6
Load food when ready and monitor progress
Slide in your prepared food only after the thermometer confirms the target range. Start timing from the moment you close the oven door.
Tip: Rotate trays halfway through if you notice uneven browning. - 7
Finish with a post-check and adjust
Once cooking completes, recheck temperatures for subsequent dishes and adjust rack placement or temperature for future batches to maintain consistency.
Tip: Keep a kitchen log of what worked for future reference.
Questions & Answers
Do all recipes require preheating a gas oven?
Most baking recipes assume a preheated oven to achieve consistent rise and browning. Some recipes, especially stews or casseroles, may specify starting in a cold oven. Always follow the recipe, and when in doubt, preheat and use a thermometer to verify.
Most recipes expect a preheated oven, but check the instructions for exceptions like casseroles that begin cooking in a cold oven.
How long should it take for a gas oven to preheat?
Gas ovens vary; the time to reach the target temperature depends on model and insulation. Use an oven thermometer to confirm readiness rather than guessing based on the dial.
Gas ovens vary; use a thermometer to confirm when it’s ready.
Is it safe to preheat with the door open?
No. Preheating with the door ajar can lead to heat loss, gas buildup risk, and burns. Keep the door closed during preheat.
No, keep the door closed during preheat.
Can I bake in a cold oven?
Some recipes require starting in a cold oven, but this is less common for cookies and bread. If the instructions don’t call for it, preheated is usually best for reliable results.
Some recipes start in a cold oven, but most baking benefits from preheating.
What should I do if the oven won’t reach temperature?
Check the door seal for leaks, verify the thermostat calibration, and inspect the bake element. If issues persist, consult an appliance service professional.
Check seals and calibration; consult a professional if it won’t reach temp.
Should I preheat for broiling or high-heat searing?
Broiling often requires preheating the top element. Follow the recipe’s guidance; if it specifies preheating, do so, otherwise preheat as you would for baking.
Broiling usually needs preheating; follow the specific recipe.
Watch Video
Main Points
- Preheat for most baking to ensure even heat and rise
- Verify temperature with a reliable thermometer
- Keep the door closed during preheat for consistency
- Adjust rack placement and pan choice to promote even browning