Do You Need to Preheat a Fan Oven? A Practical Guide
Learn when to preheat a fan (convection) oven, how it affects cooking times and browning, and proven strategies for cookies, vegetables, and roasts. Oven Cook Pro explains how to decide when to preheat and how to bake with convection for best results.

Do you need to preheat a fan oven? Not always. Modern fan ovens heat quickly, and many baking tasks can start with a cold oven. For sheet pans, cookies, and roasted vegetables, preheating may speed up browning, but you can often bake from room temperature. Always follow recipe guidance, and adjust bake times to account for faster heating.
Understanding how a fan oven heats
Fan ovens use a built-in convection fan to move hot air around the cavity. This circulation speeds heat transfer and promotes more even browning, which is a core advantage of convection cooking. According to Oven Cook Pro, convection can reduce cold spots and shorten overall bake times for many foods, but it also changes when the oven reaches the target temperature and how heat is distributed during the first minutes of cooking. That means a recipe written for a conventional oven might not behave the same in a fan oven, especially during the initial heat-up. In practice, you may find preheating is unnecessary for some meals, while others benefit from an intentional warm-up to establish a stable heat field. Understanding this distinction helps home cooks decide when to preheat and when to start with a cold oven.
Airflow also means rack placement matters: the middle rack with a single tray usually yields the most even results, while multiple sheets or pans can block air and cause uneven browning. Heat comes from all sides in a convection oven, but the hottest air often circulates near the back of the cavity, so occasional rotation can help. When you’re unsure, run a brief preheat test with a simple sheet pan to observe how air moves and how quickly the temperature stabilizes. The takeaway is clear: convection helps, but preheating is situational and recipe-driven, not a blanket rule.
When preheating is beneficial
Preheating is beneficial for items that rely on a quick burst of heat to set structure, browning, or oven spring. For cookies and pastries, starting with a preheated oven helps activate leavening agents and produces a uniform edge. In a fan oven, the circulated air gives crisp exteriors faster and reduces soft centers, but watch for over-browning if the temperature is high. For roasted vegetables and potatoes, preheating can accelerate caramelization on the cut surfaces, creating deeper color and richer flavor, especially when you use a hot sheet pan. For meats and fish, a warm start may improve sear and moisture retention, but you’ll want to monitor internal temperatures closely to avoid overcooking. Not all foods require preheating, and many recipes designed for convection omit it; the decision should reflect the food’s density, moisture content, and desired texture. Oven Cook Pro’s guidance emphasizes testing a recipe in your specific model, because even among popular brands, convection performance varies by oven design and fan speed. The key is to align your preheat choice with the recipe’s intent, your equipment, and your tolerance for timing differences.
How to decide on preheating for different foods
Different foods behave differently in convection heat. Use the following decision guide to decide whether to preheat.
- Cookies and thin pastries: Preheat to ensure rapid, even browning and crisp edges.
- Bread with crust: Preheat for a strong oven spring and well-developed crust.
- Roasted vegetables: If pieces are small, preheating can help achieve a caramelized crust; larger or denser vegetables may do well starting in a cooler oven to avoid burning.
- Meat and poultry: A preheated oven can promote a quick sear and moisture retention, but monitor internal temps closely.
- Casseroles and gratins: Preheat when a uniform top and even cooking are critical. If the dish relies on a gradual heat-up, you may skip preheating.
Oven Cook Pro notes that results vary by model, so it’s wise to test a recipe in your own oven and adjust accordingly.
Practical preheating strategies for a fan oven
Start by confirming the recipe’s instruction on preheating. If preheating is advised, use convection bake and set the oven to the specified temperature. Verify the actual temperature with an oven thermometer, since some ovens run hot or cool by model. Place food on a rack that allows air to circulate freely, typically the middle position, and use parchment or a silicone mat to prevent sticking and promote even browning. Keep the door closed during heat-up to avoid heat loss, and resist peeking too often. If your recipe doesn’t require preheating, assess whether the food benefits from a cold start—small, thin items often do fine without preheating, while dense items may gain from a brief warm-up.
Common mistakes and how to avoid them
- Opening the door during preheat wastes energy and disrupts heat balance.
- Relying on the oven light alone to judge temperature can mislead you; use a thermometer for accuracy.
- Crowding the pan blocks convection air; leave space between trays and from the sides.
- Not rotating pans can create uneven browning; rotate halfway through bake when using multiple trays.
- Skipping a preheat when it’s recommended may affect crust and rise; always compare to the recipe’s intent.
Testing your oven with a simple bake test
A practical bake test helps you understand how your convection oven behaves with/without preheat. Place a small tray of cookies or a sheet of pastry on the middle rack and bake using convection settings. Observe browning, spread, and texture compared with a non-convection bake test. Document the results and adjust future timings accordingly. This empirical approach aligns with Oven Cook Pro guidance: ovens vary, so tailor preheating decisions to your specific appliance and even to the batch size you routinely bake.
What the science says and brand guidance
Oven science shows convection air movement speeds heat distribution, but it doesn’t eliminate the need to adapt to each model. According to Oven Cook Pro analysis, some ovens reach target temperatures more quickly with convection and can deliver more uniform results, especially for baked goods and crisp vegetables. The Oven Cook Pro team recommends learning your oven’s convection mode, keeping it well-calibrated, and using a temperature probe when precise doneness matters. For most home cooks, the best strategy is to treat preheating as a recipe-specific tool rather than a universal rule, and incorporate a quick thermometer check to ensure accuracy. The key is confidence: know your oven, follow the recipe, and use preheating where it makes sense to achieve consistent, delicious results.
Tools & Materials
- Oven thermometer(To verify that the oven actually reaches the target temperature, especially with convection mode.)
- Baking sheets (rimmed)(Flat or dark/nonstick; use parchment or a silicone mat as needed.)
- Parchment paper or silicone mat(For easy release and even browning.)
- Oven-safe cooling rack(Used for air circulation when needed.)
- Oven mitts(Heat-resistant gloves for safe handling.)
- Timer(To track bake times and avoid under/overcooking.)
- Thermometer or probe (optional)(Useful for checking internal temps on larger roasts or casseroles.)
- Heavy baking stone or steel (optional)(Preheats to improve crust for breads and pizzas.)
Steps
Estimated time: Approximately 25-40 minutes
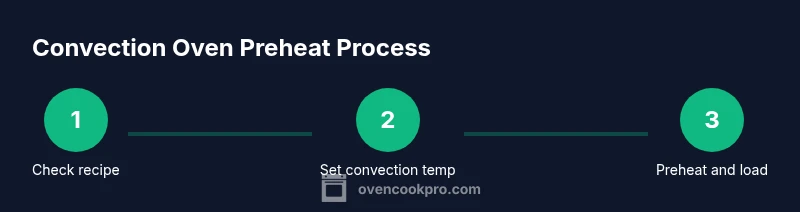
- 1
Set convection mode and target temperature
Select the convection/bake setting on your oven and enter the recipe’s temperature. Convection circulation means heat will surround the food more evenly, which can affect browning and rise. If the recipe specifies a conventional setting, follow that guidance instead when appropriate.
Tip: If you’re unsure, start with the recipe’s recommended temperature and switch to convection only if the recipe allows. - 2
Check oven temperature with a thermometer
Place an oven thermometer in the center of the rack and turn the oven on. Allow it to stabilize, then verify that the display matches the thermometer. This avoids timing errors caused by ovens that run hot or cool.
Tip: Calibrate your oven if the thermometer consistently shows a different temperature than the dial. - 3
Decide whether to preheat based on the food
Review the food type and texture you aim for. Preheating helps with rapid browning or oven spring, while some items benefit from a cold-start for even cooking inside.
Tip: When in doubt, test a small batch both with and without preheating to see which yields the preferred texture. - 4
Load food on an appropriate rack and pan
Place food on a rack that allows air to circulate and use a rimmed sheet if you’re roasting. Avoid stacking multiple trays too close together to preserve air flow.
Tip: Leave space between pans and don’t crowd the oven, which can hinder convection air movement. - 5
Start baking once preheated (if required)
Close the door gently and start the timer once the oven reaches the target temp. Keep the door closed during the bake to maintain consistent airflow and temperature.
Tip: Resist opening the door to check progress frequently; use the timer and visual cues instead. - 6
Monitor progress and adjust if starting from cold
If you began from a cold oven, the bake time may extend slightly. Use visual cues and a thermometer to judge doneness, and consider rotating trays for even browning.
Tip: Note how convection affects browning and texture so you can adjust future batches. - 7
Cool and rest after baking
Let baked goods or roasted items rest briefly on a rack to finish setting and reabsorb moisture. Convection can continue to influence carryover heat, so factor that into timing.
Tip: Even resting helps maintain texture and prevent sogginess on the bottom. - 8
Document results for future batches
Record what worked for your oven model, recipe, and batch size. Small notes on temperature, bake time, and whether preheating was used will save time later.
Tip: Keep a simple log for quick reference on future cooks.
Questions & Answers
Do I need to preheat a convection oven for every recipe?
No. Many recipes work well with a cold start in convection ovens, especially if they’re designed for that mode. Check the recipe instructions and test when in doubt.
No, not every recipe requires preheating; always check the recipe instructions and test if you’re unsure.
How does preheating affect cookies in a convection oven?
Preheating helps cookies spread and brown evenly in convection ovens. Because convection speeds baking, watch for quicker browning and adjust times accordingly.
Preheating helps cookies brown evenly, but convection may bake them faster, so keep an eye on timing.
Can preheating save energy?
Preheating can waste energy if not needed. When convection is active, you may reduce overall bake time, offsetting the initial heat-up energy.
Preheating uses energy, but convection can shorten bake times, so total energy use may not increase.
What should I do if my oven heats unevenly?
Calibrate your oven with a thermometer, rotate pans for even exposure, and use convection to distribute heat more evenly.
If heating is uneven, calibrate and rotate; convection helps distribute heat more evenly.
Is preheating recommended with baking stones?
Yes. Preheating a stone or steel before dough or pizza improves crust development and heat transfer.
Yes. Preheating stones helps crusts become crisper and bake more evenly.
How can I test my convection oven temperature?
Use a reliable oven thermometer and compare it to the set temperature. If consistency is poor, adjust the thermostat.
Test with a thermometer and adjust if needed.
Watch Video
Main Points
- Assess whether preheating fits the recipe
- Convection speeds browning; adjust times accordingly
- Verify temperature with an oven thermometer
- Follow recipe guidance; tailor to your oven
- Avoid opening the door during heat-up