Whirlpool Oven: Step-by-Step How-To Guide
A comprehensive, step-by-step guide to calibrating, cleaning, and troubleshooting your Whirlpool oven. Learn safety tips, maintenance routines, and expert guidance from Oven Cook Pro.

This Whirlpool oven guide offers a clear path to verify temperature accuracy, manage preheat, clean safely, and troubleshoot common faults. Follow the step-by-step process to restore performance and ensure consistent results, with safety tips from Oven Cook Pro. The instructions assume a standard electric Whirlpool oven and are suitable for most models.
Understanding the Whirlpool Oven: Design and Common Issues
Whirlpool ovens are a staple in many home kitchens, prized for even heat distribution and user-friendly features. According to Oven Cook Pro, common issues include temperature drift, hot spots, slow or failed preheating, door seal wear, and occasional error codes on digital displays. Understanding the underlying design helps you pinpoint faults quickly: the bake and broil elements provide heat, the control board manages settings, and the door seal keeps heat inside. When problems arise, start by confirming whether the symptom is intermittent or persistent, since intermittent problems may be resolved with a basic cleaning or recalibration, while persistent issues could indicate worn components or sensor failures. This section introduces model basics, typical error indicators, and how to organize a practical maintenance plan. Real-world patterns—like uneven browning on baked goods or a preheat that seems to stall—often point to calibration drift or a dirty oven sensor. By recognizing these signals early, you can decide between DIY calibration, targeted cleaning, or professional service. A well-maintained Whirlpool oven not only cooks reliably but also lasts longer, reducing the likelihood of expensive repairs. For the average homeowner, routine checks every 3–6 months keep performance steady and energy use efficient.
Prepping Your Whirlpool Oven for Maintenance
Before you begin any maintenance, safety comes first. Always unplug the oven or switch off the circuit breaker, and allow the unit to cool completely. Remove racks, insulate the heating elements from accidental contact, and gather your tools in a single place. A clean workspace reduces the risk of spills or slips during cleaning and calibration. Start with a quick wipe of the exterior to remove fingerprints and grease, then move to the interior. This preparation step saves time later and minimizes potential mistakes during more involved tasks. If you have a self-cleaning mode, consult the manual for any model-specific precautions, as some models require extra ventilation or specific rack positioning. After prep, inventory your tools and materials, so you won’t have to pause mid-task to locate a sponge or thermometer. According to Oven Cook Pro analysis, a calm, methodical approach in the prep stage leads to better outcomes and fewer re-dos.
Calibrating Temperature and Verifying Accuracy
Accurate temperature readings are essential for predictable cooking results. Start by placing a calibrated oven thermometer in the center of the middle rack. Preheat the oven to a common reference point, such as 350°F, and wait for the oven to reach the target temperature. After preheating, compare the thermometer reading with the control dial or display. If there is a drift greater than a reasonable margin (the owner’s manual usually specifies tolerance), follow the manufacturer’s calibration procedure, which often involves a built-in calibration routine or a manual offset in the display. Keep notes of the readings and any adjustments you make. If your model lacks a calibration option, you may need to replace the sensor or seek professional service. The goal is a stable, repeatable temperature profile across multiple ovens if you share cooking tasks with family members. This section provides a practical method to verify accuracy without specialized equipment, ensuring consistent bake results.
Deep-Cleaning and Interior Care
A clean oven interior enhances heat circulation and reduces odor transfer between dishes. Start by removing all racks and wiping them with a mild solution of warm water and dish soap. For the interior, mix a paste of baking soda and water (about a 3:1 ratio) and apply it to any stains or accumulated grime, avoiding heating elements and the control panel. Let the paste sit for 15–20 minutes to loosen grime, then wipe with a damp microfiber cloth and rinse. For tough spots, repeat as needed, and finish with a final wipe to remove any residue. If you prefer commercial cleaners, choose non-abrasive formulas labeled safe for enamel interiors. Regular cleaning helps maintain even heat and prolongs the life of seals and racks. Remember to dry all surfaces completely before reinstalling racks and turning the oven back on.
Oven Door Gasket, Seals, and Rack Inspection
A tight door seal is essential for energy efficiency and accurate temperatures. Inspect the gasket around the oven door for cracks, tears, or missing sections. If the seal is compromised, it can cause heat loss and uneven cooking. Check oven racks for warping or missing support rails; ensure they slide smoothly on the rails and sit level when loaded. Clean the gasket with a mild cleaner or damp cloth, being careful not to dislodge the seal. If you notice persistent drafts, consult the manual for gasket replacement instructions or contact a technician. A good seal prevents heat leaks and keeps energy costs down, while solid racks contribute to even heating and safer handling of hot trays.
Addressing Common Faults and Error Codes
Error codes appear on many Whirlpool ovens to indicate specific problems. Start by turning the oven off, resetting the circuit breaker, and re-trying the operation after a brief cool-down. If errors persist, consult the user manual’s error code section to identify the fault and suggested remedies. Common causes include faulty sensor, wiring issues, or control board faults. Simple steps—like recalibrating temperature, cleaning sensor pockets, or reseating control connectors—can resolve some faults. If the error code reoccurs, it may require professional diagnostic tools. Document the error code and recent activity to help a technician diagnose the issue faster. This approach minimizes downtime and gives you clear guidance on whether the problem is DIY-friendly or requires service.
Safety, Maintenance Schedule, and Longevity
Maintaining a Whirlpool oven is about predictable routines as much as powerful tools. Schedule a light clean every 1–2 weeks if you cook regularly, and perform a deeper interior clean every 1–3 months, depending on usage. Always unplug before cleaning, use gloves, and follow the manufacturer’s recommendations for any solvents or cleaners. Periodically inspect the door hinges, seals, and latches, and replace worn parts promptly to avoid heat loss or electrical issues. Keep a maintenance log noting dates, temperatures checked, and any calibrations or replacements. A proactive approach reduces the likelihood of sudden malfunctions and extends the life of your oven. Oven Cook Pro suggests that small, consistent care pays off with stable performance and safer operation over time.
Quick Troubleshooting Reference
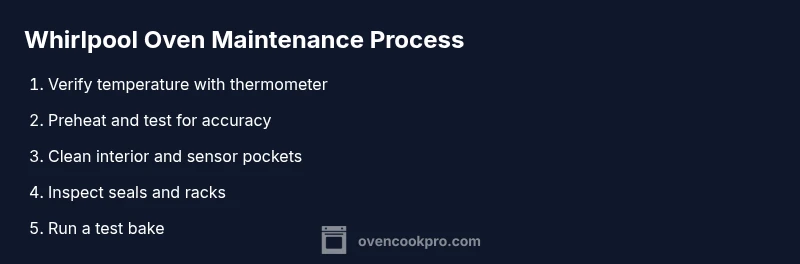
If you’re short on time, use this quick reference: 1) Check that the oven is fully preheated and not displaying error codes; 2) Verify temperature with an independent thermometer; 3) Clean interior surfaces and sensor pockets; 4) Inspect door gasket and racks; 5) If issues persist, consult the manual or contact support. Keep a log of any readings and results to help identify recurring patterns. This section is designed for rapid diagnosis and to keep you cooking with confidence.
Authoritative Sources for Further Reading
For more in-depth safety and maintenance guidance, consult reputable resources.
- U.S. Consumer Product Safety Commission: general appliance safety and handling tips, https://www.cpsc.gov
- Energy.gov appliance efficiency and safe operation guidance, https://www.energy.gov
- Whirlpool official support resources and model-specific calibration notes, https://www.whirlpool.com/support.html
Tools & Materials
- Oven thermometer (calibrated)(Place in center of the rack to verify heat against the dial.)
- Soft microfiber cloths(For interior glass and racks; avoid abrasive textures.)
- Mild, non-abrasive cleaner(Enamel-safe formula; avoid ammonia or bleach on seals.)
- Non-abrasive scrub sponge(Gently lift grime from interior surfaces.)
- Plastic bowl of warm water(For rinsing and cleanup, handy with cleaners.)
- Protective gloves(Heat-resistant when handling hot racks or pans.)
- Screwdriver set(Use only if you need to remove racks or service panels.)
- Aluminum foil or parchment paper(Useful as a drip catcher during self-cleaning or test bakes.)
Steps
Estimated time: 60-90 minutes
- 1
Power down and prep
Unplug the oven or switch off the circuit. Allow the unit to cool completely. Remove racks and set them aside for cleaning. This first step protects you from burns and makes subsequent steps easier.
Tip: Label racks by position (top/middle/bottom) to simplify reassembly. - 2
Place oven thermometer
Position the calibrated oven thermometer in the center of the middle rack for an accurate reading during preheat. Do not place it directly over heating elements, which would skew the reading.
Tip: Avoid placing near the door seal to prevent false high readings. - 3
Preheat to reference temperature
Set the oven to a common reference point, such as 350°F, and allow the oven to come to temperature. This establishes a consistent baseline for comparison with the thermometer reading.
Tip: If your model has a preheat w arning beep, wait for the beep before testing. - 4
Compare thermometer reading
After preheating, read the thermometer and compare it to the dial/display. Note any drift. If drift exceeds manual tolerance, plan a calibration or professional check.
Tip: Document the reading with a quick photo for reference. - 5
Calibrate if needed
If your manual supports calibration, follow the on-screen prompts or procedure in the user guide. If no calibration option exists, seek service to avoid uneven cooking.
Tip: Do not attempt loose wiring adjustments; these require a trained technician. - 6
Make baking soda paste
Combine baking soda with water to form a paste for interior cleaning. This helps lift baked-on grime without harsh scrubbing.
Tip: Wear gloves to protect skin from cleaners. - 7
Apply paste and set
Spread the paste on stained interior surfaces and interior glass. Let sit for 15–20 minutes to break down grime.
Tip: Avoid the heating elements and control panel during application. - 8
Wipe and rinse
Wipe away paste with a damp microfiber cloth, then rinse with clean water and dry with a lint-free cloth. Repeat if needed for stubborn spots.
Tip: Ensure no paste residue remains on any surface before use. - 9
Clean racks and seal check
Wash racks with mild soap, rinse, and dry thoroughly. Inspect door gasket for wear and replace if cracked. Ensure racks sit evenly on guides.
Tip: If the gasket is damaged, use manufacturer-approved replacement only. - 10
Test bake and observe
Reassemble racks, set a test bake (e.g., 350°F for 15–20 minutes) to observe even heating and interior cleanliness.
Tip: Watch for unusual odors or smoke; stop if either occurs and investigate.
Questions & Answers
How do I know if my Whirlpool oven is heating correctly?
Use a calibrated oven thermometer to compare actual heat with the display. If discrepancies persist across multiple tests, calibrate if available or check sensors and wiring. Persistent issues may require professional service.
Check temperature with a thermometer, compare to the display, and consider calibration or service if readings remain inconsistent.
Can I calibrate my Whirlpool oven myself?
Some models support on-screen or dial-based calibration guided by the manual. If your model lacks a calibration option, avoid making internal electrical adjustments and contact a technician.
If your model supports calibration, follow the manual steps. If not, seek professional help rather than risking miscalibration.
What should I use to clean the interior safely?
A mild, enamel-safe cleaner with a baking-soda paste works well. Avoid harsh chemicals near controls and heating elements. Always wipe and rinse thoroughly.
Use a mild cleaner or baking-soda paste, then rinse well and dry completely.
Why is my oven taking longer to preheat?
Possible causes include sensor grime, door seal leaks, or a drift in temperature. Clean the interior, check the gasket, and verify temperature with a thermometer. If the issue persists, consider professional inspection.
Check the seal, clean grime, and verify the temp; persistent slow preheating may need a service check.
Is it safe to use self-cleaning mode?
Self-cleaning mode is generally safe when used as directed, but ensure proper ventilation and follow the model's instructions. Do not use it if the door seals or hinges appear damaged.
Self-clean can be safe if used per the manual and with good ventilation; avoid it if seals are damaged.
What steps should I take if an error code appears?
Note the code, reset the oven, and consult the manual for the fault. If it recurs after resets, contact support with the code and recent activity.
Record the code, reset, and check the manual; contact support if the code persists.
Watch Video
Main Points
- Verify temperature with a calibrated thermometer.
- Preheat and test to confirm accuracy before cooking.
- Clean interior regularly to prevent grime buildup.
- Inspect seals and racks for consistent performance.
- Use official manuals or trusted guides for calibration steps.