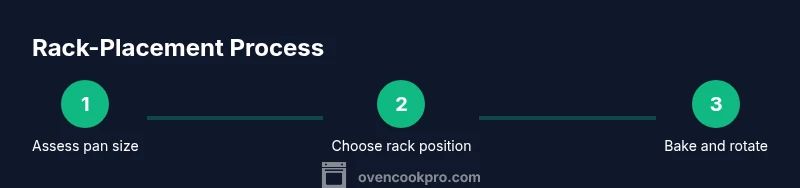
Which Oven Rack for Cake: A Step-by-Step Guide
Learn how to choose the right oven rack for cake baking. Practical guidance on rack positions, pan sizes, and step-by-step placement to ensure even rise, browning, and flawless textures every time.

To bake a cake evenly, start with the middle oven rack for standard pans. If baking two pans, stagger them and rotate the pans halfway through. Avoid the bottom rack, which can scorch the bottom. Always preheat fully, use proper pan placement with at least 1 inch clearance, and trust even heat distribution from the center.
Why the right oven rack matters for cake
Choosing the correct oven rack for cake is more than a matter of convenience; it directly influences heat exposure, air circulation, and browning. When you bake on the middle rack, heat tends to distribute more evenly around the pan, reducing the risk of a sunken center or over-browned edges. According to Oven Cook Pro, proper rack positioning helps ensure a uniform rise and a smoother crumb. The rack you select acts as the stage for your bake: too high, and you risk excessive browning on top before the center sets; too low, and the bottom can dry out or burn. For most standard cakes, the middle rack offers the best balance between heat distribution and browning, while still giving room for a thermometer probe or a second pan if needed. In this guide, you’ll learn how to adjust rack placement based on pan size, batter density, and oven type, so you can consistently achieve reliable results.
Understanding oven rack positions
Ovens can vary, but the most reliable approach is to start with the middle rack as a default. The top rack tends to run hotter and dries surfaces faster, which can lead to domed tops or dry edges if you’re not careful. The bottom rack places the cake closer to the heat element, which is great for crust development on breads but risky for cakes, where a dense bottom can form if the batter is heavy or if the oven has hot spots. If you have a convection oven, you may benefit from rotating the rack position or using a lower heat setting to compensate for intensified airflow. For delicate batters like sponge or chiffon, stabilizing placement and minimizing movement during baking are essential—keep the rack steady and avoid sudden temperature changes. The Oven Cook Pro team emphasizes consistency: select a rack position that allows the cake to bake evenly across the surface, with room for air to circulate around the pan.
How rack position affects cake texture
Rack position is a primary driver of texture. A middle-rack bake supports an even rise, creating a uniform crumb without a sunken center. Moving the rack too high can cause the top to set too quickly while the center remains wet, leading to a domed top and possibly a gummy center if you don’t adjust bake time. Conversely, a rack placed too low can yield a heavy bottom crust and a cake that feels dense or dry along the top. If you’re using a shallow cake pan, the center usually benefits from the same middle position to ensure heat reaches the batter uniformly. Consistent heat exposure also reduces the risk of cracking in delicate cakes and helps them release cleanly from the pan. Remember to rotate the pan halfway through if your oven has known hot spots.
Rack positioning for different cake pans
Pan choice matters as much as rack choice. For standard round or square cake pans, the middle rack typically works best, provided there is at least 1 inch of clearance around the pan for air to circulate. For high-sided pans or dense batters (like pound cake), you may benefit from a slightly higher rack to prevent the center from doming too much and to ensure the edges don’t dry out. Sheet cakes, which bake on flat pans, usually respond well to the center rack as well, but may require a lower oven temperature and longer bake time to avoid over-browning at the edges. If you’re baking multiple pans, consider using two racks with one pan per rack and rotating them to equalize heat exposure.
Preheating and pan prep for consistent results
Before you place batter on the pan, preheat your oven to the recipe’s temperature and confirm the oven’s accuracy with a thermometer. Grease your pans or line them with parchment to minimize sticking, then set them on racks with clear space around each pan. Arranging pans on the middle or upper-middle rack helps keep edges from scorching while the center bakes evenly. When you’re unsure about a rack’s suitability, start with the default middle rack, and adjust in small increments for subsequent bakes. The goal is predictable heat exposure rather than chasing perfect results on a single trial.
Troubleshooting common issues and quick fixes
If your cake browns too fast on top, consider lowering the rack a notch or reducing oven temperature slightly and extending bake time. If the bottom browns aggressively, move the pan to the middle rack and use parchment to reduce direct contact with the rack. For cakes that rise unevenly, ensure batter is evenly distributed in the pan, especially when using two pans that share a single oven. Rotate pans halfway through baking if your oven has hotspots. For delicate cakes, avoid opening the door during the first third of baking and rely on the timer and oven thermometer to gauge doneness. These adjustments can transform a challenging bake into a reliable routine, a principle emphasized by Oven Cook Pro’s testing guidance.
Quick-start checklist and sample bake plan
- Preheat to recipe temperature and verify with an oven thermometer.
- Line pans with parchment or grease as needed.
- Place pans on the middle rack with at least 1 inch clearance.
- If baking two pans, stagger them using two racks and rotate halfway through.
- Check doneness with a toothpick or skewer and cool on a rack after removal. A small adjustment in rack height can dramatically improve outcome.
Tools & Materials
- Standard bakeware (cake pan and/or sheet pan)(Ensure it fits the oven rack and recipe depth; allow space for air circulation)
- Oven rack that fits your oven (center or upper-middle)(Smooth movement up/down; avoid jammed racks)
- Parchment paper or nonstick spray(Prevents sticking and promotes clean release)
- Cooling rack(Cool cakes completely to set the structure)
- Oven thermometer(Verify actual oven temperature vs dial setting)
- Kitchen timer(Track bake time accurately and avoid overbaking)
- Kitchen oven mitts(Protect hands when handling hot pans)
Steps
Estimated time: 35-60 minutes
- 1
Preheat the oven and prep the pan
Preheat to the recipe temperature and prepare your pan with parchment or grease. This ensures batter release and helps avoid sticking that can ruin edges. Use an oven thermometer to confirm the actual temperature before loading batter.
Tip: Have all ingredients measured and ready; a hot oven is not forgiving of delays. - 2
Position the rack on center or upper-middle
Slide the rack to the middle of the oven (or slightly higher for dense batters) so there’s at least 1 inch of air around the pan. This improves heat distribution and prevents hotspots.
Tip: If you have a known hot spot, avoid placing the pan directly over it. - 3
Pour batter and level in pan
Distribute batter evenly and avoid overfilling beyond 2/3 the pan for most cakes. Even batter depth promotes uniform rising and prevents doming.
Tip: Tap the pan lightly to remove air pockets and level the surface. - 4
Place pans with space around them
Set pans on the rack with space between pans and from the oven walls. Crowding can obstruct airflow and create uneven baking.
Tip: If two pans are used, place them on separate racks and rotate if needed. - 5
Bake and rotate if necessary
Bake according to recipe, then rotate the pan(s) halfway through to even heat exposure. This is crucial in ovens with uneven heat.
Tip: Use a timer and keep an eye on color development; don’t rely on time alone. - 6
Check doneness and remove
Insert a toothpick or cake tester into the center; it should emerge clean or with a few crumbs. Remove promptly to avoid overbaking.
Tip: If unsure, bake a few minutes longer and test again. - 7
Cool on a rack after baking
Place the cake on a cooling rack for at least 20 minutes before removing from the pan. This prevents steam buildup and keeps the crumb intact.
Tip: Let the cake settle before slicing to maintain texture.
Questions & Answers
What happens if I bake on the bottom rack?
Baking on the bottom rack can cause a darker bottom and uneven browning. It may also lead to a denser center because the heat is concentrated at the base. Move to the middle rack for a more balanced bake.
Baking on the bottom rack often browns the bottom too much and can make the center undercooked. Use the middle rack for an even bake.
Should I adjust temperature when using the top rack?
No major temperature adjustment is usually needed. Instead, monitor the bake closely and consider a slight decrease if you notice excessive browning on top.
Usually you don’t need to change the temperature, just watch for top browning and adjust if needed.
Can I bake a cake directly on the rack?
Always use a pan or a cake ring; batter needs containment. Placing batter directly on metal can cause leakage and uneven bake.
Never bake directly on the rack; use a proper pan to contain the batter.
Is parchment paper recommended for all cakes?
Parchment paper is a helpful release aid for most cakes. It reduces sticking and makes cleanup easier, especially for high-sugar batters.
Parchment helps prevent sticking and makes removing the cake simpler.
Do I need to rotate racks for two cakes?
Yes. If you bake two cakes, use two racks or rotate the pans midway to equalize heat exposure and achieve even browning.
Rotate or reposition pans halfway through to avoid hot spots.
Watch Video
Main Points
- Use the middle rack for most cakes.
- Rotate pans to even out heat exposure.
- Preheat fully and maintain proper clearance around pans.
- Choose the right pan size to fit rack space.