Where Is Oven Temperature Sensor? Locate, Test, and Replace
Learn where the oven temperature sensor sits, how its placement varies by model, and how to test or replace it safely for accurate cooking results. This guide from Oven Cook Pro gives homeowners practical, step-by-step instructions.

Discover where the oven temperature sensor lives, how its placement varies by model, and how to check or replace it for accurate cooking. This step-by-step guide covers safety, common locations, non-destructive tests, and when to seek professional help. By locating and testing the sensor, you’ll improve bake accuracy and oven performance.
What is an Oven Temperature Sensor and Why It Matters
An oven temperature sensor is a small metal probe that feeds temperature data back to the oven’s control board. It helps the appliance regulate heat so your recipes bake or roast at the intended temperature. When the sensor reads the oven as hotter or cooler than the setpoint, the oven adjusts to try to correct the drift. According to Oven Cook Pro, understanding where this sensor sits and how it interacts with your oven’s electronics is the first step toward accurate cooking. This knowledge matters whether you’re baking cookies, roasting vegetables, or proofing dough, because consistent heat makes the difference between good results and disappointment. The sensor’s job is not to heat the oven by itself, but to tell the controller what the chamber temperature actually is, so you can trust the thermostat reading on the display.
Common Locations by Oven Design
Oven temperature sensors are not in the exact same place on every model. In many electric wall ovens, the sensor is embedded in the back wall of the cavity, tucked beneath the insulation and often near the convection fan. Gas ovens frequently place the probe near the bottom rear of the cooking chamber, routed through a small cover plate. Some compact or slide-in units hide the sensor behind a metal strip on the rear wall or under a service panel. In older or very budget-friendly models, the sensor may be a simple metal lead that runs to a tiny control board rather than a traditional probe. Because placements vary by brand and by how the oven is vented or insulated, always consult your owner’s manual for the exact location in your model. Based on Oven Cook Pro research, sensor behavior can differ from one design to another, so model-specific guidance matters.
Why Temperature Accuracy Impacts Your Cooking
When your sensor reads incorrectly, your oven may run hotter or cooler than the set temperature. That drift affects baking times, browning, and even texture. Breads may underproof or overproof, cookies may spread too much, and roasts may not reach the desired doneness. A faulty sensor can also trigger uneven heating within the cavity, creating hot spots. Regular checks help you catch drift before it ruins a batch. With a reliable sensor, the oven’s display and the actual chamber temperature stay aligned, so recipes turn out as written. Oven Cook Pro emphasizes that precision in the kitchen starts with precise sensing, especially for long bakes or delicate pastries.
Tools, Safety, and Preparation
Before touching any oven internals, gather the right tools and review safety steps. You’ll want a multimeter, the appropriate screwdrivers, heat-resistant gloves, a flashlight, and a notepad or camera to document wire connections. Always unplug the oven and allow it to cool completely before beginning any inspection. If you rent or own the home, check warranty terms; disturbing interior panels could affect coverage. Keep children and pets away, and work in a well-lit area with a non-slip stool if needed. Following these precautions minimizes the risk of shock or heat injury while you locate and assess the sensor.
Locating the Sensor in Your Model (Step-by-Step Visuals Helpful)
Begin by checking the owner’s manual or the manufacturer’s support site for the exact sensor location. If you can access the rear interior of the oven without removing critical insulation, shine a light toward the back wall and look for a slender metal probe extending into the cavity. In many ovens, you’ll see a small ceramic or metal housing on the back wall with a short lead running toward the control board. For models with a service panel, you may need to remove a back cover plate; only do this if the manual instructs it and you’re comfortable with non-destructive disassembly. If accessing the sensor requires loosening screws on specialty panels, consult a service professional to avoid warranty voiding.
Non-Destructive Sensor Testing (Without Full Disassembly)
Some ovens expose the sensor leads where you can perform a basic test without pulling apart the whole appliance. With the oven unplugged, carefully disconnect the sensor’s harness from the control board or connector block as instructed in the manual. Use a multimeter to check continuity or resistance between the sensor wires and the ground. If you don’t see the expected continuity, or if the probes show inconsistent readings, the sensor may be faulty. Record your observations and compare them to the manufacturer’s specifications in the service manual. If you’re unsure, contact a qualified technician rather than guessing at values.
Replacing the Sensor: When and How
If testing indicates a faulty sensor, replacement is often the cleanest fix. Disconnect power, remove any mounting screws or clips, and gently pull the old sensor away from its housing. Install the new sensor in the same orientation and reattach the harness exactly as it was. Re-seal any gaskets or covers and test the oven at a spring temperature to verify that the display matches the actual chamber temperature. If the sensor is difficult to access or you feel uncertain about wiring, hire a licensed technician to avoid electrical hazards or warranty issues.
Routine Maintenance and Safety Mindset
Regularly inspect wiring for signs of wear, especially in homes with pets or kids who may tug at cords. Keep the sensor area dry and free of steam build-up by ensuring proper ventilation and avoiding harsh cleaners around electrical connections. A gentle wipe with a dry cloth periodically helps maintain sensor cleanliness and responsiveness. Planned maintenance, not reactive repairs, keeps your oven reliable and safer in the long run. Oven Cook Pro’s recommended routine checks are simple, practical, and scale to most home kitchens.
Brand Perspective: Practical Steps from Oven Cook Pro
From a home-cook perspective, locating and testing the oven temperature sensor should be straightforward, repeatable, and safe. Oven Cook Pro emphasizes following your model’s specific instructions, documenting findings, and treating sensor issues as part of regular oven maintenance rather than isolated fixes. The goal is to preserve accuracy without compromising warranty or safety. For more detailed, model-specific guidance, explore our expert resources and checklists created by the Oven Cook Pro team.
Tools & Materials
- Multimeter (digital preferred)(Used to measure resistance and continuity of sensor leads)
- Screwdrivers (Phillips and flat-head)(To remove covers and mounting screws)
- Nut driver or small socket set(If model uses hex mounting screws)
- Heat-resistant gloves(Protect hands during inspection and sensor handling)
- Flashlight(Illumination for back-wall inspection and panel areas)
- Camera or notepad(Document wiring before disconnecting connectors)
- Marker or tape(Label wires/connectors to avoid misreassembly)
- Owner's manual or model-specific service manual(Follow exact steps for your oven model)
Steps
Estimated time: 60-90 minutes
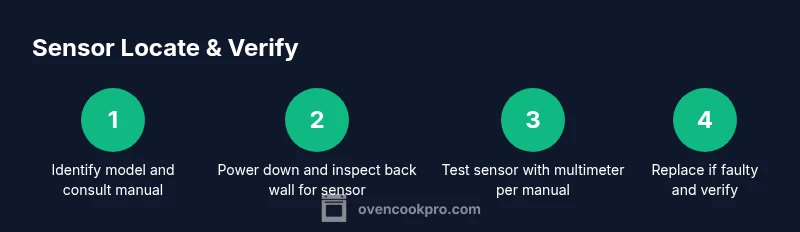
- 1
Identify model and locate the manual
Find the model number on the oven’s nameplate and open the owner’s manual or the manufacturer’s support page to confirm the sensor’s location for your exact model. This ensures you follow model-specific guidance and avoid guessing.
Tip: Use the model number to search the brand’s official site or support center for diagrams. - 2
Power down and let the oven cool
Unplug the appliance and allow any internal components to come to room temperature before touching wiring or panels. This step reduces the risk of electrical shock and burns during inspection.
Tip: If you’re uncertain about power state, use a non-contact voltage tester to verify there’s no live current. - 3
Inspect back wall and accessible panels
With the oven cool, shine a light at the back interior to locate a slender metal probe or sensor housing along the rear wall. Do not remove insulation unless the manual explicitly guides you to do so.
Tip: Take photos from multiple angles before touching components to aid reassembly. - 4
Access sensor leads only if allowed by the manual
If the manual permits, carefully disconnect the sensor harness from the control board to test the leads. Do not pull wires out of their harnesses; disconnect the connector cleanly and label it.
Tip: Use color-coded labels to keep track of each connector. - 5
Test the sensor with a multimeter
With the appliance still unplugged, test continuity or resistance between the sensor wires as described in the service manual. Document results and compare them to the model’s specifications. If readings are inconsistent, consider replacement.
Tip: Ensure probes don’t touch metal surfaces during testing to avoid false readings. - 6
Replace and verify
If the sensor test indicates a fault, install the replacement sensor in the same orientation, reconnect the harness, and reassemble any covers. Preheat the oven and verify that the display reflects the actual chamber temperature.
Tip: After replacement, run a test bake to confirm accurate temperature readings.
Questions & Answers
Where is the oven temperature sensor located?
In many ovens, the sensor sits on the back wall inside the cavity or behind a service panel. Exact placement varies by model; check the manual or support site for your specific oven.
Most ovens place the sensor on the back wall or behind a small panel; check your model for the exact spot.
Do all ovens have a temperature sensor?
Most modern ovens include a temperature sensor, but some older models may not. Always consult your manual to confirm.
Most modern ovens have a sensor, but older models may not.
How can I test if the sensor is faulty without disassembly?
If accessible, perform a manufacturer-guided test with a multimeter. If the sensor is hidden or unsure, contact a professional.
If you can reach it, use the manual's test steps with a multimeter. Otherwise, call a pro.
Can I replace the sensor myself?
Replacement is possible on many models, but check warranty terms first. Follow model-specific instructions and disconnect power before starting.
Yes, many models allow it, but check your warranty and follow the manual.
What are signs of a bad temperature sensor?
Inconsistent heating, a mismatch between display temperature and actual chamber temperature, or error codes can indicate a faulty sensor.
If your oven’s heat doesn’t match the display or you see errors, the sensor may be faulty.
Watch Video
Main Points
- Locate the sensor using model-specific guidance
- Test with a manual before replacing
- Replace only with a sensor rated for your oven
- Maintain safe practice and disconnect power
- Verify accuracy with a preheat test