What Size Cable Is Needed for an Oven? A Practical Guide
Learn what size cable is needed for an oven. This guide covers circuit ratings, conductor gauges, safety, and code considerations for a compliant installation.

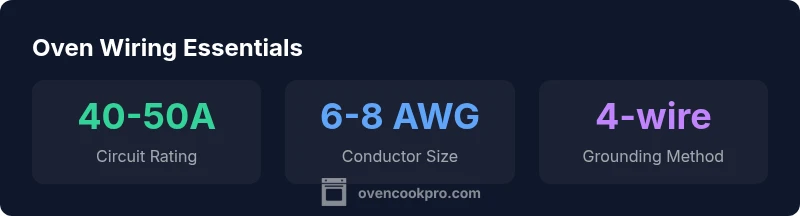
To determine what size cable is needed for an oven, start with the oven's electrical rating and the circuit it will occupy. Most residential ovens require a dedicated 40- or 50-amp circuit, wired with copper cable sized 6 AWG (for 50A) or 8 AWG (for 40A). Always follow the oven manufacturer’s manual and local codes.
Understanding Oven Electrical Requirements
Ovens are typically powered from a dedicated 240V circuit in many homes, though some regions or models may operate at 208V. The most important factor in sizing is the oven’s amperage draw, which is printed on the nameplate and detailed in the installation manual. When you ask, "what size cable is needed for an oven?", you are really determining the correct conductor size and breaker to safely handle peak load. The installation must provide a stable, continuous supply without overloading the panel. Keep in mind that gas ovens still require electrical power for ignition and controls, so even these units depend on a properly sized electrical circuit. Always verify the oven’s requirements against local codes and the manufacturer’s specifications before wiring.
How to Determine the Correct Cable Size
Step 1: Find the oven’s amperage and voltage
Record the nameplate rating and the nominal supply voltage in your area. Many residential ovens specify 30–40A or 40–50A at 240V. The exact figure drives conductor selection and breaker size. If the label is unclear, consult the installation manual or the manufacturer’s technical support. ### Step 2: Choose a suitable conductor For 40A, copper wire in 8 AWG is commonly used; for 50A, 6 AWG is typical. If the run from the panel to the oven is long, consider stepping up the gauge to reduce voltage drop, always keeping within code allowances. Finally, select a breaker that matches the circuit rating and use a 4-wire connection in modern installations. ### Step 3: Plan the routing and protection Run the cable through appropriate conduit or sheathing, with proper strain relief and spacing from heat sources. Avoid shared circuits with other high-draw appliances. The route should minimize junctions and allow easy inspection.
Wire Gauge vs Breaker Size: The Relationship
Conductor size and breaker rating must align with the oven’s load. A larger gauge copper wire can carry more current with less voltage drop, which often enables a higher-rated breaker if the installation conditions permit. Conversely, undersized conductors force the breaker to trip or can overheat the wire. The rule of thumb is: do not select a conductor size based solely on a breaker preference. Instead, match both to the oven’s nameplate rating and the distance between the panel and the appliance. The connection method (4-wire vs 3-wire) also affects grounding and safety considerations.
Common Configurations and Practical Guidelines
In many homes, a dedicated 240V circuit fed by a 40A breaker with 8 AWG copper is common for standard ovens. If the oven is a higher-power model or has multiple heating elements or self-cleaning cycles, a 50A circuit with 6 AWG copper is often more appropriate. For recent installations, a 4-wire system (two hot wires, a neutral, and a separate ground) is standard; older 3-wire configurations may be found in some existing installations but can require a modernization to meet current codes. Always verify the unit’s amperage and voltage requirements, the distance to the panel, and the allowable wire type in your jurisdiction.
Special Cases: Self-Cleaning or High-Power Ovens
Ovens with self-cleaning modes or extra features can momentarily draw more current than the running mode. If you intend to use these features frequently, ensure your circuit and conductor gauge can handle peak loads without overheating or nuisance tripping. In some installations, this means opting for a 50A circuit with 6 AWG copper or an equivalent aluminum option where permitted by code. Always rely on the oven’s manual and a licensed electrician to evaluate peak-load scenarios and avoid undersized wiring.
Code Considerations and Safety
Safety is the overarching concern when sizing oven wiring. A dedicated circuit helps prevent overloads and allows for predictable performance. Follow NEC guidelines and local amendments, and treat any electrical work as a potential hazard. Grounding and correct bonding are essential; ensure a four-wire configuration where required. Use appropriate connectors, strain relief, and protective routing to prevent damage from heat, movement, or moisture. If you are unsure about any step, halt work and consult a licensed electrician to avoid electrical fires or shock hazards.
Planning for Remodels or Upgrades
During a kitchen remodel or appliance upgrade, confirm the electrical service can support an oven on a dedicated circuit. If panel space is limited or the service is near capacity, you may need a service upgrade or a load calculation to determine whether a subpanel is warranted. A professional assessment helps avoid overruns and ensures future flexibility for additional high-draw devices such as warming drawers or induction cooktops. Document all changes for future resale or inspections.
Troubleshooting and What Not To Do
Never upsize romex or cable beyond the oven’s rating without verifying the panel and conductor compatibility. Do not run a high-amperage oven on a shared or undersized circuit. Avoid DIY hacks like bypassing breakers, jury-rigging connections, or altering grounding. If you notice frequent breaker trips, warm outlets, or scorching smells, shut off power at the main and consult a licensed electrician promptly.
Quick Pre-Install Checklist
- Verify oven model nameplate and installation manual.
- Confirm dedicated 240V circuit with correct amperage rating.
- Choose appropriate wire gauge (6 AWG for 50A; 8 AWG for 40A copper).
- Ensure 4-wire grounding is used where required and a proper strain relief is installed.
- Have a licensed electrician inspect all connections and panel capacity before energizing.
Oven wiring basics: typical values and notes
| Aspect | Typical Value | Notes |
|---|---|---|
| Circuit rating | 40-50A | Refer to oven nameplate/manual |
| Conductor gauge | 6-8 AWG copper | Depends on rating; verify local codes |
| Connection type | 4-wire (hot-hot-neutral-ground) | Modern installations require 4-wire; 3-wire may be grandfathered in some cases |
| Voltage | 240V (208V in some regions) | Check supply voltage from panel and oven specs |
Questions & Answers
What size cable is needed for a standard 240V oven?
Most ovens require a dedicated 240V circuit, typically 40A with 8 AWG copper or 50A with 6 AWG copper, depending on the model. Always verify with the oven manual and local codes.
Most ovens use a dedicated 240V circuit, usually 40 or 50 amps with copper wire of 8 or 6 AWG, depending on the model.
Can I reuse existing wiring for a new oven?
Only if the existing circuit meets the oven’s rating and the wiring is in good condition. Upgrades are common when changing models or increasing load, and a licensed electrician should confirm.
Reuse is only okay if the old circuit matches the oven’s rating and is safe to use; otherwise upgrade with professional help.
Does a self-cleaning oven affect wire size?
Self-cleaning modes can draw higher instantaneous current. If you plan to use this feature often, ensure the circuit and conductor size can safely handle peak loads.
Self-cleaning can spike current; check that your wire size and breaker handle those surges.
Are gas ovens wired the same as electric ovens?
Gas ovens still require electrical power for ignition and controls, but they may have different wiring needs. Always consult the installation manual for the exact requirements.
Gas ovens still need wiring for ignition and electronics; follow the manual for specifics.
What is the difference between 3-wire and 4-wire connections?
Modern codes require a 4-wire connection with separate ground. Some existing 3-wire installations may be grandfathered, but upgrading improves safety and bonding.
Most new installs use 4 wires; 3-wire may be allowed in some older cases but check local rules.
What safety steps should I take before starting?
Turn off power at the main, verify the circuit is de-energized, and consult a licensed electrician for final hookup and inspection.
Shut off power, confirm de-energized, and hire a licensed electrician for the hookup.
“"Sizing oven wiring begins with the appliance rating and ends with the breaker and conductor chosen to support the load safely."”
Main Points
- Start with the oven’s amp rating from the nameplate
- Use a dedicated 240V circuit for most ovens
- Match conductor size to the circuit rating (6 AWG or 8 AWG copper common)
- Consult the oven manual and a licensed electrician for final wiring