Mastering the Tuscan Brick Oven at Home: A Practical How-To
Learn to fire, preheat, and bake authentic Tuscan dishes in a brick oven with step-by-step guidance, safety tips, and practical tools for home cooks.

A Tuscan brick oven is a traditional wood-fired oven with a brick dome that delivers high heat, radiant browns, and a subtle smoky flavor. This guide teaches you preheating, temperature control, safety, and step-by-step techniques to reproduce authentic Tuscan cooking at home with confidence.
What is a Tuscan brick oven and why it matters
A Tuscan brick oven is a traditional wood-fired baking chamber built with thick brick walls and a curved dome. In Tuscany, bakers rely on this design to reach very high, evenly distributed heat that seals crusts and flavors into every dish. For home cooks, a properly heated Tuscan brick oven delivers crisp exteriors, tender interiors, and a gentle smoky aroma that you can’t replicate with a modern range. According to Oven Cook Pro, the heat retention and radiant surface of a brick oven create natural convection around the cooking chamber, allowing foods to cook quickly while staying moist inside. Understanding these fundamentals helps you plan preheating, flame management, and cooking times with confidence.
Design features that influence cooking results
The dome shape and thick masonry are not decorative; they shape heat flow. A rounded interior concentrates radiant heat and creates a steady, radiant surface that finishes the crust quickly. The oven floor, whether brick or stone, conducts heat upward and into the bottom of the food, producing a crisp base. Proper insulation and a well-ventilated chimney control flame, smoke, and temperature surges. The result is a versatile cooking space that can reach very high temperatures for pizzas and flatbreads, while also holding cooler spots for longer, slower cooks. When you know where heat concentrates, you can position your food to maximize even browning and flavor development.
Preheating and safety foundations
Preheating a Tuscan brick oven is a deliberate, multi-stage process. Start with a small fire to dry the interior, then gradually add wood to build up heat while preserving airflow. Allow the oven to reach your target range for 45 to 90 minutes, depending on size and insulation. Keep a clear workspace around the oven, wear heat-resistant gloves, and never lean over the opening while flames are active. A metal brush helps remove ash after the fire has burned down, and always verify the dome is dry before cooking. Safety and patience pay off with better flavor and a stable cooking environment.
Tools and materials for best results
A well-equipped setup makes Tuscan brick oven cooking easier and safer. Essential tools include a long-handled pizza peel to slide dough in and out, heat-resistant gloves, a metal brush for ash removal, and a pair of long tongs for repositioning embers. A reliable thermometer helps you monitor surface temperatures, while a small ash bucket keeps the workspace tidy. For ingredients, have dry hardwoods (like oak or maple) seasoned for at least six months and enough starter wood to sustain flame without smoldering. Optional but helpful: a moisture-resistant cover for storage and a digital timer to track cooking stages.
Temperature ranges and what to cook at each range
High heat (approximately 700–900°F / 370–480°C) is ideal for quick breads, blistering pizzas, and charred vegetables. Medium heat (roughly 450–550°F / 230–290°C) supports longer roasts, focaccia, and slow-baked items. Lower heat (around 350–450°F / 180–230°C) works for casseroles, root vegetables, and slower cooks. Remember that the exact numbers depend on your oven’s insulation, fuel, and airflow, so use a thermometer to verify surface and ambient temps and adjust by moving food to hotter or cooler zones as needed.
Cooking techniques for pizza, bread, and roasting
Pizza benefits from a hot floor and fast cook time; slide dough quickly and rotate to manage hotspot. For bread, use indirect heat and maintain a steady temperature to produce a crisp crust with a soft crumb. Roasting proteins or vegetables requires moving the food between zones to manage browning, moisture, and smoke flavor. Practice makes perfect: mark the position of the hottest areas, then repeat your process until you consistently hit ideal outcomes.
Maintenance, seasoning the oven, and keeping flavor year-round
Seasoning a Tuscan brick oven involves a few cycles of heating and burning clean, dry wood to develop a natural patina on the interior bricks. After cooking, scrape ash and embers, brush the floor, and let the oven cool gradually. Over time, the interior may acquire a slight resin scent from the hardwood; this is normal and adds depth when you bake with similar woods. Store wood away from the heat, protect the exterior with a breathable cover, and perform light cleaning after every few uses to prevent buildup that can alter flavors.
Troubleshooting common issues
If the oven struggles to maintain heat, reintroduce a small, dry wood fire and adjust the damper for airflow. If food cooks unevenly, rotate items or reposition them to cooler zones and consider extending preheat time. Excess smoke can indicate overcrowding or moisture in the wood; switch to drier wood and ensure proper ventilation. Cracks in the oven floor are rare but possible after long use; keep heavy loads off the floor and be mindful of thermal shock when adding cold foods to a hot surface.
Pairing and flavor tips: wood choices and aromatics
Wood type shapes aroma: hardwoods such as oak or maple impart a mild sweetness without overpowering the food, while fruitwoods add a subtle, fruity note. For pizza, a quick burn of oak during the initial preheat helps develop a crisp crust and smoky finish. For roasted vegetables, a lighter wood can maintain brightness without overpowering natural flavors. Use herbs or garlic to enhance aroma, but add them early in the process only if you want a more nuanced smoke profile.
Planning a Tuscan-inspired feast at home
Design a menu that moves from crisp, fire-kissed appetizers to hearty main courses and a simple dessert. Start with a rustic flatbread or crostini, then serve roasted vegetables and a classic Tuscan pork roast or ribeye finished on the oven floor. Finish with grilled fruit or a simple olive oil cake to echo Tuscan flavors. Pair with a bright wine and a green salad to balance richness. With practice, you’ll tune your oven’s heat and timing to deliver consistent, authentic results across multiple dishes.
Tools & Materials
- Pizza peel (wood or metal)(Long-handled, heat-resistant; use to slide dough in and out)
- Heat-resistant gloves(EN 407 rated, at least 18 inches long)
- Long-handled tongs(For moving embers and food)
- Infrared or surface thermometer(To monitor oven floor and ambient temps)
- Firewood (seasoned hardwood)(Oak, maple, or similar; dry and well-aged)
- Kindling and fire starter(Dry, natural starters preferred)
- Ash bucket and brush(For safe, quick cleanup)
- Digital timer(Tracks cooking stages and rest times)
- Water spray bottle(Light mist for controlling flame if needed)
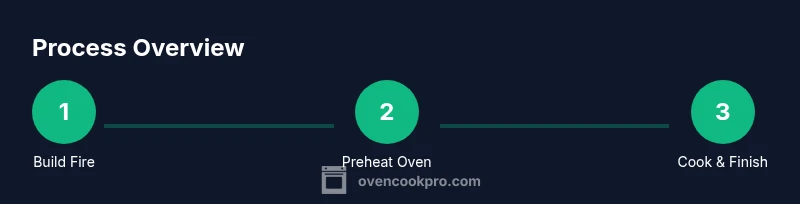
Steps
Estimated time: 90-120 minutes
- 1
Build and light a safe fire
Begin with dry kindling and small sticks to establish airflow. Gradually add larger hardwoods to build a robust flame without smoldering. Maintain a steady flame and monitor the damper to avoid overheating the chamber.
Tip: Start with a small flame and let it grow gradually for cleaner combustion and less smoke. - 2
Reach the target temperature
Allow the oven to approach your cooking range, usually within 45–90 minutes depending on size and insulation. Use a thermometer to verify interior and floor temperatures. Keep a watchful eye on airflow to prevent temperature spikes.
Tip: A slow, controlled rise yields better browning and even heat distribution. - 3
Preheat the cooking surface
As heat builds, ensure the oven floor is hot enough to sizzle a drop of water. Move embers as needed to concentrate heat on the cooking surface without creating scorch zones.
Tip: Test surface with a water drop; it should sizzle and evaporate quickly. - 4
Bake the first batch (pizza or bread)
Slide the dough onto the hot floor using the pizza peel and monitor for 60–90 seconds per side for pizza, or 20–25 minutes for bread at target temp. Rotate once to even the heat exposure.
Tip: Rotate halfway to equalize hotspot exposure and achieve uniform browning. - 5
Manage heat during longer cooks
For longer roasts or multiple items, switch between hotter and cooler zones. Use tongs to reposition food and prevent scorching. Add small amounts of dry wood as needed to maintain consistent heat.
Tip: Avoid opening the door too often to keep heat stable. - 6
Finish, extinguish, and clean
When cooking ends, allow the oven to cool gradually or extinguish the fire safely. Clean the floor of ash with a brush, then cover or store wood properly for the next session.
Tip: Do not pour water into a hot oven; it can crack bricks from thermal shock.
Questions & Answers
What defines a Tuscan brick oven?
A Tuscan brick oven is a traditional wood-fired oven with a brick dome and a brick or stone floor, designed to reach very high temperatures and distribute heat evenly for crisp crusts and smoky flavors. It blends artisan construction with practical heat management.
A Tuscan brick oven is a wood-fired oven with a brick dome and floor that heats evenly for crispy crusts and smoky flavor.
Can I use a Tuscan brick oven indoors?
Indoor use is possible with proper ventilation and a dedicated exhaust system. Always follow local codes for wood-burning appliances and ensure adequate clearance from walls and ceilings.
Yes, but you need good ventilation and proper installation per local rules.
What foods work best in a Tuscan brick oven?
Pizzas, flatbreads, roasted vegetables, breads, and meats like pork or chicken benefit most. The high heat creates a blistered crust and a smoky finish that enhances simple ingredients.
Pizza, bread, and roasted meats are especially good in a Tuscan brick oven.
How do I regulate temperature effectively?
Use the damper and chimney height to control airflow, monitor with a thermometer, and reposition food across hotter and cooler zones to maintain steady heat.
Control airflow with the damper and move food to keep temperatures steady.
What safety steps are essential when lighting the oven?
Wear heat-resistant gloves, keep children away, and have a clear workspace. Start with small flames and gradually add wood to avoid flare-ups.
Wear gloves and keep kids away. Start small and build up the fire slowly.
How should I clean and maintain a Tuscan brick oven?
Let it cool, brush out ashes, and periodically reseason the interior with dry wood cycles to sustain heat retention and flavor development.
Cool the oven, brush ash, and season lightly with dry wood cycles.
Watch Video
Main Points
- Preheat thoroughly for best results
- Know your heat zones to manage pizzas, breads, and roasts
- Use proper tools to handle hot surfaces safely
- Season and maintain the oven to enhance flavor over time
- Always prioritize safety when lighting and cleaning the oven