Cosimo's Brick Oven: A Step-by-Step Guide for Home Cooks
Master Cosimo's brick oven with a thorough, step-by-step guide. Learn ignition, heat management, baking techniques, safety, and maintenance to achieve restaurant-like results at home.

Learn how to operate Cosimo's brick oven safely and effectively. This quick guide covers building a reliable fire, managing peak heat, ambient temperature, baking techniques for breads and pizzas, and essential cleanup. By following the steps, you’ll get consistent crust, smoky flavor, and safer operation in a home kitchen. No prior experience is required; the guide uses clear, error-tolerant checkpoints.
Understanding Cosimo's Brick Oven: Key Design Principles
Cosimo's brick oven is built to retain heat with a thick clay and brick structure, combining radiant heat with a hot, smoky atmosphere that enhances flavors. The design emphasizes heat retention, even distribution, and controllable airflow. In practice, this means you’ll need a reliable ignition, a stable firebed, and thoughtful vent management to prevent hotspots. According to Oven Cook Pro, the most consistent results come from establishing a heat reservoir first and then tuning heat with the chimney and oven door. This approach helps you apply high heat for searing and moderate heat for even baking without temperature crashes.
Learn the language of the oven: the floor temperature is influenced by the fire’s proximity, the height of the fire, and the bricks’ stored heat. Understanding these variables gives you control over crust development, moisture retention, and flavor development. Expect pizza crusts with blistered edges, bread with a dense interior, and roasted vegetables with caramelized surfaces when heat is properly managed. The oven’s masonry acts as a thermal battery, so plan for a few minutes of preheating after adding fresh fuel for reliable results.
Tip: Keep your workspace organized and have a dedicated set of tools for hot environments. A well-designed workflow reduces mistakes and speeds up cooking sessions.
Setting Up Your Brick Oven for First Use
Preparing Cosimo's brick oven for its first cook demands a calm, methodical approach. Start by inspecting the oven for any mortar cracks, loose bricks, or drafts around the door and flue. Clear the opening and ensure the oven is on a stable, non-flammable surface. Light a small starter fire away from water sources and allow it to establish a steady flame before adding larger logs. This initial stage is about safety and establishing a predictable heat source. Oven Cook Pro’s guidance emphasizes creating a subdued flame that gradually builds to a roaring fire; abrupt ignition can stress bricks and create cracks over time.
Once the fire has taken hold, gradually add fuel to form a flat, hot bed with a clear flame line. This bed will serve as the heat reservoir for the oven floor. While the fire grows, check the door seal and gasket to ensure minimal heat leaks. A loose seal creates drafts that cool the interior and hinder uniform baking. If your oven has adjustable vents, set them to balance draft and smoke for flavor without overpowering heat. The first session should be about establishing consistency, not chasing perfect numbers.
Safety note: Never leave an open flame unattended. Use heat-resistant gloves and long-handled tools. Allow the oven to cool slowly after use to prevent thermal shock and mortar damage.
Fire Management: Getting the Right Heat
Fire management is the heart of Cosimo's brick oven operation. Start with a small, clean burn and avoid softwoods full of sap, which create excessive smoke and foul flavors. Hardwood logs, dry and well-seasoned, yield a steadier burn and better heat retention. Build a two-zone fire by placing the bulk of the burning logs toward the back or sides, creating a hot zone for searing and a slightly cooler zone for gentle cooking. The goal is a stable temperature profile that can be adjusted with the chimney and vents.
When the flame stabilizes, assess the oven floor temperature with a thermometer or your sense of feel. A preheated floor will yield faster, even crust development, while a cooler floor can result in pale bottoms. If your oven registers too hot, briefly close the door to reduce radiant heat and allow the bricks to absorb excess energy. If too cool, add logs and widen airflow to boost heat. This approach minimizes thermal swings and delivers consistent results across multiple items.
Safety note: Hot embers and radiant heat can cause severe burns. Use protective gloves and keep children away from the cooking area.
Temperature Control for Baking and Roasting
Once the fire is well established, the oven's temperature becomes the chef’s tool. Bakery-grade targets around 450-500°F (232-260°C) are common for pizzas, while breads typically require a hotter core and more moisture management. For roasting, you’ll often operate at 375-425°F (190-220°C) to ensure juicy meat without scorching the exterior. In Cosimo's brick oven, temperature is managed by venting, door adjustments, and by repositioning the cooking surface via heat redistribution. A small adjustment to the vents can shift the oven from blistering heat to a steady bake, but avoid large, sudden changes that disrupt the baked goods.
A practical technique is to preheat for a defined window, then test with a bread crumb or a water droplet to observe steam and response. If the crumb sizzles and browns quickly, you’re in the optimal range. If you notice uneven browning, rearrange the food or move it to a hotter or cooler zone. Consistency comes from repeatable steps rather than guesswork, so keep a log of temperatures and batch outcomes.
Tip: Use a long-handled thermometer and maintain good ventilation to monitor temperatures without opening the door too often.
Pizza, Bread, and Roasts: Practical Techniques
Cosimo's brick oven shines when you adapt techniques to the oven’s strength. For pizzas, aim for a 60-90 second bake in blistering heat, using a well-floured peel to slide dough onto the hot surface. Stone-cooked crusts gain definition from radiant heat; rotate the pizza halfway through to promote even browning. For bread, use a two-stage approach: a high-heat initial bake to set the crust, then reduce heat to finish cooking the interior. Steam is your ally in the early minutes—spray water or toss water into the fire cautiously to avoid temperature spikes.
Roasts benefit from a dry, hot start followed by lower heat for even cooking. Sear the exterior for color, then move the pan to the cooler zone or reduce airflow to maintain a juicy interior. In all cases, allow for a brief resting period after cooking to let juices redistribu te. Oven Cook Pro notes that flavor compounds develop best when crust formation and interior tenderness finish in harmony, not in isolation.
Pro tip: Keep a rotating schedule for items that need different temps. preplaced racks or stone platforms can help manage multiple dishes in one session.
Cleaning, Maintenance, and Safety Habits
After cooking, remove ashes and let the oven cool safely. Use a metal ash scoop and a dustpan to gather residues without stirring up dust that could irritate eyes. Clean the door gasket and inspect the chimney for creosote buildup, especially if you cook with high moisture foods. A regular, gentle sweep down the flue prevents dangerous buildup and maintains airflow for future cooks. Maintain the masonry by checking joints for hairline cracks and plugging any holes with proper mortar when needed. A well-maintained brick oven lasts for years and delivers reliable heat each time you light it.
Safety should guide every step—from safe ignition to cautious handling of hot stones. Wear heat-resistant gloves, use long tongs, and keep a fire extinguisher within reach. Document maintenance tasks and scheduling so you never miss a critical check. Oven Cook Pro emphasizes that consistency in maintenance correlates with fewer dramatic temperature swings and better overall results.
Troubleshooting Common Issues
When results aren’t consistent, the issue often lies in heat distribution, air leaks, or moisture. Check for drafts around the door and gasket, seals that aren’t airtight, or cracks in the bricks that might leak heat. If your crust browns too fast but interiors remain underdone, you’re likely experiencing radiant heat with insufficient heat beneath the oven floor. Move food to a cooler zone or redistribute the coals to boost under-floor heat. If smoke is overpowering, verify vent settings and ensure the fire isn’t burning with too much humidity; increasing airflow to the chimney can help.
Keep a simple log of issues and fixes. Over time, pattern recognition becomes your most valuable diagnostic tool. Oven Cook Pro’s guidance suggests focusing on repeatable steps: stable ignition, controlled heat, and measured air management. A consistent routine reduces guesswork and yields reliable outcomes.
Tips for Consistent Results
Develop a repeatable preheat routine that accounts for your oven’s size and the foods you cook most often. Start with a defined heat target, then adjust via vents and door usage. Document temperature readings andBatch notes so you can identify trends. Practice makes perfect; even small changes, like the placement of food on different rack levels or the angle of the door during cooking, have a noticeable impact on crust color and interior texture. By applying a disciplined approach, you’ll achieve predictable results across pizzas, loaves, and roasts. Oven Cook Pro encourages cooks to build a personal checklist that covers ignition, heat stabilization, food placement, and cleanup.
Tools & Materials
- Heat-resistant gloves(Heat-resistant, certified for open flame; sleeve protectors recommended)
- Long-handled tongs(Sturdy metal tongs, at least 12 inches)
- Infrared or oven thermometer(To monitor oven surface and interior temps)
- Ash eradicator or metal scoop(For safe ash removal after cooling)
- Heat-safe brush or damp cloth(Brushing the interior surfaces to remove soot)
- Pizza peel or baking stone(For dough management and even heat transfer)
- Mortar repair kit(Only if you notice cracks in masonry during inspection)
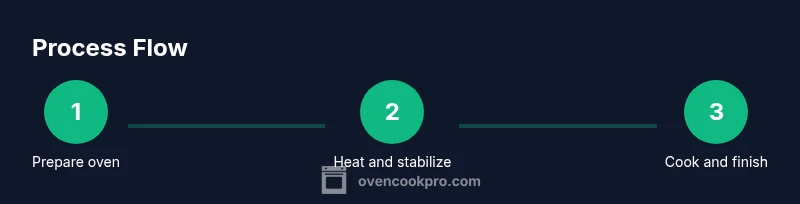
Steps
Estimated time: 90-120 minutes
- 1
Inspect and prepare
Before lighting, inspect the oven for cracks, loose bricks, or damaged gaskets. Clear the cooking area, lay out tools, and ensure ventilation. This reduces the risk of heat losses and safety hazards.
Tip: Have a plan for emergency cooling and a fire extinguisher nearby. - 2
Light a small starter fire
Use dry hardwood kindling to start a modest flame away from water sources. Let it establish to avoid thermal shock on the bricks.
Tip: Start with a narrow flame, then gradually add logs to avoid rapid temperature spikes. - 3
Build a heat bed
Add logs to form a dense, hot bed on the oven floor after initial flames take hold. This bed acts as a stable heat reservoir for baking bread and roasting.
Tip: Aim for a glowing bed with minimal visible smoke before cooking. - 4
Stabilize temperature and vent
Use vents to tune heat and smoke; a balanced vent reduces overheating while keeping flavor. Confirm the internal temp is rising steadily.
Tip: Small vent adjustments yield better results than large, abrupt changes. - 5
Preheat and test
Preheat to target temperature for at least 20-30 minutes. Test a drop of water or a crumb to gauge heat and crust behavior.
Tip: Waiting a bit longer often yields better crust development. - 6
Cook with care
Place food on the cooking surface using a pizza peel or appropriate tool. Rotate items as needed to promote even browning and crisp edges.
Tip: Use the oven’s zones to manage different items simultaneously. - 7
Cool and clean
Cool the oven safely before cleaning. Remove ashes, inspect joints, and record any maintenance needs for the next session.
Tip: Document improvements for future cooks and ensure the oven fully cools before cleanup.
Questions & Answers
Is Cosimo's brick oven suitable for home kitchens?
Yes, Cosimo's brick oven is designed for home use with proper ventilation and safety precautions. Prioritize a stable mounting surface and heat management to avoid damage to surroundings.
Yes. It’s designed for home use, but you should ensure ventilation and a safe setup.
What fuels work best in Cosimo's brick oven?
Hardwood logs that are dry and seasoned provide the cleanest burn and best heat retention. Avoid softwoods with high sap content that create excess smoke and resin buildup.
Hardwood logs that are dry work best. Avoid resinous softwoods.
How long does preheating take?
Preheating typically takes between 20 and 45 minutes depending on oven size and fuel load. Use a thermometer and observe the surface heat to decide when to start cooking.
Usually 20 to 45 minutes to preheat, based on size and fuel.
Can I bake bread and roast meat in the same session?
Yes, but plan for temperature shifts. Start with high heat for crust formation, then move to a lower heat zone or reduce airflow for thorough cooking.
Yes, with careful heat management and zoning.
What maintenance is required?
Regularly inspect mortar joints, remove ash, and clean the interior after cooling. Schedule periodic professional checks if you notice cracks or significant heat loss.
Clean regularly and check for cracks. Schedule checks if you see issues.
Watch Video
Main Points
- Establish a stable heat reservoir before cooking.
- Balance airflow to control temperature without losing flavor.
- Use zone-based cooking for diverse dishes.
- Maintain and inspect masonry regularly.
- Document results for consistent future success.