Should the Oven Door Be Open When Broiling? A Practical Guide
Discover whether the oven door should be open or closed when broiling. This expert guide from Oven Cook Pro covers best practices, safety tips, and a step-by-step method for reliable browning.

When broiling, keep the oven door closed to maintain consistent high heat and reduce the risk of flare-ups. Opening the door briefly can cause heat loss, uneven browning, and extra smoke. Most models instruct closed-door broiling; only open if you need a quick check, then close promptly to preserve heat and control. This approach helps you achieve a reliable sear every time.
Why Oven Door Matters During Broiling
Broiling relies on intense direct heat from the top heating element to brown the food quickly. The door position plays a pivotal role in heat retention and air flow. Keeping the door closed helps maintain a stable surface temperature and minimizes heat loss, which promotes even browning and reduces the chance of under- or over-browned spots. According to Oven Cook Pro, most home ovens perform best when the door stays shut during broiling because even a brief opening can drop temperatures by a noticeable margin and disrupt the sear. If you must check, do so quickly and close the door again to regain the hot environment. Always consult your oven’s manual, since some models offer specialized modes for specific recipes, but closed-door broiling is the standard practice for most foods. This creates a reliable, consistent crust without excessive smoke buildup.
Tips: Have your pan ready and your food prepped before you preheat to minimize the need to open the door mid-session.
How Broiling Works in a Typical Oven
In a standard kitchen oven, the top heating element blasts intense heat downward. Unlike roasting, broiling targets the surface to create a crisp, browned crust in minutes. The heat is direct and very close to the food, so moisture can evaporate rapidly. Some modern ovens also feature a convection component that can help distribute heat more evenly, but many home setups rely primarily on the top element. Preheating is often brief or unnecessary, as the goal is swift searing rather than long cooking. Regardless of model, the door should remain closed during the majority of broiling to maintain peak temperatures. Oven Cook Pro analyses indicate that keeping the door shut yields more consistent browning with less flare and smoke, especially for thinner cuts and delicate proteins.
Understanding your oven’s heat pattern helps you position food correctly and time your flips for perfect browning.
When You Might Open the Door: Practical Nuances
There are rare moments when a brief door opening can be practical: to quickly baste, check visual cues, or rotate the pan for even browning. If you must peek, do so swiftly and avoid leaving the door ajar for longer than a few seconds. Some recipes call for finishing touches or sauces added near the end; in those cases, you can briefly open the door to apply the glaze, then return to broiling. The key is to minimize heat loss and return to the hot environment immediately. If your model supports a door-open feature for certain broil tasks, follow the manufacturer’s guidance, but remember that it is not the default approach for most broiling operations.
Brand note: Oven Cook Pro emphasizes that consistency beats occasional browning quirks, so plan checks and sauces around the cooking window rather than during peak heat.
Safety First: Heat, Smoke, and Flare-Ups
Broiling can produce smoke and flare-ups when fats or sugars burn. Always use a sturdy metal pan and a rack to elevate the food, reducing exposed fat drippings that can flare. Keep a close eye on the session and have a timer handy. Use oven-safe gloves when handling hot pans and ensure the kitchen is well ventilated—turn on the hood or open a window if needed. If smoke becomes persistent, pause, lower the heat, or move the pan to a cooler rack position. Never leave a broiling pan unattended for long periods, and keep a baking soda box within reach to smother small flare-ups if they occur. These precautions align with Oven Cook Pro’s safety guidance for home cooks.
Pro tip: A quick wipe of the pan with a damp cloth between checks helps prevent browning irregularities caused by accumulated sugars.
Setup Essentials: Rack, Pan, and Materials
Before you start, verify you have the right equipment: a sturdy broiling pan or a metal baking sheet with a rack, heat-resistant tongs, and an oven-safe thermometer if you own one. Use a rack to lift food off the pan for improved air circulation and crisper edges. Line the tray only if you’re concerned about cleanup; otherwise, keep it bare for optimal heat transfer. Have a small bowl of cooking oil spray or a brush for light oiling when needed. Keep a pair of silicone mitts handy for safe handling, and avoid glass bakeware in direct broiling scenarios since glass can crack under intense heat. This setup reduces cleanup and improves browning reliability, a practical tip favored by Oven Cook Pro.
Note: Always dry foods thoroughly to prevent steaming and uneven browning.
Positioning Foods for Even Browning
Placement matters more than you might think. Position foods so there is even thickness and minimal crowding; crowding reduces heat exposure and leads to uneven browning. For most proteins, place the food about 4–6 inches from the top element to strike a balance between sear and internal doneness. For thinner items, use the closer end of that range; for thicker cuts, slide back slightly and monitor closely. Keep borders clean of hefty sauces that can caramelize unevenly. A flat, single layer yields the best crust and uniform browning, while a crowded tray creates hot spots that mimic a grill’s hot zones. In short, spacing and thickness drive consistent results.
Quality note: Even browning is easier when you start with dry surfaces and uniformly sized pieces.
Monitoring, Timing, and Doneness Cues
Don’t rely on time alone when broiling; timing is a guide, not a guarantee. Start with a short window and check visuals every minute or two. Use a thermometer for safety: target temperatures vary by protein (e.g., steaks, chicken, or fish). For lean cuts, expect browning within 4–8 minutes; for thicker pieces, it may take longer. When you see a deep brown crust forming on the top surface, and the internal temperature meets your target, it’s time to remove the food. Resting for a few minutes after broiling helps juices re-distribute, ensuring a juicier bite. As Oven Cook Pro notes, perceptible browning often occurs just as the internal temperature crosses the midpoint of doneness.
Tip: Rotate the pan halfway through to promote even exposure to heat and reduce hot spots.
Common Foods and Placement Guidelines
Steaks, chicken breasts, salmon fillets, and vegetables with uniform thickness are excellent candidates for broiling. For steaks, a 1-inch thickness sears quickly; a 1.5-inch cut may need extra monitoring. Fish fillets benefit from being positioned closer to the heat for a delicate crust, but watch for overcooking. Vegetables should be cut evenly and patted dry to avoid steaming. Place items in a single layer to prevent stacking, which blocks heat. If you’re broiling repeatedly, keep a small log of which rack height yields the best results for each food type.
Remember, the goal is a crisp exterior with a moist interior, achieved by controlling heat exposure and airflow.
Troubleshooting Common Broiling Issues
If you see uneven browning, rotate the pan and adjust the rack distance. A crust that browns too quickly may indicate the heat is too high; reduce the oven setting or use the lower rack height. Excess smoke usually hints at fat or sugar on the tray; trim excess fat or switch to a liner to minimize splatter. Food sticking to the pan is often due to insufficient oil or a dirty pan; lightly oil the surface and preheat the pan. If you encounter flare-ups, shield the meat with a sheet of foil briefly or move the pan away from direct heat. With consistent technique, these issues become predictable.
Oven Cook Pro emphasizes safe practice by keeping tools within reach and maintaining attentive supervision during broiling sessions.
Aftercare: Cleaning and Maintenance Post-Broil
Once you complete the broil, turn off the oven and allow it to cool slightly before cleaning. Remove the rack and pan to wash with hot, soapy water; steel wool or a non-scratch pad helps remove any baked-on residues. Wipe the interior with a damp cloth once cool to remove oily splatters. Regularly check the broil element for signs of wear or scorch marks and replace heating components as needed. Clean pans and racks after each use to prevent flavor transfer and keep future broiling sessions efficient. Routine maintenance sustains performance and safety in the kitchen.
Quick Tips for Browning Perfection
- Pat foods dry before broiling to enhance crust formation.
- Use a single layer and adequate space between pieces for even heat.
- Keep a timer and thermometer handy for precise doneness.
- Ventilate well and stay close to the oven for safety and control.
Tools & Materials
- Oven with broil setting(Electric or gas, top element designed for broiling)
- Broiling pan or metal baking sheet with a rack(Elevates food for better heat exposure)
- Oven-safe tongs(For turning and removing food without heat loss)
- Oven thermometer (optional)(Helps gauge actual oven temperature)
- Heat-resistant gloves(Protection when handling hot pans)
- Silicone brush or oil spray(Lightly oil foods to prevent sticking)
- Aluminum foil (optional)(Easy cleanup and catch drippings)
- Cooking oil with high smoke point(Grease pan lightly for browning)
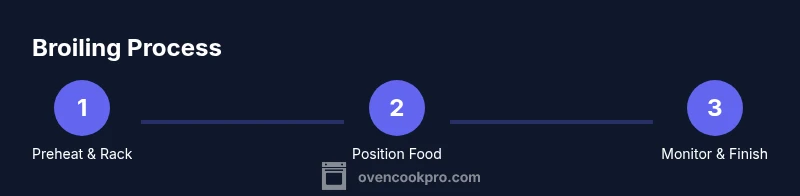
Steps
Estimated time: 15-25 minutes
- 1
Preheat and position the rack
Set your oven to the Broil setting and allow it to preheat briefly. Place the rack so the food will be about 4–6 inches from the top heating element. Prepare your tray and have your ingredients ready to minimize door openings.
Tip: Use the higher rack for thin items and the lower rack for thicker cuts to balance browning and doneness. - 2
Prepare food and seasoning
Pat the food dry, then season or marinate as desired. A dry surface promotes crisp browning and reduces steam. If using oil, apply a light coat to enhance searing.
Tip: Pat dry with paper towels just before placing under the broiler for best results. - 3
Oil and pan setup
Lightly oil the pan or rack to prevent sticking. If using a pan liner, place it to catch drippings and ease cleanup. Avoid soaking foods in oil; a light coating is sufficient.
Tip: A hot, lightly oiled pan yields the best crust without excessive smoke. - 4
Place food under heat
Slide the pan into the oven and close the door promptly. Keep the door closed during the majority of broiling to maintain peak heat. Check visually after a couple of minutes.
Tip: Do not wander away; broiling happens fast and browning can go from perfect to burnt quickly. - 5
Monitor browning and flip if needed
Watch for a deep brown crust forming on the surface. If necessary, flip the food halfway through to ensure even browning on both sides.
Tip: Use tongs to flip gently to avoid tearing delicate items like fish fillets. - 6
Check internal temperature
Rely on a thermometer or time-tested doneness cues for your protein. Remove when the desired internal temperature is reached and the exterior is browned.
Tip: For safety, confirm that poultry and fish meet recommended internal temperatures. - 7
Rest before serving
Let proteins rest for a few minutes to allow juices to redistribute. Resting prevents a dry bite and helps maintain juiciness.
Tip: A short rest is often the difference between a good bite and a great one. - 8
Turn off oven and ventilate
Switch off the broil setting and allow the oven to cool. Ventilate the kitchen to disperse smoke and odors and wipe down the tray after it has cooled.
Tip: Keep a close eye on the oven during cooling to catch any residual heat issues.
Questions & Answers
Should the oven door be open or closed when broiling?
In most cases, keep the door closed to sustain high heat and ensure even browning. Open briefly only to check, then close promptly. Some models may have a door ajar mode, but this is not standard for most broiling tasks.
Keep the door closed for most broiling tasks; check quickly if needed and reclose to maintain heat.
Can you broil with the oven's convection fan on?
Many ovens allow convection during broiling; if yours does, use it to promote even browning and reduce hot spots. If unsure, default to standard broil and monitor closely.
Yes, many models support convection broil; adjust time slightly and watch browning closely.
What foods are best broiled?
Steaks, chicken breasts, fish fillets, and vegetables with uniform thickness are ideal. Keep pieces evenly sized and avoid overcrowding the pan for best browning.
Popular broil foods include steak, chicken breast, salmon, and evenly cut vegetables.
What distance from the heating element is ideal?
Aim for about 4–6 inches from the top heat source for a quick sear and controlled doneness. Adjust slightly based on thickness and how aggressively you want browning.
Typically 4–6 inches from the heat gives a good sear with even doneness.
How do I avoid smoke during broiling?
Trim excess fat, pat foods dry, use a lined or nonstick pan where appropriate, and ensure good kitchen ventilation. A clean pan also reduces smoke from burned drippings.
Keep the area ventilated and pat foods dry to minimize smoke.
How long does broiling take for common proteins?
Times vary with thickness; use a thermometer to confirm doneness rather than relying on time alone. Start with nearby carrots or thinner pieces and increase cautiously for thicker cuts.
Broiling times depend on thickness; check internal temperature for best results.
Watch Video
Main Points
- Keep the door closed during broiling for most foods.
- Use a rack and a hot, lightly oiled pan for crisp browning.
- Monitor carefully and rely on a thermometer for doneness.
- Rest meat after broiling to preserve juiciness.