Should Your Oven Be Flush with the Countertop? A Practical Guide
Learn whether an oven should sit flush with the countertop, plus step-by-step guidance on alignment, clearance, safety, and installation options for a seamless kitchen.

Should oven be flush with countertop? In most kitchens, yes, a flush installation creates a clean, integrated look and minimizes gaps where dust collects. The key is proper clearance for heat, ventilation, and door movement, plus sturdy cabinet support. If your oven requires an adjustable trim kit, use it to achieve a flush finish. A misaligned oven can cause door binding and heat issues, so verify with a level and plan for shims if needed.
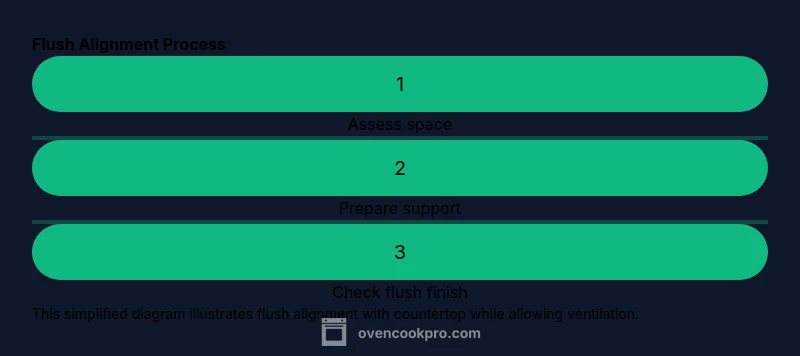
Why flush alignment matters
According to Oven Cook Pro, the decision to run an oven flush with the countertop affects both aesthetics and function. A flush install removes visible gaps that can collect dust and crumbs, creates a seamless kitchen line, and often makes the appliance feel like a built-in feature rather than a freestanding unit. More importantly, flush alignment can improve airflow around the appliance, which supports even cooking and reduces hot spots near cabinet edges. However, this alignment must balance practical factors such as ventilation, heat dissipation, and the oven’s mounting requirements. Before committing to a flush finish, map out the space, note any protruding trim, and decide whether a trim kit or furring strips are necessary to achieve a precise flush surface.
Aesthetics and Function: Visual Continuity
A flush oven blends with countertops and cabinets, yielding a cohesive kitchen look. When the face of the appliance sits at the same plane as the counter, it minimizes visual breaks that can interrupt the design. This uniformity is particularly important in open-plan kitchens where sightlines run from the prep area to dining spaces. To maximize visual harmony, pair the flush setup with matching edge profiles on your countertops and a coordinated cabinet finish. The result is a kitchen that reads as a single, integrated unit rather than a collection of separate pieces. Ensure handles, control panels, and door fronts align with the surrounding cabinetry for a high-end, professional appearance.
Ventilation, Heat, and Safety Considerations
Ventilation is a critical factor in flush installations. If the oven vents through its rear or sides, ensure there is adequate clearance to prevent heat buildup in cabinetry. In many cases, manufacturers specify minimum setback distances from walls, flooring, and upper cabinets to maintain safe temperatures and prevent fire risk. When your oven sits flush with countertops, you must confirm that the venting path remains unobstructed and that any heat-sensitive materials stay out of the potential heat plume. If you’re uncertain, refer to the appliance’s installation manual and consult a licensed professional to verify ventilation adequacy and electrical or gas connections.
Measuring Your Space: Clearance and Fit
Precise measurements are the backbone of a successful flush install. Start by measuring cabinet depth, countertop overhang, and the oven’s mounting height. Check the manufacturer’s specification for recommended clearances around the appliance, especially at the top, sides, and rear. Use a level to confirm that the oven’s face is perfectly plumb and that the countertop surface is even. If the oven sits a fraction too far forward or back, use shims or an adjustable mounting rail system to achieve a true flush finish. Remember: small misalignments at the front can magnify gaps at the sides after trim is added.
Installation Paths: Flush with Countertop vs Trim Options
There isn’t a single right path for every kitchen. Some installations rely on a full-height cabinet panel and a dedicated flush trim kit to hide gaps entirely, while others use a minimalist trim to create a subtle line between the oven and countertop. Both approaches require careful planning to maintain venting clearances and door swing space. If you’re remodeling, assess whether you’re adding a full-width cabinet surround or using a built-in kit that matches your countertop thickness. The goal is a seamless transition that preserves accessibility and safety without compromising venting or structural integrity.
Cabinetry and Structural Support
A flush oven must be mechanically supported by sturdy cabinetry or mounting rails. The oven’s weight, door swing, and vibration during use necessitate secure anchoring to avoid sagging or misalignment over time. Before fastening, locate studs or use high-strength anchors designed for heavy appliances. If your cabinet carcasses are not deep enough, you may need to modify or reinforce sides or add a dedicated mounting panel. Avoid relying solely on face-framed doors for support, as this can lead to wobble or failure under heavy loads.
Electrical and Gas Requirements
Flush installations must maintain safe, code-compliant connections. Electric ovens require proper voltage, dedicated circuits, and correctly sized wire gauges. Gas ovens need secure gas lines with proper shut-off valves and ventilation. If you’re replacing an older unit or moving connections, hire a licensed electrician or gas technician to inspect line sizes, clearances, and shutoffs. Never compromise on electrical clearance or gas leaks, as improper connections pose fire hazards and can void warranties.
Maintenance and Long-Term Considerations
A flush installation often makes cleaning easier along the front edge and reduces crumb collection along cabinet gaps. However, access for servicing sometimes becomes more challenging if the oven is deeply recessed. Plan for occasional removal of panels for maintenance and ensure you have a clear path to disconnect power for safety. Periodically inspect the seal around the oven face to prevent heat leakage into cabinetry. If you anticipate future countertop changes, choose a versatile trim kit that can adapt to different thicknesses.
Common Mistakes and How to Avoid Them
Common mistakes include skipping ventilation requirements, underestimating mounting support, and neglecting to verify door clearance. Always test the oven’s full range of motion, including door opening, rack removal, and light access, to ensure nothing binds when flush. Another pitfall is choosing a trim that doesn’t perfectly match countertop thickness, which can create an obvious gap. Take exact measurements, bring a sample of your countertop edge to the shop, and verify fit before final installation.
Tools & Materials
- Measuring tape (25 ft preferred)(to measure cabinet depth and countertop overhang)
- Torpedo level or 4-ft level(for verifying height and alignment across the face of the oven)
- Screwdriver set (Phillips and flathead)(essential for mounting brackets and trim screws)
- Drill with appropriate bits(for anchoring into studs or tile if needed)
- Non-flammable oven-safe silicone sealant(to seal gaps between oven edge and countertop)
- Shims or spacer blocks(to adjust flush height without tilting)
- Flush-mount trim kit or face-frame kit(to finish the flush look)
- Protective gloves and safety glasses(for safety during installation)
- Masking tape(keep edges clean during sealing)
Steps
Estimated time: 60-120 minutes
- 1
Prepare the space
Clear the area, remove nearby items, and measure the cabinet depth and countertop overhang. Double-check that you have the appliance's installation guide and clearances. Confirm there’s an accessible power or gas shutoff if you’re relocating connections.
Tip: Record all measurements before cutting or forcing components; a small error becomes obvious at flush height. - 2
Power down and safety check
Turn off the circuit supplying the oven and, for gas models, shut off the gas supply. Use a tester to confirm the outlet or gas line is de-energized before you begin any work. Safety first to prevent shocks or leaks during installation.
Tip: Lock out the circuit with a tag if other people might restore power. - 3
Remove old components
If you’re replacing an existing oven, disconnect wiring or gas lines following the manufacturer’s instructions. Remove any trim or face panels that could interfere with flush alignment. Keep mounting hardware in a labeled container for reuse if compatible.
Tip: Take photos of connections before disconnecting to simplify reinstallation. - 4
Dry-fit the oven for flush alignment
Place the oven in the cavity without sealing to verify fit and determine if shims are required. Check that the front edge sits level with the countertop surface. Adjust position so the doors can open fully without rubbing cabinets.
Tip: Use shims gradually and test door clearance after each minor adjustment. - 5
Install mounting rails and anchors
Attach any mounting rails or brackets to the cabinet frame or studs according to the oven’s specs. Ensure rails are square and evenly spaced to bear the oven’s weight. Recheck level before final fastening.
Tip: Check for stud alignment behind panels before drilling to avoid misalignment. - 6
Achieve flush with shims and trim
Insert shims where needed to bring the oven face to the same plane as the countertop. Install the trim kit or finish panels, ensuring seamless edges. Seal the gaps with the non-flammable sealant for a clean look and safety.
Tip: Apply sealant sparingly and smooth with a tight, even bead to avoid seepage. - 7
Reconnect utilities and test
Restore power or gas only after all fasteners are secure and the flush finish is complete. Run a diagnostic cycle to verify operation, door clearance, and even heat distribution. Listen for unusual noises or air drafts near seals.
Tip: Keep a spare fuse or breaker on hand in case of a minor electrical issue during testing. - 8
Final checks and documentation
Inspect all edges for gaps and ensure the appliance looks professionally integrated. Record final measurements, and note any ventilation clearances. Save the installation manual and keep receipts for trim kits and sealants for future maintenance.
Tip: Photograph the final flush installation for future reference or resale.
Questions & Answers
Should the oven be flush with the countertop?
In most kitchens, yes, a flush installation yields a seamless look and can improve airflow around the appliance. Always confirm venting clearance and mounting support before finalizing.
Yes. Most kitchens benefit from a flush oven, but you must verify venting clearance and proper mounting before finishing.
What clearances are required around a flush oven?
Clearances vary by model, but common requirements include space for ventilation, door swing, and access to power or gas connections. Check the manufacturer’s installation manual for exact measurements.
Clearances depend on the model; always consult the manual for exact venting and access distances.
Can I install a flush oven myself or should I hire a pro?
Simple flush installations can be done by confident DIYers with electrical or gas experience. Complex wiring, gas connections, or tile work should be handled by licensed professionals to ensure safety and code compliance.
If you're comfortable with electrical or gas work, you can DIY; otherwise, hire a pro for safety and code compliance.
What countertop brands or thicknesses work with flush ovens?
Most flush installations assume standard countertop thickness and edge profiles. If your countertop is thicker or uses an unusual edge, you may need a custom trim kit or replacement panels.
Most flush setups expect standard thickness; custom trims may be needed for non-standard edges.
How can I tell if the oven vents properly when flush?
Ensure there’s an unobstructed path for exhaust, and verify that the back or sides aren’t pressed into cabinetry. If in doubt, run a test cook and feel for heat buildup near adjacent cabinets.
Make sure exhaust can escape; do a test cook to confirm there’s no heat buildup near cabinets.
Are there safety codes involved with flush installations?
Yes. Flush installs must meet electrical, gas, and fire safety codes. Always consult installation manuals and local codes, and consider professional help for compliance.
Yes, always follow electrical, gas, and fire safety codes and consult a pro if unsure.
Watch Video
Main Points
- Flush alignment improves aesthetics and airflow.
- Verify venting clearances and weight support before finalizing.
- Use a trim kit and shims for precise flush fit.
- Safety and code compliance require licensed professionals for electrical/gas work.