How to replace oven igniter: A complete guide
Learn how to replace oven igniter safely with our comprehensive, step-by-step guide. This Oven Cook Pro tutorial covers tools, safety, troubleshooting, and maintenance to keep your oven heating reliably.

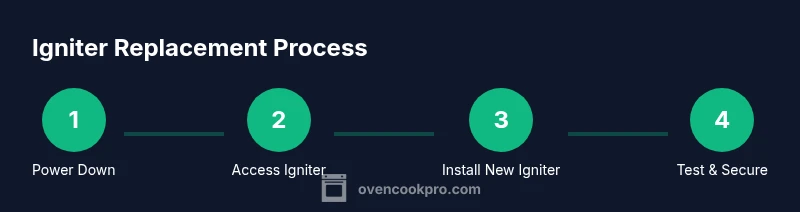
According to Oven Cook Pro, replacing oven igniter is a manageable home repair when you power down safely, access the igniter housing, install a compatible replacement, reconnect wiring, and test the oven before reassembly. This step-by-step approach covers tools, safety checks, and troubleshooting to restore reliable heating. Expect 30-60 minutes depending on your model.
Understanding how an oven igniter works
In most gas ovens, the igniter is a critical component that heats up until it glows bright enough to ignite the gas that feeds the bake and broil burners. If the igniter fails or becomes weak, you may notice extended preheat times, a clicking sound without ignition, or no heat at all. Knowing why the igniter fails helps you decide when to replace oven igniter instead of pursuing other repairs. Replacing the igniter restores reliable preheating and eliminates guessing games about why your oven won’t light. When you replace oven igniter, you are returning the path for safe ignition and consistent baking results, which is a fundamental part of keeping your kitchen running smoothly.
Oven ignition reliability also depends on the igniter’s electrical connection and the control module. A faulty connector or a weak glow can prevent ignition even if the burner is in good condition. In this guide, we’ll walk through identifying the correct igniter type, securing safe access, and installing a replacement part that matches your oven’s model and gas/electric configuration. This ensures you replace oven igniter correctly and minimize future failures, saving time and frustration in the long run.
According to Oven Cook Pro, investing in a high-quality, model-matched igniter reduces return visits to the repair shop and protects your oven’s safety features during ignition. Using OEM parts when possible helps preserve warranty coverage and compatibility with your oven’s safety sensors. By following our steps, you’ll gain confidence in diagnosing ignition issues and performing a safe, effective replacement if needed.
note":null},
Tools & Materials
- OEM or compatible oven igniter(Verify compatibility with your oven model and gas/electric configuration before purchase.)
- Screwdrivers (Phillips and flat-head)(For removing screws on the access panel and burner housing.)
- Nut driver or socket set(Needed to remove mounting screws and panels securely.)
- Needle-nose pliers(Help with gentle wire manipulation and connector removal.)
- Electrical tape or high-temperature wire connectors(Insulate and secure wire splices if needed.)
- Heat-resistant gloves(Protect hands when handling hot components or sharp edges.)
- Flashlight or headlamp(A bright light helps you see inside tight spaces.)
- Small container or magnetic tray(Keep screws organized during disassembly.)
- Multimeter (optional)(Useful for checking igniter circuit resistance if you have model specs.)
Steps
Estimated time: 30-60 minutes
- 1
Power down and unplug
Begin by turning off the oven’s power at the wall outlet or through the circuit breaker. Confirm the appliance is de-energized before touching any wiring. This prevents accidental shock during the ignition system inspection and ensures you can safely access the igniter area.
Tip: Use a flashlight to verify there’s no glow from the igniter after you unplug. - 2
Access the igniter housing
Remove the back or bottom access panel according to your oven’s manual. Clear space so you can reach the igniter and the wiring harness. If your oven has a storage drawer, move it to access screws without bending metal panels.
Tip: Keep panel screws in a labeled container to avoid misplacing them later. - 3
Disconnect the igniter wiring
Carefully unplug the igniter connector or disconnect the leads from the control harness. Take a photo of the wiring before disconnecting so you can re-create the correct wiring arrangement when installing the new igniter.
Tip: Avoid pulling on wires; grip connectors firmly and wiggle gently. - 4
Remove the old igniter
Unfasten the mounting screws and slide the old igniter out of its holder. Inspect the igniter mounting area for any signs of fuel residue or corrosion that could affect the new part’s seating.
Tip: Do not bend or twist the igniter leads; excess bending can fracture the ceramic insulation. - 5
Install the replacement igniter
Slide the new igniter into place and secure it with the original screws. Connect the wiring precisely as photographed earlier, ensuring a snug, vibration-free fit to prevent loose connections.
Tip: Handle the igniter core carefully to avoid damaging the ceramic insulator. - 6
Reattach panels and restore power
Reinstall the access panel and any covers you removed. Plug the oven back in or switch the circuit breaker back on, then prepare to test the ignition sequence.
Tip: Double-check that all tools are removed from the oven cavity before testing. - 7
Test the oven ignition
Set the oven to a bake temperature and listen for the igniter to glow and gas ignition (for gas ovens) or confirm heating in electric models. If the oven lights within a few seconds, you’ve completed the replacement successfully.
Tip: If there’s no ignition after a few attempts, power down and recheck connections or consult a professional.
Questions & Answers
Do I need to unplug the oven before replacing the igniter?
Yes. Always disconnect power before handling any ignition components to prevent shock or short circuits. If you’re unsure about your wiring, consult the manual or a professional.
Always unplug the oven before starting. If you’re unsure, seek professional help.
Can I replace an igniter on a gas oven myself?
In many gas ovens, a DIY igniter replacement is feasible with basic tools and careful handling of the gas line area. Ensure the gas supply is off and you follow safety steps closely.
Yes, many people replace a gas oven igniter themselves, but only if you’re confident and follow safety steps.
What are signs the igniter is failing?
Common signs include long preheat times, the burner not lighting, clicking without ignition, or a bright glow that doesn’t ignite. If you notice these, plan a replacement.
Watch for slow or no ignition and frequent clicking without lighting.
Will replacing the igniter fix every oven problem?
Replacing the igniter addresses ignition-specific issues but won’t fix problems like a faulty gas valve, thermostat, or electronic control board. A diagnostic is still important if ignition doesn’t solve the heat problem.
It helps with ignition issues but other oven problems may require different fixes.
What if the oven still won’t heat after replacement?
If ignition occurs but the oven won’t heat to the set temperature, you may have a thermostat, gas valve, or control board issue. Recheck wiring and consult a professional if problems persist.
If it still won’t heat after replacement, there may be another issue like the thermostat or control board.
Watch Video
Main Points
- Unplug the oven before starting any ignition work
- Use model-specific igniters to ensure safe, reliable ignition
- Label wiring and photograph connections for accurate reassembly
- Test ignition carefully and stop if ignition fails
- Keep safety gear ready and follow manufacturer guidance