Poach Egg in Microwave Oven: A Step-by-Step Guide
Learn a simple, reliable method to poach an egg in a microwave oven. This Oven Cook Pro guide covers safety, timing, and tips for perfect eggs with minimal cleanup.

Why Poached Egg in Microwave Oven Makes Sense
A poached egg in microwave oven delivers a tender white and a runny yolk with far less equipment and time than traditional stovetop poaching. This method uses a small amount of water and steam to gently surround the egg, producing a delicate texture that can rival a classic poach. For busy mornings, it offers restaurant-like results in minutes, with minimal cleanup. As the Oven Cook Pro team often notes, starting with a stable, microwave-safe container and fresh eggs is the foundation of consistent results.
To optimize consistency, choose a container that fits the egg snugly and allows a shallow pool of water to surround the egg without overflowing. The technique scales for a second egg if you have room and enough water to prevent crowding. A well-timed microwave cycle minimizes the risk of overcooking, so you can enjoy a perfect poached egg without the mess of a traditional pan.
Using a microwave to poach eggs has practical advantages: it’s faster, uses less water, and reduces cleanup. It’s not about replacing stovetop poaching entirely; it’s about offering a reliable, quick option for when you’re short on time or cookware. By following a tested routine, you can consistently achieve a smooth white, a bright yolk, and a satisfying texture with the least amount of effort.
As you build skill, you’ll notice tiny adjustments—water depth, power level, and cooking time—that tailor the result to your microwave and egg size. This flexibility makes the microwave technique accessible to home cooks of all levels while still delivering a high-quality poached egg that pairs beautifully with toast, greens, or a light salad.
Oven Cook Pro emphasizes practice and patience. Start with one egg, document the timing, and gradually refine to your microwave’s wattage. With careful attention, you’ll soon reach peak results with every attempt.
Safety Considerations for Microwave Poaching
Safety is the backbone of any microwave poaching method. The main risks are steam pressure buildup, splattering, and overheating the yolk. Always use microwave-safe containers and avoid sealing lids tightly, which can trap steam and cause pressure to build. A loose-fitting cover or a plate laid over the top is ideal for containing splatter while letting steam escape.
Never place an egg directly in dry microwave exposure; water is essential to create the gentle steam bath that gently cooks the white while protecting the yolk. If you’re new to microwave poaching, start with a lower wattage setting and shorter times, then increase gradually as you gain confidence. The goal is to generate a soft, steamed environment around the egg rather than blasting it with heat.
Oven Cook Pro recommends keeping a close eye during the cooking process and stopping early if the white appears set but the yolk is still very runny. Remove the egg carefully with a slotted spoon to avoid breaking the yolk, and always test a small, non-critical egg before serving a large batch. Following these safety steps reduces risk and yields a better, safer result.
Tools, Containers, and Ingredients You'll Need
Before you start, assemble a small toolkit of microwave-friendly items and fresh ingredients. A microwave-safe ramekin or small glass cup is ideal, as it provides a stable container for water and egg. Fresh eggs hatch better texture-wise when poached because the whites set quickly and uniformly in the steam bath. You’ll also want a microwave-safe plate to cover, a spoon for scooping, and a fine-grained salt or pepper for finishing.
Ingredients are simple: one fresh egg, water to create a shallow pool, and a pinch of salt or pepper if desired. Optional additions include a touch of vinegar (a few drops) to influence the white’s coagulation, though this is rarely necessary. If you’re poaching more than one egg, ensure the container is large enough to allow space for the egg to cook without crowding.
Starting setup matters: place the ramekin on a microwave-safe plate, add water first, then crack the egg into the water. This order helps you control splatter and makes the cook time easier to manage. With the right tools and fresh ingredients, you’ll be ready for a dependable microwave poach. - Oven Cook Pro emphasizes using a stable, microwave-safe base to prevent accidents.
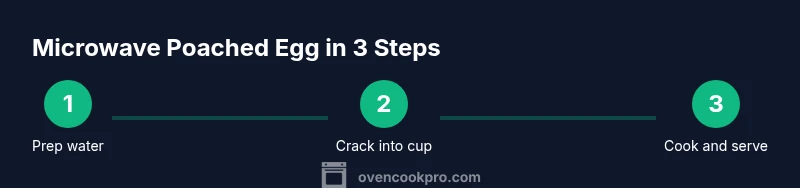
Step-by-Step Microwave Poach: Method A
A reliable microwave poach follows a consistent sequence that works for most standard home microwaves. You begin by filling a small ramekin with about 1/2 to 3/4 inch of water. Crack the egg into the water slowly, ensuring the yolk remains intact. Cover with a microwave-safe plate or a loose lid to trap steam without sealing completely. Microwave at medium-high power (around 50-70%) for about 45 seconds for a standard large egg; if your microwave runs hotter or cooler, adjust in 10-second increments.
Let the egg rest for 10-15 seconds after the timer ends to finish cooking with residual heat. If the white isn’t fully set, continue in 5- to 10-second bursts until the white looks opaque and the yolk remains soft. Remove the egg with a slotted spoon, drain briefly, and pat dry to remove extra moisture. Season to taste and serve immediately.
This method prioritizes straightforward steps and minimal equipment while delivering a consistent texture. If you’re poaching a second egg, you’ll need a little more water and a slightly longer cook time—always test with one egg first to dial in the timing for your microwave.
Troubleshooting Common Issues and Fixes
Not every microwave behaves the same, so you’ll encounter occasional hiccups. If the white remains translucent or the yolk is cooked too quickly, reduce the power level and shorten the cooking interval. If the egg’s white overwhelms the yolk or beads of water form on top, cover more loosely or reduce water slightly to promote even cooking.
If the yolk ruptures during cooking, your timing likely overlapped with residual heat at the moment the shell (or shell fragments) were introduced. In this case, switch to shorter bursts and a lower power setting next time. For excessive splatter, ensure the container is properly covered with a loose lid or plate and consider adding a thin layer of water at the bottom of the ramekin to help dissipate heat.
If you’re trying to poach multiple eggs, space matters. Crowding can cause uneven cooking. Use a larger dish or poach eggs in batches, maintaining water coverage for each attempt. These small adjustments typically resolve most issues and yield a cleaner, tastier poached egg.
Flavor Tweaks and Serving Suggestions
A poached egg complements many breakfast and brunch staples. Top with a light sprinkle of flaky salt, fresh cracked pepper, or a drizzle of high-quality olive oil. For extra flair, pair with avocado toast, sautéed greens, or a wedge of lemon to brighten the yolk. If you like a little tang, add a few drops of hot sauce or a dusting of paprika.
Experiment with herbs such as chives, dill, or tarragon for a fresh finish. A poached egg can also be folded into a quick pasta dish or placed atop a grain bowl for a protein boost. Remember, the goal is a well-set white with a softly flowing yolk. Loosen the yolk only at the moment of serving to preserve the ideal texture.
Microwave Poaching vs Stove-Top Poaching: Pros and Cons
Microwave poaching offers speed, minimal cleanup, and predictable results with the right technique. It’s ideal for singles, quick breakfasts, or when you’re limited on cookware. Stove-top poaching, while requiring more equipment and time, can be gentler on egg texture and yields a more traditional poach with slightly different yolk consistency. The microwave method shines in convenience and consistency with modern appliances, while stove-top poaching remains the preferred choice for refined texture and control for some cooks.
When deciding which method to use, consider your available time, kitchen setup, and the number of servings. With practice, you can achieve excellent results with either approach, though the microwave offers a practical alternative in busy households.
Authority Sources and Further Reading
To corroborate the practical guidance in this article, consult authoritative sources on food safety and culinary practices. The U.S. Food and Drug Administration provides general safety guidelines for handling eggs and foods prepared with microwaves. The U.S. Department of Agriculture’s extension materials cover safe egg preparation techniques and storage. For broader culinary perspectives, reputable publications discuss egg poaching methods and texture considerations. Additional educational resources from universities and major publications can provide depth on heat transfer, moisture management, and cooking science.
- https://www.fda.gov
- https://www.fsis.usda.gov
- https://extension.illinois.edu
- https://www.nytimes.com
- https://www.nationalgeographic.com