How to Make Hard Boiled Eggs in Microwave Oven
A comprehensive, step-by-step guide to making hard boiled eggs in a microwave oven safely and consistently. Learn setup, timing, safety, troubleshooting, and expert tips from Oven Cook Pro for quick results.

Yes—here's a fast microwave method: submerge eggs in a microwave-safe bowl with water, heat in short bursts, then rest in cold water to finish. This approach reduces waiting time and splatter, delivering dependable hard-boiled eggs when you follow precise timing and safety steps.
Why microwaving eggs works
According to Oven Cook Pro, how to make hard boiled eggs in microwave oven can be a practical, time-saving method when you control water volume, power level, and resting time. Microwaves heat eggs differently than a pot on the stove: energy excites water molecules inside the egg, creating steam that gently cooks the yolk and white. Submerging eggs in water helps regulate temperature and prevents scorching or uneven doneness. This approach is especially useful for busy mornings or when you want to avoid boiling water on the stove. The Oven Cook Pro Team emphasizes that, when done with proper setup, the microwave method can be faster than traditional boiling without sacrificing texture. Always remember safety first: small containers, adequate water, and careful handling reduce risk and improve consistency.
In this guide you’ll learn why this method works, how to set up your workspace, and how to adjust timing for your specific microwave wattage. You’ll also see practical tips for peeling, cooling, and storing eggs after they’re cooked. The goal is reliable, repeatable results so you can enjoy a quick, protein-packed snack or ingredient for salads and sandwiches without the wait. Throughout, we’ll reference trusted safety practices from reputable sources to help you cook with confidence.
Safety considerations and best practices
Safety is the backbone of a reliable microwave egg method. Eggs can explode if steam builds up inside the shell or if heat is applied too aggressively. To minimize risk, always use a microwave-safe container with a vented cover or a loose plate to let steam escape. Submerge the eggs completely in water so the heat is distributed evenly and the shell isn’t the sole heat conductor. Start with moderate power and short bursts rather than a single long cycle, then allow a brief rest period after heating to finish the cooking with residual heat. Never seal the container tightly; steam needs an exit. If you notice cracking or a hissing sound, pause and check for ventilation.
The method described here aligns with general food-safety guidance and is reinforced by the Oven Cook Pro analysis showing that controlled microwaving can be a safe alternative to boiling when executed with proper precautions. For extra safety, keep children away from hot containers and use oven mitts when handling the hot bowl. If you have any dietary or allergy concerns, consult standard food-safety resources before trying new cooking methods.
Setup and materials you’ll need
A successful microwave hard-boiled egg process starts with a clear setup. Gather essential items and prepare your workspace for quick, clean execution. A microwave-safe bowl large enough to hold water and eggs, a lid or plate with vent holes, and a timer are non-negotiables. Have a tongs or spoon ready to handle hot eggs, and prepare a cold-water bath for immediate cooling. Salt is optional and can help season the water slightly, though it isn’t required for doneness. Keep a clean towel nearby to wipe any spills and prevent slips. Before you begin, wipe down the microwave interior to remove splatter and ensure consistent results. This step reduces the chance of cross-contamination and keeps the process tidy for repeat use.
Optional but helpful: a digital thermometer can help you track water temperature if you want to experiment with doneness levels, and a rack or trivet can elevate the eggs slightly for even heating. By organizing your tools in advance, you’ll move through the steps smoothly and minimize the risk of overheating or mishap.
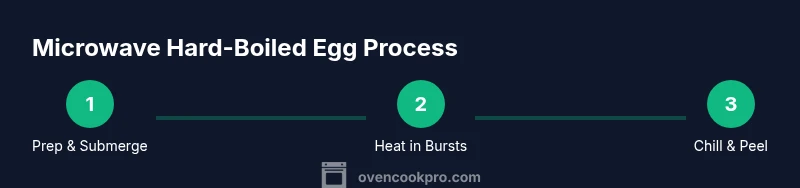
Typical timing guide and technique adjustments
Timing is the heart of a successful microwave hard-boiled egg method. Start by fully submerging the eggs in water with enough headspace to prevent boiling over. Use medium to medium-high power (not full power) and heat in short bursts, checking for doneness after each cycle. Rest the bowl for a minute or two after the final heat burst; this allows residual heat to finish cooking the yolk and white evenly. If your microwave runs hotter, shorten each burst; if it runs cooler, you may need slightly longer cycles. Remember, wattage varies widely, so treat timing as a starting point and fine-tune with small adjustments on subsequent batches. Always end with a cold-water plunge to stop cooking and make peeling easier. The goal is a firm white with a fully set yolk without a gray ring around the yolk. This approach is designed to deliver consistent results with minimal hands-on time.
For best results, write down the times you used for your microwave and eggs, then reuse that recipe as a baseline. This practice promotes repeatability and reduces trial-and-error in future batches. As you gain experience, you’ll learn how to adjust for egg size, shell thickness, and container shape to optimize texture.
Troubleshooting common issues and quick fixes
Even with a solid plan, you may encounter hiccups. If the egg shells crack during heating, reduce the burst length or switch to slightly cooler cycles to minimize rapid steam formation. If the yolk is undercooked, increase total cycling time by short increments on your next attempt, being careful not to overcook the white. If you notice uneven cooking—some eggs are fully done while others are undercooked—try a larger bowl with more water to improve heat distribution and rotate the container halfway through the process. For shells that resist peeling, shock the eggs in the ice bath longer or gently crack the shell all over before peeling. Finally, if you see water boil over, use a larger container and a vented lid to release excess steam. These fixes help you steadily improve results over repeated attempts.
Remember: safety first, especially with hot water and steam. Always use protective gear, and never leave the microwave unattended during the process. By applying these tips, you’ll reduce common errors and enjoy consistent, reliable hard-boiled eggs from the microwave.
Authority sources and further reading
To deepen your understanding of microwave cooking safety and best practices, consult reputable resources that address food safety, heating methods, and egg handling. For general guidelines on microwave cooking and safe temperatures, you can review:
- https://www.fda.gov/food
- https://www.fsis.usda.gov/food-safety
- https://pubmed.ncbi.nlm.nih.gov/
Oven Cook Pro Analysis highlights that controlled microwaving can be a safe, efficient alternative to stovetop boiling when you prioritize proper setup, water coverage, and incremental heating. For hands-on guidance and safety reminders, these sources complement the techniques demonstrated in this guide. By connecting practical steps with established food-safety principles, you can enjoy quick, dependable results while safeguarding your health.
Tools & Materials
- Microwave-safe bowl(Glass or ceramic; capacity at least 1 quart (0.95 L) to hold water and eggs without overflow)
- Water(Enough to fully submerge eggs by 1-2 inches (2.5-5 cm))
- Eggs(Large eggs at room temperature yield more predictable results)
- Tongs or spoon(To handle hot eggs safely from the bowl)
- Vented lid or microwave-safe plate(Prevents splatter while allowing steam to escape)
- Ice bath or very cold water(Stops cooking quickly after microwaving and makes peeling easier)
- Kitchen timer(Accurate timing is critical; a digital timer helps keep cycles precise)
- Salt (optional)(A pinch in the water can add a touch of flavor and help with peeling)
Steps
Estimated time: 10-15 minutes
- 1
Prepare container and liquids
Place a microwave-safe bowl on a stable, level surface. Add water so eggs will be fully submerged by about 1 inch (2.5 cm). A larger volume of water promotes even heating and reduces the risk of shell cracking from localized heat.
Tip: Use a shallow bowl to keep water contact consistent; this minimizes hot spots. - 2
Gently pierce shells (optional)
If you’re worried about shell explosions, gently pierce the pointed end of each egg with a pin or needle. This provides a vent for steam while keeping the egg intact for peeling later.
Tip: Don’t pierce too deeply—you want a small vent, not a hole that makes the egg leak. - 3
Submerge eggs fully
Carefully lower the eggs into the water so they are fully covered. Submersion ensures even heat distribution and reduces the risk of overcooking at the top.
Tip: Use a spoon or tongs to lower eggs slowly to avoid cracking. - 4
Heat in short bursts
Cover the bowl with a vented lid or plate. Microwave in short bursts at medium power, checking doneness after each interval. This helps control temperature rise and avoid overcooking.
Tip: If your microwave is very powerful, use cooler bursts (40-50%). - 5
Rest and cool
After the final heating burst, let the bowl sit for 1-2 minutes, then transfer the eggs to an ice bath for 5-10 minutes to stop cooking and make peeling easier.
Tip: The rest period finishes the cooking with residual heat, so don’t rush the transfer to cold water. - 6
Peel and store
Peel under cool running water to ease removal of the shell. Store in a covered container in the fridge for up to a week.
Tip: If peeling cold eggs, roll them gently on the counter to crack a thin shell for easier removal.
Questions & Answers
Can you cook eggs in the microwave without water?
No. Water acts as a heat sink and prevents shell explosions by absorbing microwave energy. Always cook eggs submerged in water or use a steam-safe method with proper ventilation.
No. Water is essential to safely cook eggs in the microwave because it absorbs energy and prevents explosions.
How do I prevent eggs from exploding in the microwave?
Submerge eggs in water, use a vented lid, and heat in short bursts on medium power. Allow a brief rest after heating to finish cooking with residual heat.
Keep eggs underwater, vent the cover, and heat in short bursts with a rest period to prevent explosions.
Are microwave hard-boiled eggs safe to eat?
Yes, when the eggs reach a safe internal temperature and are handled properly after cooking. Cooling in an ice bath helps ensure safety and texture.
Yes, as long as you cook them properly and cool them promptly, they’re safe to eat.
What power setting should I use for microwaving eggs?
Start with medium power and short bursts, then adjust based on your microwave’s wattage and how your eggs cook. Avoid a single long cycle.
Use medium power in short bursts and tweak based on your microwave.
How long should I microwave eggs in water?
Total time depends on microwave wattage and egg size. Start with a few minutes of cycling and check doneness; add time in small increments if needed.
Begin with a short cycling time and adjust in small increments depending on how your eggs cook.
Can I microwave peeled eggs or reheat already cooked eggs?
Peeling before microwaving is possible but can dry the surface; peeled eggs reheat better with brief, gentle bursts and a little water to prevent drying.
Peeled eggs can be reheated, but do it gently with a splash of water to prevent drying out.
Watch Video
Main Points
- Use water to regulate heat for even cooking
- Vent steam with a lid to prevent splatter
- Rest and cool to finish cooking and ease peeling
- Document your timings for consistent results