Plug in Oven: Safe, Step-by-Step Guide for Home Cooks
Learn how to safely plug in and operate a countertop oven with expert tips, a clear safety checklist, and a practical step-by-step guide from Oven Cook Pro.

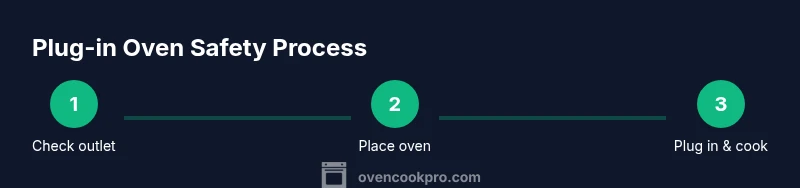
This guide shows you how to safely plug in and operate a portable countertop oven. You’ll learn outlet requirements, proper cord usage, distance from flammable materials, and a step-by-step setup so cooking with a plug-in oven is reliable, safe, and easy to replicate every time. Follow these actions in order to prevent shocks, fires, or damaged cookware.
Understanding the basics of a plug-in oven
A plug-in oven is a compact countertop appliance designed to provide the versatility of a full-sized oven in a smaller footprint. According to Oven Cook Pro, these devices are popular for quick dinners, baking small batches, and reheating leftovers with even heat. When you choose to use a plug in oven, you’re opting for convenience, but you still need to respect electrical safety and clearance guidelines to avoid shocks or fires. This section defines what a plug-in oven is, how it differs from a traditional wall oven, and what to look for when assessing a unit for home use. Most plug-in ovens share a few common traits: a heating element or elements, a controllable thermostat, a timer or auto shutoff feature, and a plug that fits standard household outlets. Some models include convection fans, interior racks, and accessory trays that expand what you can cook. Regardless of the model, what matters most is how you connect, power, and position the unit to ensure reliable performance. The Oven Cook Pro team found that safe operation begins with choosing the right power source and maintaining a clean, unobstructed cooking environment. By understanding these basics, you’ll reduce the risk of overheating, electrical faults, and accidental burns.
Outlet and power requirements for plug-in ovens
Powering a plug-in oven safely starts with the right outlet and cord. Always aim for a secure, grounded outlet that can handle the oven’s load without tripping a circuit. Avoid using damaged cords or adapters, which can overheat or cause arcing. If your kitchen uses older wiring or if the outlet feels warm during use, stop and reassess before continuing. In many homes, a dedicated, dedicated circuit improves safety and performance by reducing voltage drop and heat on other devices. Ensure the oven’s plug is fully inserted and that there are no loose connections that could heat up or loosen over time. For optimal reliability, place the oven on a stable surface that remains cool during operation, and keep it away from water sources or damp areas. If you need to relocate the oven for storage, unplug it first and allow it to cool completely before moving. These practices reduce the chance of shocks, electrical faults, or accidental tip-overs while cooking.
Safety features and common misuses
Modern plug-in ovens come with several built-in safety features, but user habits matter just as much. Always read the user manual for the specific model you own, and respect safety warnings about leaving the oven unattended, avoiding metal utensils near heating elements, and not blocking ventilation openings. Typical misuses include using extension cords, placing the appliance on a heat-sensitive surface, or attempting to bake items that require much more space than the oven can safely accommodate. To minimize risk, clear flammable materials from the surroundings, use heat-resistant mats, and ensure there is ample clearance around the oven for air to circulate. If you notice signs of damage, such as frayed cords or scorched outlets, stop using the unit and seek professional assistance. With careful placement and mindful operation, a plug-in oven can be a dependable everyday tool rather than a safety hazard.
Step-by-step overview for safe use (preview)
In this section you’ll see the practical sequence used to plug in and operate a plug-in oven without surprises. We cover setup, preheating considerations, monitoring during cooking, and post-use shutdown. Remember to reference the dedicated STEP-BY-STEP section for the exact actions you should take in order, including tips and warnings for tricky steps.
- Preparation: verify the outlet and surface, inspect the cord, and clear the area.
- Setup: place on a stable, heat-safe surface and ensure adequate clearance.
- Operation: plug into a dedicated outlet, select temperature and timer, and monitor as needed.
- Shutdown: unplug after use, allow the oven to cool, and clean the interior after it’s safe to do so.
Step-by-step guide to using a plug-in oven safely (overview)
This section provides a concise overview of the exact actions you'll perform in the detailed STEp-BY-STEP block. The steps emphasize direct actions, safety checks, and practical decisions to make plug-in oven use predictable and safe in a home kitchen. By following this preview, you’ll be prepared for the more granular, numbered steps that follow with tips and warnings tailored for common kitchen layouts and power setups.
Cleaning, maintenance, and longevity tips
Regular maintenance helps your plug-in oven perform consistently and safely. After each use, let the appliance cool completely before cleaning. Wipe the exterior with a damp cloth and avoid aggressive cleaning agents that could damage the surface. Interior cleaning typically involves removing racks and baking trays and brushing loose crumbs from the floor with a soft brush. Keep the heating elements clean and free of grease buildup, which can affect heating efficiency. Periodically inspect the cord and plug for signs of wear; a damaged cord should be replaced, not repaired. Store the oven in a dry place away from moisture and extreme temperatures. Routine checks also extend the life of door seals and interior racks, helping you achieve more even cooking results over time.
Troubleshooting common issues
If you notice uneven heating or longer preheat times, start by checking the outlet for heat buildup and confirm that the cord and plug are not damaged. If the oven seems to turn on but doesn’t heat, verify the setting, timer, and any safety locks that may be engaged. Unusual smells, smoke, or buzzing are signs of potential electrical problems; unplug immediately and seek professional service. For gasket and door performance, inspect the seal and ensure the door closes fully. Regular maintenance and careful operation reduce the frequency of faults and extend the life of your plug-in oven.
Choosing the right plug-in oven for your kitchen
When selecting a plug-in oven, consider capacity, features, and your typical cooking tasks. Look for models with even heat distribution, adjustable racks, a clear display, and a reliable timer. If you bake frequently, a unit with convection capability can improve air circulation and meal consistency. Consider the size of your countertop and the weight of the oven, ensuring you have a stable, level surface. Finally, read user reviews to understand reliability and after-sales support. With the right choice, a plug-in oven becomes a versatile helper for weeknight meals, batch baking, and quick reheating tasks.
Tools & Materials
- Plug-in oven (portable countertop model)(Ensure it has a heat-resistant exterior and a properly rated cord)
- Dedicated standard household outlet(Prefer a grounded outlet on its own circuit if possible)
- Heat-resistant placemats or mat(Place under and around the oven to protect surfaces)
- Non-slip surface or mat(Prevents movement during operation)
- Cooling rack or trivet(Useful when handling hot cookware after cooking)
- Dishcloth or silicone brush(For cleaning crumbs and spills after use)
- Outlet tester (optional)(Helps verify outlet safety and grounding)
- Instruction manual for the model(Always reference for model-specific guidance)
- Fire extinguisher or a fire-safe baking tray(Keep accessible in the kitchen as a precaution)
Steps
Estimated time: 15-25 minutes
- 1
Verify outlet compatibility
Inspect the outlet to ensure it is grounded and can handle the oven’s power demands. Check the cord for any signs of wear, and unplug if you notice damage. This step reduces the risk of overheating or electrical faults.
Tip: If the outlet feels warm, stop and assess; don’t continue with a compromised connection. - 2
Prepare a safe workspace
Clear the countertop of clutter and ensure a clean, dry surface. Place heat-resistant mats on both the back and sides to protect surrounding surfaces. Keep flammable items at a safe distance from the oven.
Tip: Position the oven away from the edge of the counter to prevent accidental tipping. - 3
Place the oven on a stable surface
Set the oven on a flat, non-slip surface that stays cool during operation. Ensure there is adequate ventilation around the unit so heat can dissipate.
Tip: Avoid placing the oven directly on a wooden cutting board or fabric material. - 4
Connect and power on
Plug the oven directly into the outlet; avoid using an extension cord or power strip. Turn the unit on and confirm it powers up with a ready indicator light or display.
Tip: Do not force plugs into outlets; if it doesn’t fit smoothly, don’t press it in. - 5
Set temperature and timer
Choose the appropriate temperature and timer for your intended dish. Use the timer to prevent overcooking and to keep heat under control. If preheating is required, allow the oven to reach the target temperature before adding food.
Tip: Always err on the side of shorter cooking times and check early to avoid overcooking. - 6
Monitor and adjust during use
Stay nearby during the initial uses to understand how your oven behaves with different foods. If you notice smoke, unusual noises, or smells, turn the oven off immediately and unplug.
Tip: Keep a watchful eye during the first few uses; it helps create a reliable mental model for future cooking. - 7
Cool down and unplug after use
Allow the oven to cool completely before moving or cleaning. Unplug to ensure there is no residual heat or power. Store away from moisture and ensure cords are neatly coiled.
Tip: Always unplug before cleaning; never use water to extinguish an electrical issue.
Questions & Answers
Is it safe to leave a plug-in oven unattended while cooking?
No. Always monitor the oven during operation and unplug when finished. If you must leave briefly, turn to a safe, low setting and keep a close eye on progress.
No. Always watch the oven during use and unplug when done. If you must step away briefly, reduce heat and stay within sight.
Can I bake bread in a plug-in oven?
Yes, many plug-in ovens can bake bread or dough-based items, but you’ll want to keep the batch size appropriate for the interior space and monitor for even browning.
Yes, you can bake bread in a plug-in oven, but monitor for even browning and fit the dough to the oven’s interior size.
What should I do if the outlet or plug smells burnt?
Unplug immediately and inspect the outlet and plug. If the outlet or plug shows damage, discontinue use and consult a professional to assess wiring safety.
Unplug immediately and inspect for damage. If anything looks burned or unusual, stop using it and call a professional.
Are plug-in ovens energy efficient?
Plug-in ovens can be energy efficient for small batches and quick tasks. Use preheating judiciously and batch cook to maximize efficiency.
They can be efficient for small tasks; preheat only when needed and batch cook when possible.
Do plug-in ovens have temperature control and safety features?
Most models offer adjustable temperatures and timers, plus basic safety features. Always verify the specific model's settings and safety notes before use.
Most models have temperature control and a timer, plus basic safety features. Check your model’s manual for specifics.
Watch Video
Main Points
- Plug directly into a grounded outlet for safety.
- Maintain clearances and a stable surface to prevent fires.
- Monitor initially and unplug after use to cool safely.
- Inspect cords and outlets regularly to avoid hazards.
- Follow model-specific guidelines to ensure reliable performance.