How to Cook Without a Stove: An Oven-Only Guide
Learn how to safely and effectively cook when the stove isn’t available. This guide covers temps, timings, cookware, and practical oven-only techniques for reliable meals.

With the stove unavailable, your oven can still power most meals by baking, roasting, or slow-cooking. The key is planning, proper cookware, and safe temperature control. You’ll need reliable bakeware, a preheated oven, and a simple timing plan to avoid undercooking or scorching foods. This guide shows how to adapt stove-based recipes for oven-only execution, safely and efficiently.
Understanding the Oven-Only Kitchen Scenario
According to Oven Cook Pro, many homeowners face a common situation where the stove is unavailable due to renovations, outages, or small-space layouts. The oven can be repurposed as your primary heat source for a wide range of recipes when you understand how to control heat, airflow, and timing. This section helps you diagnose when oven-only cooking is practical and outlines the planning mindset that reduces guesswork. You will learn to think in terms of bake times, convection vs. conventional heat, and the difference between dry-heat and moist-heat cooking approaches. By approaching meals with a simple framework, you can maintain flavor, texture, and safety even when the stove is out of service.
The Oven Cook Pro team emphasizes safety first. If you plan to cook with the oven as your sole heat source, you must account for cookware compatibility, air circulation within the oven cavity, and the potential for uneven heating. A well-lit kitchen, a ready timer, and properly placed racks become your closest allies. Keep in mind that some recipes will translate more smoothly to oven-only cooking than others, especially those already designed for dry-heat environments. In short, oven-only cooking is not a stopgap; it is a structured approach to reliable results.
Safety Essentials Before You Begin
Safety is nonnegotiable when you rely on the oven alone. The first rule is to verify your oven’s temperature accuracy with a dedicated oven thermometer, since home models can drift by several degrees over time. Next, ensure you have heat-resistant baking sheets, pans, and cookware that distribute heat evenly. Use parchment or aluminum foil to prevent sticking and to simplify cleanup. Always wear oven mitts when handling hot items, and never place plastic or silicone containers in the oven. Finally, implement a clear timing plan and use a timer that signals when to rotate items or adjust temps. Oven-only cooking compounds risk if you neglect ventilation or hydration in some moist-heat dishes.
The Oven Cook Pro Team recommends testing a small batch first whenever you try a new recipe adaptation. This minimizes waste and lets you calibrate times before committing to a full meal.
Preheating and Oven Setup for Consistent Results
Preheating remains essential when you are cooking without a stove. Start by setting the oven to the target temperature specified by the recipe you are adapting. If you are unsure, a common starting point is 350°F (175°C) for many casserole, vegetable, and bake-style dishes, then adjust up or down based on results. Position racks to promote even air circulation; typically one rack in the middle is ideal for most foods, with a second rack used for broiling or finishing a top crust. Allow at least 10 minutes for steady-state heat after preheating, and use an oven thermometer to confirm the interior matches the target temperature. This alignment reduces undercooking and prevents overbrowning.
Selecting the Right Cookware for Oven-Only Cooking
The right tools make a big difference when the stove is unavailable. Use heavy, heat-retentive bakeware such as metal sheet pans, glass-ceramic dishes, or cast-iron compliant with oven temperatures. Darker metals can brown faster, so plan accordingly. For casseroles and layered dishes, a 9x13 inch pan or a deep dish with a secure lid is ideal. Lining pans with parchment paper or foil helps with cleanup and prevents sticking. Metal skewers or racks can elevate food away from direct heat for more even cooking. Remember to check your cookware’s maximum safe temperature and avoid ceramic pieces that may crack under rapid temperature changes.
Oven-safe silicone mats and silicone spatulas provide flexible support for turning or lifting delicate items. Pro-tip: always place a sheet pan beneath delicate items when you are worried about drips or spills. This keeps the oven cleaner and simplifies the cleanup process later on.
Temperature and Time Guidelines for Oven-Only Cooking
When you replace stovetop cooking with oven cooking, you must translate cooking times to an oven-friendly framework. A typical baked or roasted dish often runs 25–45 minutes at 350–375°F (175–190°C), but this varies with thickness and ingredients. Use a two-step approach: bake at a moderate temperature to cook through, then finish with a higher heat or broil for crispiness. For dishes that need moisture, such as braises or dishes with sauce, you may finish in a covered vessel or by using a water bath to prevent drying. Always check for doneness with a thermometer or a visual cue, since surface browning may mask undercooked centers.
If you are converting a stovetop recipe, consider reducing fat content and adding a little extra liquid to compensate for evaporation in the oven. The Oven Cook Pro Team suggests starting with a conservative time and temperature, then adjusting based on your first attempts. Patience and careful observation deliver the best results when you are cooking without a stove.
Practical Examples: Foods That Translate Well to Oven-Only Cooking
Some foods adapt particularly well to oven-only cooking. Roasted vegetables, sheet-pan chicken or fish, casseroles, lasagnas, baked eggs, and grain-based bowls all benefit from even heat and long, slow cooking. A few tips help them shine: slice vegetables uniformly for even cooking, use a pan with high sides to contain sauces, and rotate trays halfway through to avoid hotspots. For bread and pastry, reliable oven heat will produce a crisp crust and a tender crumb if you monitor moisture and avoid over-browning. Remember that not all stove-based recipes will convert cleanly; some sauces may tighten too much or require additional liquid. When in doubt, start with a familiar dish and adjust gradually on your next attempt.
Adapting a Stove Recipe: A Step-By-Step Practical Example
Take a classic stovetop chicken and peppers dish and adapt it for the oven. Begin by preheating to 375°F (190°C) and slicing vegetables evenly. Toss chicken pieces with a light coat of oil, salt, and preferred spices. Spread on a sheet pan in a single layer, and add pepper slices and onions around the chicken. Roast for 20–25 minutes, then stir and continue cooking for another 10–15 minutes until the chicken reaches 165°F (74°C) and the vegetables are tender. If you want a sauce, combine broth and tomato in a separate dish and pour over the chicken toward the end, allowing a brief simmer in the oven. Always use a meat thermometer to confirm safe internal temperatures.
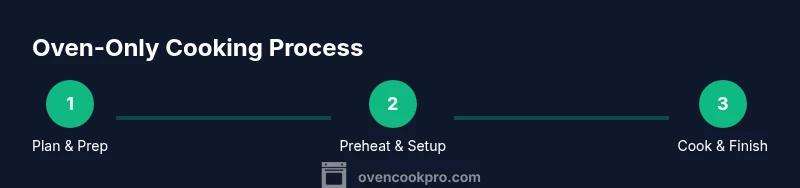
Step-by-Step: A Complete Oven-Only Dinner Plan
- Gather gear and preheat to 375°F (190°C). Prepare bakeware with parchment paper and a light oil coating. 2) Layer proteins and vegetables on a sheet pan, ensuring even spacing. 3) Place the tray in the middle rack and bake for 20–25 minutes. 4) Rotate the tray and check internal temperatures; continue until safe depth is reached. 5) If a sauce is needed, add it halfway through and let it thicken in the oven. 6) Rest the dish briefly after removal to redistribute juices. 7) Serve with a simple side and finish with a quick broil for color if desired. 8) Clean up while hot to prevent sticking. 9) Store leftovers promptly in a shallow container. 10) Reheat evenly in a subsequent bake. Estimated total time: 60–90 minutes.
Troubleshooting and Common Pitfalls
Uneven heating is the most common challenge when cooking without a stove. If you notice hotspots, rotate trays or use a second rack to ensure consistent browning. If vegetables appear soggy, increase convection by using a higher heat for a short finishing broil. Dry dishes can be saved by adding a splash of liquid and covering the dish to trap moisture during the final stage of cooking. If you encounter burning, reduce the temperature by 25 degrees and extend the cooking time slightly. Finally, always verify doneness with a thermometer rather than relying on appearance alone.
Cleaning, Maintenance, and Safety After an Oven-Only Cook Session
After you finish, unplug any cords, let cookware cool, and wipe the interior with a non-abrasive sponge. Use warm, soapy water for enamel surfaces and a degreasing agent for greasy layers on racks. Remove and wash parchment or foil to prevent buildup in seams. If you have a self-cleaning feature, consult your manual before use and remove any large debris first. Regular maintenance, including checking seals on the door and ensuring venting is clear, reduces energy waste and extends the life of your oven. Store tools in a dry place to prevent rust. Remember that safety is ongoing work, not a one-time event.
Energy, Safety, and Efficiency Considerations for Oven-Only Cooking
Cooking without a stove can be efficient when you optimize preheating, heat distribution, and pan choice. Use the oven’s even heat to your advantage, and plan meals that benefit from long, steady cooking rather than quick sears. Keep oven racks clean to prevent sticking and drafts of heat that can scorch foods. When dealing with meat, always rely on a thermometer to ensure proper doneness and minimize the risk of foodborne illness. Use timers to monitor progress and set up a mid-cooking check to prevent overcooking. Finally, consider energy usage by batch cooking multiple items on different racks when allowed by your oven’s design. This approach saves time and reduces energy draw over multiple sessions.
Quick-Start Checklist and Meal-Planning Ideas
- Confirm oven temperature with a thermometer before cooking.
- Have parchment paper and foil ready for easy cleanup.
- Plan for one-dish meals that adapt well to oven heat.
- Prepare a simple glaze or sauce to add toward the end.
- Use a timer and rotate trays for even cooking.
- Store leftovers safely in shallow containers for quick reheating.
Meal ideas: sheet-pan chicken and vegetables, baked eggs with vegetables, one-dish casseroles, roasted potatoes with herbs, and grain bowls baked with protein. With a little planning, you can create a week’s worth of meals using only the oven.
Tools & Materials
- Oven thermometer(Place in the oven to verify accurate temp vs set temp.)
- Sheet pans and baking dishes(Heavy gauge metal preferred for even heating.)
- Parchment paper or aluminum foil(Prevents sticking and makes cleanup easier.)
- Oven-safe cookware (cast iron, glass-ceramic, metal pans)(Ensure each piece is rated for your target temperature.)
- Heat-resistant silicone spatula(Helpful for turning and lifting without damage.)
- Digital timer(Set multiple reminders for staggered checks.)
- Oven mitts(Heat-resistant, full coverage for safety.)
- Meat thermometer(Optional for verifying internal doneness.)
Steps
Estimated time: 60–90 minutes
- 1
Gather materials and preheat
Collect all cookware, utensils, and ingredients. Preheat the oven to the target temperature specified by your recipe or the guidelines in this guide (often 350–375°F). This initial step ensures consistent heat when you start cooking.
Tip: Use a dedicated oven thermometer to verify accurate heat. - 2
Prepare ingredients
Wash, trim, and cut ingredients into uniform pieces. Uniformity ensures even cooking and predictable results when the oven is your sole heat source.
Tip: Uniform sizes reduce hot spots and help food finish together. - 3
Line pans and set up
Line pans with parchment or foil, arrange ingredients in a single layer where possible, and pre-oil if needed to prevent sticking.
Tip: A single layer optimizes air circulation and browning. - 4
Bake or roast
Place pans in the middle rack. Bake at the chosen temperature for the indicated time, rotating the tray halfway through for even results.
Tip: If you notice browning too quickly, lower the temp slightly and extend time. - 5
Check doneness
Use a meat thermometer or visual cues to determine readiness. Probe the thickest part of meat or the center of baked goods.
Tip: Always verify internal temperature before serving. - 6
Finish and glaze or sauce
If a glaze or sauce is desired, apply during the final minutes of cooking and return to the oven to set.
Tip: A brief finish under broil can add color without overcooking. - 7
Rest and divide
Let meats rest to redistribute juices; rest times vary by protein. Slice and serve with sides.
Tip: Resting prevents juices from pooling on the plate. - 8
Cleanup while cooling
Once cooled, remove pans and clean with appropriate cleaners for your cookware. This prevents residue from hardening and makes future meals faster.
Tip: Clean as you go to keep the oven ready for the next use. - 9
Store leftovers
Cool leftovers and store in shallow containers for quick reheating later.
Tip: Label with date and contents to prevent waste. - 10
Plan next oven-only meal
Review what worked, note any adjustments, and plan another oven-based recipe to build confidence.
Tip: Incremental practice makes oven-only cooking second nature.
Questions & Answers
Can I bake eggs if there is no stove available?
Yes, you can bake eggs in a shallow dish or muffin tins in a preheated oven. Add seasonings and vegetables as desired. Bake until set and fully cooked.
Yes, you can bake eggs in a dish or muffin tins in a preheated oven until they are set.
Is it safe to cook sauces in the oven without a stove?
Sauces can be finished in the oven using a small, oven-safe dish. Keep an eye on moisture levels and stir as needed to prevent scorching.
Sauces can be finished in an oven-safe dish; stir occasionally to prevent scorching.
What temperatures work best for oven-only substitutions?
Start with moderate heat such as 350–375°F (175–190°C). Adjust based on how quickly food browns and how evenly it cooks.
Start at around 350 to 375, and adjust based on browning and doneness.
How do I cook rice or pasta without a stove?
Rice and pasta can be cooked using a covered dish with simmering water or broth in the oven. Expect longer cooking times and ensure liquid levels remain sufficient.
You can cook rice or pasta in a covered dish with broth in the oven, but it will take longer than on a stove.
What safety steps should I take when using the oven for non-stove meals?
Always use oven mitts, keep flammable items away, and verify temperature with an oven thermometer. Follow manufacturer guidelines for your model.
Remember to wear oven mitts and keep flammables away; check the thermometer and follow your oven’s guide.
Watch Video
Main Points
- Plan with temp and time in mind
- Use oven-safe cookware and parchment for easy cleanup
- Rotate trays and verify doneness with a thermometer