Denver Oven Repair: A Step-by-Step Guide for Home Cooks
Learn how to diagnose and fix common oven problems in Denver with a safe, step-by-step approach. This guide covers tools, safety, and when to hire a pro, tailored for homeowners.

This oven repair denver guide walks homeowners through safe, DIY steps for common oven problems and when to call a professional. According to Oven Cook Pro, you’ll learn diagnostic tips, required tools, and step-by-step actions to restore heat, accuracy, and door safety. It highlights local considerations, permits, and when to escalate to a licensed technician in the Denver area. Expert insights from Oven Cook Pro.
Understanding Denver-Specific Factors for Oven Repair
In Denver, climate, altitude, and housing stock influence oven performance and wear patterns. Older homes may use different wiring and gas lines, and frequent temperature swings can alter calibration. This section explains what unique local factors to watch for when diagnosing issues, so you avoid misattributing symptoms to the oven itself and consider installation history, venting, and electrical supply. The Oven Cook Pro team notes that starting with correct safety steps and model-specific manuals reduces frustration and improves success rates in the Denver area. Expect variations in how ovens heat in high-altitude environments and how local power quality can influence electronic controls. By acknowledging these factors, homeowners can approach repairs more accurately and plan for potential downtime during service.
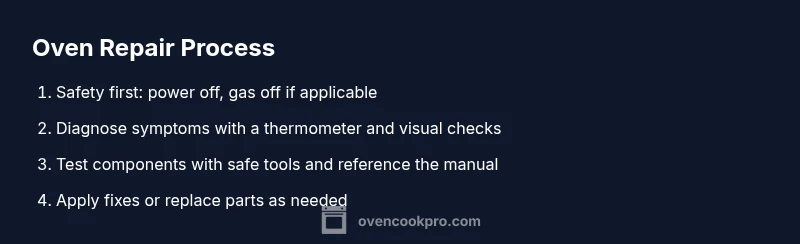
Safety Protocols Before You Begin Any Oven Work
Safety is non-negotiable when dealing with electric coils, gas igniters, and high temperatures. Always cut power at the breaker, unplug the unit if accessible, and verify there is no live power before removing panels. If you smell gas, evacuate and call the utility or a licensed plumber. Wear heat-resistant gloves, use insulated tools, and keep a dry workspace. Keep children and pets away. After removing panels, test for stray electrical hazards with a non-contact tester. Document any labeling or wiring diagrams to avoid reconnecting wires incorrectly. Following these safety steps helps prevent shocks, fires, and gas leaks, and it aligns with HVAC and appliance-safety guidelines from trusted sources.
Common Oven Problems Seen in Denver Homes
Many Denver homes report issues like ovens not heating, uneven heat distribution, temperature calibration drift, or doors that won’t seal properly. In dry, sometimes windy conditions, venting performance can influence baking outcomes. This section catalogs typical symptoms, possible culprits (like faulty igniters, damaged bake elements, or worn door gaskets), and the initial checks you can perform safely. You’ll learn to observe oven behavior—timing discrepancies, hot spots, or error codes—and how those observations guide you toward the right replacement parts or service steps. Remember that even common symptoms may mask more serious electrical or gas-supply issues, which should be handled by a professional if you’re uncertain.
Diagnosing Temperature and Heat Distribution Issues
Temperature accuracy matters for every bake, roast, and slow-cook setting. With a calibrated oven thermometer, you can verify actual vs. set temperatures and detect drift. If heat isn’t even across racks, inspect heating elements, bake and broil coils, and the oven sensor. For gas ovens, ensure the igniter glows and the flame is steady; a weak or delayed ignition indicates a worn component. In Denver, altitude can slightly affect airflow and sensor response, so follow model-specific calibration procedures in the manual. Document readings, compare them with the manufacturer’s specs, and avoid making irreversible adjustments without confirmation.
Tools, Parts, and Sourcing Replacements in Denver
Before you begin, gather essential tools and safe replacements. A multimeter helps test wiring and sensors, while a nut driver set and screwdrivers simplify panel removal. A non-contact voltage tester adds a layer of safety, and a kitchen thermometer validates temperature readings. Source OEM parts when possible to ensure compatibility with your model. Local hardware stores and appliance parts shops in Denver can provide compatible bake elements, igniters, and door seals. Always verify part numbers and compatibility with your oven’s serial and model before purchasing.
DIY Fixes You Can Attempt vs When to Call a Pro
DIY fixes can save time and money for non-technical issues, such as replacing a worn door gasket, cleaning vent paths, or re-seating a loose rack. However, electrical faults, gas-safety concerns, and control-board problems often require licensed technicians. If you smell gas, hear hissing, or see burnt smells around any electrical component, stop immediately and call a pro. For Denver homeowners, partnering with a reputable technician who understands local codes and permits is a smart safety-forward choice. Always weigh cost, risk, and potential warranty impact when deciding whether to DIY or hire a pro.
A Local-Ready Checklist for Denver Homeowners
Create a simple pre-work checklist to keep repairs on track: confirm you have power shut off, locate the model number, read the manual, gather the needed tools, and prepare a safe workspace. Take photos before disassembly to aid reassembly. Schedule a test bake at a low temperature after any fix to confirm heat is stable, then gradually test higher temps. Keep a log of issues and solutions to inform any future service calls.
Tools & Materials
- Multimeter(Test voltage, continuity, and resistance of elements/sensors)
- Nut driver set(Various sizes for panel screws)
- Screwdrivers (Phillips & flathead)(Include Torx if your model uses it)
- Non-contact voltage tester(Check for live circuits safely)
- Thermometer or oven thermometer(Verify heat accuracy across temps)
- Heat-resistant gloves(Protect hands when handling hot parts)
- Owner’s manual / wiring diagram(Model-specific specs and wiring)
- Cleaning supplies (mild detergent, cloth)(Clean parts during inspection)
Steps
Estimated time: 60-90 minutes
- 1
Power down and verify safety
Turn off the oven at the wall or main breaker and unplug if accessible. If the oven is gas, close the shut-off valve and ensure there is no gas smell or flame. Wait 2-5 minutes for capacitors to discharge before you touch any internal components.
Tip: Always double-check that power is off with a tester before touching wiring. - 2
Gather tools and parts ahead of time
Collect the tools and any replacement parts you identified as needed. Having everything at hand reduces the chance of leaving panels open and increasing risk.
Tip: Lay out a clean tray for screws and small parts to avoid loss. - 3
Inspect heating elements/igniter visually
Look for visible cracks, breaks, or soot on bake/broil elements or the igniter. Replace any damaged parts following the manufacturer’s instructions.
Tip: Never touch a live heating element; allow it to cool completely. - 4
Test the thermostat and sensor with a meter
Use the multimeter to check continuity and resistance of the oven sensor and thermostat per the service manual. Compare readings to the specified values.
Tip: Record readings at room temp to establish a baseline. - 5
Check door gasket and alignment
Inspect the door seal for wear and ensure the door closes flush. Replace a cracked gasket and adjust hinges if needed to regain a proper seal.
Tip: Clean the gasket with mild soap and water to reveal cracks. - 6
Inspect racks, slides, and venting paths
Remove racks and check for warped slides or blocked vents. Clear any obstructions and reassemble correctly to avoid heat buildup in undesired areas.
Tip: Ensure racks are evenly seated to prevent tipping during use. - 7
Reconnect power and calibrate
Reinstall panels, restore power, and run a calibration or bake test to verify stable heating. Allow the oven to stabilize for 10-15 minutes before testing temperatures.
Tip: Start with 250°F and gradually test higher temps to confirm stability. - 8
Decide when to escalate to a pro
If symptoms persist after basic fixes, or if you encounter gas safety concerns, contact a licensed technician in Denver. Document symptoms, error codes, and the model number to speed service.
Tip: Keep a repair log for future reference and warranty considerations.
Questions & Answers
What are the most common signs my oven needs repair?
Common signs include uneven heating, failure to reach target temperatures, unusual oven smells, or a door that won’t seal. Start by validating temperatures with a thermometer and inspect seals and wiring for obvious wear. If symptoms persist after basic checks, consider professional assessment.
Common signs include uneven heating, failing to reach temperature, and door sealing issues. Check seals and test temperatures first; if unresolved, call a professional.
Should I attempt an DIY oven repair in Denver?
DIY can cover basic maintenance and gasket replacement, but electrical and gas-related repairs should be left to licensed professionals. Consider your comfort with tools and understanding of safety procedures before starting. For most Denver homes, a pro is the safer choice for complex issues.
DIY is okay for basics, but avoid electrical or gas repairs unless you’re trained. When in doubt, call a pro.
What safety precautions are essential when repairing an oven?
Always disconnect power, verify there’s no live current, and if gas is involved, shut off the gas supply. Wear heat-resistant gloves, use insulated tools, and keep a dry workspace. Do not bypass safety features or attempt to repair a gas line.
Always unplug, test for power, and shut off gas if applicable. Wear gloves and work in a dry area.
When should I replace rather than repair an oven?
If multiple major components fail, or if repair costs approach the price of a new unit with limited lifespan, replacement becomes more cost-effective. Also consider energy efficiency and technology upgrades when deciding.
If several major parts fail or costs near replacement price, consider a new oven.
Do I need permits to repair a gas oven in Denver?
Gas appliance work typically requires licensed technicians and may require permits depending on local codes. Always consult with a Denver-licensed pro to confirm permit needs and safety requirements.
Gas repairs usually need a licensed pro and may require permits in Denver.
How can I tell if calibration after repair is successful?
Use an oven thermometer to compare set temperature with actual temperature across several points. If readings remain off, repeat calibration steps in the manual or request a service call. A stable, consistent temperature indicates a successful calibration.
Check with an oven thermometer across multiple temps to confirm calibration.
Watch Video
Main Points
- Plan safety first: disconnect power and verify gas shutoff.
- Use model-specific manuals and the right tools.
- Test with proper instruments and document results.
- Call a licensed pro for gas issues or unresolved problems in Denver.