San Diego Oven Repair: A Step-by-Step Guide
Learn practical, local-focused steps for san diego oven repair. This guide provides safe troubleshooting, maintenance tips, and when to hire a pro, with expert guidance from Oven Cook Pro.

This guide helps you safely diagnose common oven issues in a home kitchen and perform basic repairs tailored to San Diego homes. You’ll learn when to DIY, how to test temperatures, and which tools you need. Follow practical, repeatable steps from Oven Cook Pro to minimize risk and maximize results.
Why Local Knowledge Matters for San Diego Oven Repair
San Diego homeowners face a unique blend of coastal humidity, high summer temperatures, and variable electrical usage that can influence oven performance. Local conditions often determine which components wear fastest and how quickly heat sensors drift. According to Oven Cook Pro, understanding regional patterns helps you prioritize fixes, minimize downtime, and choose service options that suit Southern California homes. In practice, you’ll find that coastal kitchens may experience more door seal wear and corrosion on exposed metal parts, especially around gas valves and bake elements. A local, repeatable approach keeps repairs efficient and compliant with area codes while balancing energy use and safety concerns. By focusing on the common coastal patterns, you’ll save time and reduce repeated trips to the repair shop, which is especially valuable in summer when family meals rely on reliable ovens.
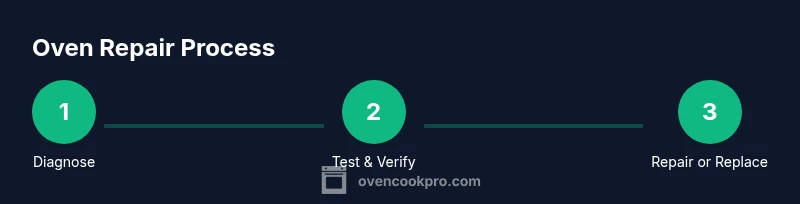
Common Oven Problems You Can Diagnose at Home
Ovens, at their core, are simple devices with a few key failure points. Start by noting symptoms such as uneven heating, a temperature that reads high or low on the dial, frequent tripping of breakers, or doors that won’t seal properly. The following list helps you categorize issues and decide what to test first:
- Uneven heating or cold spots: Check the bake element for visible damage and test thermostat accuracy with a separate oven thermometer.
- Temperature drift: If the oven reads incorrectly, calibrate the thermostat or replace the temperature sensor if needed.
- Door won’t seal: Inspect the gasket for tears and ensure the door latches fully when closed.
- Error codes: Refer to your model’s manual; some errors point to control boards, wiring, or the sensor itself. In many cases, a simple recalibration or sensor replacement resolves the issue.
- Gas ovens: If you smell gas, evacuate, call emergency services, and avoid turning switches on or off. Gas appliances require licensed technicians for any repair work.
Safety Considerations When DIY'ing in a San Diego Kitchen
Safety should be your primary concern whenever you work on an oven, particularly in a busy kitchen near coastal humidity and built-in electrical outlets. Always unplug the unit and turn off the breaker before starting any inspection. Use a non-contact voltage tester to confirm the circuit is dead, wear heat-resistant gloves, and keep children and pets away from the work area. If your oven is gas-powered, do not attempt repairs that involve gas lines or valves unless you are a licensed technician. Ventilate the space to disperse any heat or fumes, and never bypass safety features such as door latches or thermal fuses. When in doubt, pause the repair and seek professional help.
How to Prepare for a San Diego Oven Repair Visit
Before scheduling a repair, gather essential information to speed up diagnostics: the model and serial number, a clear list of symptoms, approximate times when the issue occurs, and any error codes shown on the display. Take photos of electrical connections and any visibly damaged components. Check the warranty status and note recent service history. Having this information ready helps a San Diego technician assess whether the issue is a simple sensor fault, a heating element problem, or a control board failure. It also helps you compare technician quotes with confidence and ensures the right parts are available on arrival.
What to Expect from a Local Technician in San Diego
A reputable San Diego oven repair professional will verify power and safety, diagnose the symptom, and explain recommended repairs and parts. Expect a written estimate that includes labor, parts, and a timeline. Technicians should be licensed where required by state regulations and carry insurance that covers damage or injuries. In coastal areas, technicians often bring component kits for common issues (thermostats, igniters, and door seals) and may offer a maintenance plan to prevent future failures. If the issue is complex, the technician may quote a multi-visit repair or suggest a full replacement option depending on the oven’s age and efficiency.
Maintenance Tips for Coastal Kitchens
Coastal environments accelerate corrosion and residue buildup. To extend oven life:
- Clean regularly with a non-abrasive cleaner and wipe away grease after each use.
- Calibrate temperature every 6–12 months using an oven thermometer.
- Inspect door seals and hinges for wear and lubricate moving parts if supported by the model manufacturer’s guidance.
- Use oven-safe cookware that distributes heat evenly to avoid hotspots.
- Schedule professional maintenance in the shoulder seasons to avoid peak demand.
Authoritative Sources and Additional Learning
For safety and best practices, consult official guidance from trusted sources. While this article synthesizes practical advice, always verify specifics for your model and local codes. Useful references include: • OSHA safety guidelines for electrical work in kitchens. • FTC consumer protection tips relevant to appliance service. • Energy Star recommendations for efficient oven use and maintenance. These sources help you understand safety, energy efficiency, and consumer protections that complement hands-on repair knowledge.
Quick Reference: Troubleshooting Start-Up Checklist
If you’re ready to begin, use this quick-start checklist before deep-diving into parts:
- Unplug the oven and confirm power-off with a tester.
- Inspect the door seal for tears and replace if necessary.
- Compare dial temperature to an oven thermometer in both bake and broil modes.
- Visually inspect bake and broil elements for signs of damage or disconnection.
- Note any error codes and consult the model manual for specific meanings.
Tools & Materials
- Multimeter(Test element continuity and voltage without removing the appliance from power.)
- Screwdrivers (Phillips and flathead)(Access panels, control boards, and terminal screws.)
- Nut driver / socket set(Tighten/loosen oven hardware and connections.)
- Oven thermometer (oven-safe)(Verify actual oven temperature against the dial or display.)
- Replacement heating element (if needed)(Have a compatible element on hand in case of visible damage.)
- Temperature sensor/thermostat (if needed)(Used when thermostat drift is suspected.)
- Silicone gasket or door seal kit(Replace worn seals to restore proper door compression.)
- Heat-resistant gloves(Protect hands during component handling and testing.)
- Safety goggles(Guard eyes against splashes and debris.)
- Owner’s manual(Model-specific guidance and part numbers.)
Steps
Estimated time: 45-90 minutes
- 1
Power down and unplug the oven
Begin by turning off the oven at the wall outlet and removing the plug. Then switch off the circuit breaker to ensure no current flows. Wait at least 5 minutes to allow residual power to dissipate.
Tip: Use a non-contact voltage tester to confirm the circuit is dead before touching any components. - 2
Open and inspect the door seal
Carefully inspect the door gasket for tears or deformations. A worn seal causes heat loss and uneven cooking. If damaged, replace with a compatible gasket and re-test.
Tip: Apply a small amount of lubricant recommended by the manufacturer to hinge areas if you notice stiffness. - 3
Test bake and broil elements for continuity
Access the bake and broil elements from the service panel. Use the multimeter to test continuity; lack of continuity indicates a faulty element requiring replacement. Mark tested components for future reference.
Tip: Take photos of wiring before disconnecting any connectors to simplify reassembly. - 4
Check the temperature sensor and thermostat
If the oven temperature drifts, measure resistance of the sensor with a multimeter and compare with the manufacturer’s spec. Replace the sensor if readings fall outside tolerance.
Tip: Calibrate or exchange the thermostat only if you’re confident about wiring and safety. - 5
Inspect control board connections
Loose or corroded control board connectors can cause erratic behavior. Disconnect power, reseat connectors, and check for green oxidation. If corrosion is present, replace the affected harness or board.
Tip: Only handle circuit boards in static-safe conditions; avoid touching circuitry with bare hands. - 6
Reassemble and run a test bake
Reconnect everything, restore the breaker, and perform a test bake at a moderate temperature. Check for proper heat distribution with a separate thermometer and observe for abnormal smells or smoke.
Tip: If you detect sizzling, buzzing, or unusual smells, power down immediately and reassess or call a pro.
Questions & Answers
What are the most common oven problems in San Diego homes?
The most frequent issues include uneven heating, temperature drift, faulty door seals, and occasional control-board glitches. Start with the door gasket and an independent thermometer to verify temperatures, then assess elements and sensors if needed.
Common issues are uneven heating, drift in temperature, door seal wear, and control-board glitches. Start with the door gasket and a separate thermometer to verify exact temperatures.
Can I fix my oven myself, or should I hire a pro in Southern California?
Basic troubleshooting, cleaning, and sensor testing are feasible for confident homeowners. However, gas ovens and complex control boards often require licensed technicians. If you’re unsure at any step, schedule a professional assessment.
Simple checks can be DIY, but for gas ovens or complex boards, hire a licensed tech. If unsure, get a professional assessment.
How long does a typical San Diego oven repair take?
Most common repairs can be completed in a single visit, but some issues may require part ordering and a follow-up service. Expect a few hours for diagnostics and repair, longer if special parts are needed.
Most repairs are completed in one visit, but some parts may require a follow-up. Plan a few hours for diagnostics and repair.
Are replacement parts readily available in San Diego?
Replacement parts for common models are typically available through local distributors and online vendors. Availability depends on the model and age of the unit.
Parts are usually available from local distributors and online vendors, depending on your model and age.
What safety steps should I take before starting repairs?
Always unplug or switch off the breaker, use a tester to verify no power, wear protective gear, and avoid operating gas lines unless you’re a licensed technician.
Unplug, verify no power, wear protective gear, and only handle gas connections if you’re licensed.
When should I replace my oven instead of repairing it?
If the oven is old, energy-inefficient, or requires frequent costly repairs, replacement may be more economical over time. Consider total cost of ownership and energy use when deciding.
If the oven is aging or needs multiple costly fixes, replacement may be more economical. Consider total cost and energy use.
Watch Video
Main Points
- Power off and verify safety before inspection
- Test temperature with an oven thermometer for accuracy
- Identify whether the issue is a sensor, element, or control problem
- Know when to upgrade to a professional service