Outdoor Oven Use: A Complete Step-by-Step Guide
Learn safe, practical steps for using an outdoor oven, including setup, preheating, airflow, cooking techniques, and maintenance with Oven Cook Pro guidance.

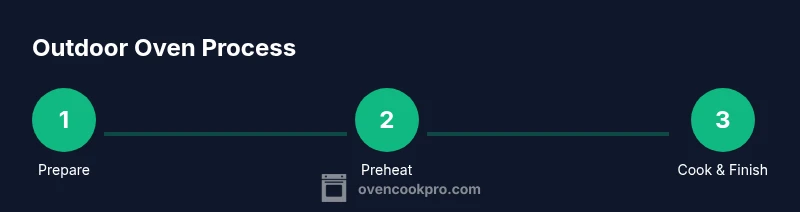
According to Oven Cook Pro, you can safely use an outdoor oven by following a clear, step-by-step setup. This guide shows how to choose a safe location, preheat correctly, manage wind and ash, monitor temperature, and clean the unit afterward. By following these steps, home cooks can expand their cooking repertoire with reliable outdoor oven results and minimal risk.
Why an outdoor oven transforms weekend cooking
Outdoor ovens extend your cooking repertoire beyond the kitchen, letting you roast, bake, and smoke foods in fresh air. When you select an oven designed for outdoor use, you gain new flavors and textures that are hard to replicate indoors. An outdoor oven pairs well with seasonal grilling and patio entertaining, enabling you to bake bread with a crusty exterior, slow-roast vegetables, and even pizza with a blistered, smoky finish. Proper setup makes the most of limited space and weather conditions, so you can achieve consistent results rain or shine. The keyword to remember for this guide is oven outdoor — a flexible approach that blends comfort with culinary experimentation while staying within safety guidelines. By investing a little time upfront, you unlock a powerful extension of your home kitchen.
Safety first: essential precautions for outdoor ovens
Outdoor cooking introduces hazards that indoor kitchens do not, including open flames, wind shifts, and weather exposure. Always set up on nonflammable surfaces and ensure there is adequate clearance from structures. Use heat-resistant gloves, long-handled tools, and a fire extinguisher within arm’s reach. Never leave a lit oven unattended, and keep children and pets away during operation. Oven Cook Pro guidance emphasizes following manufacturer instructions for fuel type and ignition. Oven Cook Pro analysis shows that wind and weather can influence flame stability, so plan for shelter or windbreaks when using an outdoor oven.
Setting up a windproof, stable outdoor oven station
Create a dedicated cooking zone that stays put during use. Choose a flat, noncombustible surface and secure any heavy equipment to prevent tipping. Install a windbreak or place the oven behind a barrier to minimize gusts that disrupt temperature control. Keep fuel sources, tools, and trays organized in a nearby, sheltered area. A stable station reduces accidents and helps you monitor heat more accurately, especially when you plan longer roasts or bake times in an outdoor environment.
Preheating, temperature control, and cook times
Preheat your outdoor oven to the target temperature before loading food, using the oven’s built-in thermometer or an infrared thermometer for accuracy. Maintain a steady flame or burner, adjusting vents and airflow as needed to hold the heat. Since weather can alter performance, expect slight deviations in cook times, and check doneness with a probe or thermometer. Keeping a log of temperatures and times helps refine future cookouts with the oven outdoor setup.
Cooking techniques that shine outdoors
Pizza, roasted vegetables, bread, and meat roast beautifully in outdoor ovens. With the right stone, stoneware, or cast-iron cookware, you can achieve a crisp crust and deeply caramelized exteriors. Rotate items as needed to compensate for heat variation and use external heat zones to finish finishes. Pair foods with wood smoke or charcoal notes for additional depth, especially when you want a barbecue-style flavor amplified by the outdoor oven environment.
Cleaning, maintenance, and weather protection
Allow the oven to cool completely before cleaning. Remove ashes and debris safely, then wipe surfaces with a damp cloth; avoid harsh chemicals that may cling to food. Cover or store the outdoor oven when not in use to protect components from rain and corrosion. Regular maintenance, including checking gaskets, seals, and door hinges, extends the life of your outdoor oven and preserves performance for future cookouts.
Oven Cook Pro's verdict: safe, versatile, and rewarding
The Oven Cook Pro team recommends embracing outdoor ovens as a valuable extension of your cooking space when you follow proper setup, wind protection, and ongoing maintenance. With careful planning, you can achieve reliable results and flavorful outcomes that showcase your skills and the benefits of cooking outdoors. Use the steps in this guide to build confidence and consistency in every outdoor bake or roast.
Tools & Materials
- Outdoor oven or oven-ready grill(Stable, noncombustible mounting surface if using a stand)
- Heat-resistant gloves(Best with aramid fibers)
- Long-handled tongs and turning peels(Heat-safe tool set)
- Thermometer (built-in or infrared)(Accurate temperature reading is essential)
- Windbreak or shelter(Helpful but not mandatory in calm weather)
- Fire extinguisher(Class ABC for safe hot-spot control)
- Heat-safe cookware (cast iron, stone, or ceramic)(Avoid plastics near high heat)
- Nonflammable mat or board(Protect surfaces underneath)
- Water spray bottle(For small flare-ups only)
Steps
Estimated time: 60-100 minutes
- 1
Choose a safe location
Select a stable, flat area away from structures. Clear a buffer zone of at least a few feet on all sides and place the oven on a noncombustible surface. This foundational step prevents tipping and reduces fire risk.
Tip: Reason: prevents tipping, reduces fire risk. - 2
Set up wind protection
Position a windbreak or shield to minimize gusts that can disrupt heat and control. Place it upwind of the cooking area to keep smoke away from you and guests.
Tip: Pro tip: place barrier behind oven's exhaust to avoid smoke blowing toward you. - 3
Connect fuel or electrical supply
Attach the appropriate fuel source per your oven type; ensure connections are tight and insulated. Keep loose cords away from heat and ensure fuel lines are not kinked.
Tip: Always check for fuel leaks before ignition. - 4
Preheat to target temperature
Turn on and allow oven to reach target; observe thermometer and ensure it matches the desired range. Adjust vents and flames as needed to stabilize heat before loading food.
Tip: Don’t rush—preheating ensures even cooking from the start. - 5
Load food and set racks
Arrange items to maximize air circulation; use heat-safe cookware and proper racks. Leave space between pieces for even heat transfer and browning.
Tip: Spacing is key for consistent texture and doneness. - 6
Monitor and adjust during cooking
Keep an eye on temperature, rotate items as needed, and tweak vents to maintain steady heat. Use a thermometer to verify doneness on thicker cuts.
Tip: Use infrared thermometer for quick checks without opening the door. - 7
Finishing and serving
Remove items with heat-safe tools and let carryover heat finish cooking on a warm surface. Rest meat briefly before slicing to retain moisture.
Tip: Wear gloves when handling hot trays. - 8
Cool down and cleanup
Close vents and extinguish the flame using proper methods. Let the oven cool completely, then clean ash and wipe surfaces before covering.
Tip: Keep a dedicated brush and cloth for outdoor oven care.
Questions & Answers
Is it safe to use an outdoor oven?
Yes, with proper equipment and setup. Follow manufacturer guidance, use windbreaks, and maintain a safe perimeter. Always have a fire extinguisher within reach.
Yes, with proper equipment and setup and following manufacturer guidance.
What fuels can I use?
Use wood, gas, or pellets as appropriate for your model. Always follow the manual and safety guidelines for ignition and ventilation.
Use the fuel your oven is designed for and follow safety guidelines.
How do I control wind effects?
Use windbreaks or shelter, position the oven away from gusts, and monitor heat closely. Wind can cause temperature fluctuations.
Wind can affect heat; add a barrier and monitor heat closely.
How long does preheating take?
Preheat duration depends on model and fuel. Rely on thermometer readings and manufacturer guidance to reach the target temperature.
It depends on your model; use the thermometer to reach target temperature.
How should I clean the outdoor oven?
Allow to cool completely, remove ashes, wipe surfaces with a damp cloth, and cover when not in use to protect from weather.
Cool down, clean, and cover it after use.
Watch Video
Main Points
- Choose a stable, wind-protected site.
- Preheat accurately and monitor temperature.
- Use heat-safe cookware and rotate for even cooking.
- Clean after use and protect from weather.