Mastering a Wood Burning Oven: A Step-by-Step Guide
A practical guide by Oven Cook Pro for using a wood burning oven safely, preheating correctly, cooking with flavor-rich results, and maintaining the oven over time.

Learn how to use a wood burning oven safely to bake, roast, and flavor foods with real-crust results. This guide covers setup, heat management, loading, and maintenance so you can cook confidently at home. According to Oven Cook Pro, proper preheating and moisture control are essential to consistent results with a wood burning oven.
What is a wood burning oven and why choose one for home cooking?
A wood burning oven is a dedicated cooking chamber fueled by wood to generate high, radiant heat. Home cooks love it for creating pizzas with blistered crusts, breads with rustic crumb, and meats with a smoky depth that’s hard to achieve with gas or electric ovens. There are two common configurations: masonry ovens, which rely on thermal mass to store heat, and metal ovens, which heat quickly but may cool faster. The flavor and texture you get from a wood burning oven come from a combination of intense heat, convection from rising air, and the aromatic compounds released by burning wood. For beginners, the learning curve centers on heat management, ventilation, and ash handling, not on complex equipment.
From a practical standpoint, plan for space, ventilation, and maintenance. Indoor installations require careful venting and CO monitoring, while outdoor setups demand weather protection and secure foundation. The Oven Cook Pro team notes that even compact home configurations benefit from a deliberate plan: establish a safe work zone, decide how you’ll manage fuel and air, and keep the cooking surface clean and seasoned. This article lays out step-by-step procedures, safety considerations, and recipe ideas to help you harness the full potential of a wood burning oven in a home kitchen or outdoor cooking area.
Using a wood burning oven at home means embracing its unique heat profile, which blends radiant and convection heat for crusty exteriors and tender interiors. The flavor comes from the wood’s aroma and the oven’s ability to hold heat for extended cooking. With careful planning, a wood burning oven can become a versatile centerpiece for weeknight meals and weekend feasts alike. By understanding the balance between fire management and cooking, you’ll unlock consistent results across breads, roasts, and vegetables. The Oven Cook Pro guide emphasizes practical tips for beginners, including how to set up your oven safely, how to preheat, and how to monitor temperature while cooking. As you gain experience, you’ll learn to adapt heat for different foods and portions while maximizing the distinctive wood-fired flavor.
This section sets the stage for safe, effective use of a wood burning oven, highlighting core concepts such as heat retention, airflow, and fuel choice. You’ll learn why seasoned wood and proper chamber design impact performance, and how preheating strategies influence texture and crust development. Throughout this guide, you’ll encounter best practices that translate to both traditional masonry ovens and modern metal units, with considerations for indoor placement and outdoor setups. By following structured steps, you’ll move from curiosity to confident execution in your own kitchen or outdoor cooking space.
Looking ahead, you’ll gain a clearer sense of how to approach preheating, loading, cooking, and maintenance. The goal is to achieve reliable results that satisfy both flavor and texture expectations. Expect to fine-tune your approach as you reference the recommendations in this guide and track outcomes with simple observations like crust color, tenderness, and aroma. With persistence, your wood burning oven will become a trusted tool for everyday meals and special-occasion dishes alike.
Tools & Materials
- Heat-resistant gloves(Certified aramid or leather, up to 500°F/260°C)
- Long-handled tongs(At least 18 inches for safe handling of hot surfaces)
- Infrared thermometer(For monitoring surface temperatures; an instant read is ideal)
- Pizza stone or baking steel(Preheated surface to promote crust development)
- Ash rake or brush(For safe ash removal when the oven is cool)
- Firestarter/kindling(Dry wood and kindling to initiate a clean burn)
- Dry hardwood fuel(Hardwoods preferred; avoid resinous softwoods for cleaner heat)
- Metal bucket for ashes(Heat-safe, with a secure lid)
- Chimney damper or exhaust vent(Optional but helps control draft and heat loss)
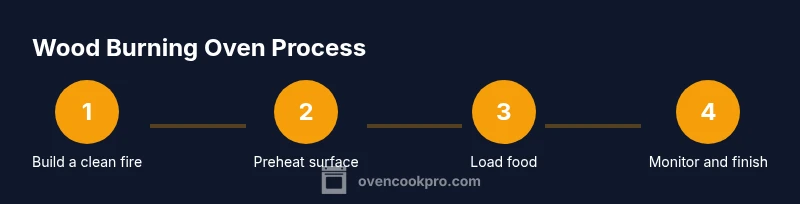
Steps
Estimated time: 60-90 minutes
- 1
Prepare the workspace and safety gear
Clear the area around the oven and lay out all tools. Put on heat-resistant gloves and eye protection. This ensures you can handle hot surfaces and moving coals safely as you begin.
Tip: Keep a dry area nearby for any fuel or tools you remove during loading. - 2
Build a controlled fire to begin heating
Place dry kindling and small dry wood to form a gentle flame, then add larger logs gradually. The aim is to establish a steady heat without creating a chimney draft that blasts the chamber.
Tip: Start with a smaller fire and allow it to grow rather than lighting a large blaze all at once. - 3
Stabilize heat and prepare the cooking surface
Once you have a strong, established fire, allow the interior to glow with evenly distributed heat. Slide the baking stone or steel into the oven so it begins absorbing heat.
Tip: Use the infrared thermometer to confirm the surface is hot before loading food. - 4
Load food and manage airflow
Position pizzas or breads on the hot surface, and place roasts on a rack if needed. Adjust vents to maintain steady heat and reduce sudden temperature swings.
Tip: Keep the door or front of the oven closed as much as possible to retain heat. - 5
Monitor temperature and adjust as needed
Regularly check the interior temperature and surface temperatures. Add wood or close vents gradually to keep a consistent heat level for the dish you’re cooking.
Tip: Keep a small log of fuel additions and temperatures to refine your process. - 6
Finish cooking and remove food safely
When the food reaches the desired crust or doneness, use tongs and a sturdy peel or tray to remove it from the oven. Allow the oven to rest briefly before further loading if needed.
Tip: Always move hot items with a protective barrier between the food and your skin. - 7
Cool down and clean up after cooking
Close vents to help cooling, safely dispose of ashes in the metal bucket once cooled, and wipe down any interior surfaces with a dry brush or damp cloth if allowed by your unit.
Tip: Never discard hot ashes into a flammable container.
Questions & Answers
What is a wood burning oven and why use one?
A wood burning oven uses wood as its primary heat source to create intense radiant heat. Home cooks use it for crusty pizzas, flavorful breads, and smoky roasts. The flavor and texture come from the wood-fired heat and the oven's heat retention, making it a distinctive tool for home kitchens and outdoor setups.
Wood burning ovens use wood to generate intense heat for crusty bread and smoky roasts. It’s a flavorful option for home cooking.
Is it safe to use a wood burning oven indoors?
Indoor use requires proper ventilation, a compliant exhaust system, and reliable carbon monoxide monitoring. Outdoor or well-ventilated setups reduce risk. Always follow local safety codes and manufacturer guidelines for your specific oven.
Ensure proper ventilation and carbon monoxide monitoring if using indoors.
What foods cook best in a wood burning oven?
Pizzas, rustic loaves, roasted vegetables, and small meats benefit most from the oven’s radiant heat and smoky aroma. The high surface heat helps develop crusts quickly while keeping interiors moist and flavorful.
Pizzas, breads, and roasted dishes shine in a wood burning oven.
How can I control temperature and airflow effectively?
Management comes from the size and placement of the fire, the moisture content of the wood, and vent adjustments. Start with a controlled flame, measure surface temps, and adjust air intake gradually to avoid temperature spikes.
Control heat by modulating the fire and vent settings gradually.
How do I clean and maintain my wood burning oven?
Let ashes cool completely, remove them safely, brush interior surfaces, and wipe down exterior areas per manufacturer guidance. Regular checks for door seals and chimney integrity help maintain performance.
Clean ash after the oven cools and inspect seals regularly.
What should I do if the oven smokes excessively?
Excessive smoke usually signals poor combustion or moisture in the wood. Check for dry, well-seasoned wood, ensure proper airflow, and avoid overloading the oven. If smoke persists, pause cooking and ventilate the area.
Tackle excessive smoke by improving wood quality and airflow, then resume cooking slowly.
Watch Video
Main Points
- Understand the heat profile of a wood burning oven and plan your cooking strategy.
- Prioritize safety with proper gear, ventilation, and monitoring tools.
- Preheat thoroughly and manage airflow for consistent results.
- Experiment with pizzas, breads, and roasts to exploit the oven's flavor-rich potential.
- Maintain the oven with regular cleaning and ash disposal to extend life.