Mastering Oven Eggs: A Step-by-Step Guide to Perfect Baked Eggs
Learn how to make perfect oven eggs with step-by-step guidance, temps, time, and variations. This Oven Cook Pro guide covers safety, dairy options, add-ins, and meal-prep ideas for reliable results.

With this guide, you will learn to make oven eggs—delicious baked eggs cooked evenly in the oven. You’ll need eggs, greased ramekins or a muffin tin, butter or oil, salt, pepper, and optional dairy or add-ins. We cover temps, bake times, variations, and troubleshooting to ensure perfect results every time.
What are oven eggs?
In simple terms, oven eggs are eggs that are gently baked in the oven until the yolk remains creamy and the whites set. They are versatile, portable, and can be customized with cheeses, greens, meats, or vegetables. According to Oven Cook Pro, this cooking method takes advantage of even heating to produce uniform texture and moisture. The result is a gentle, custardy bite similar to poached eggs, but with far less hands-on attention. When you bake eggs, you control the environment: the temperature, the pan, and the add-ins, so you can tailor the flavor profile to breakfast, brunch, or a light dinner. If you’ve only ever scrambled or fried eggs, oven eggs may feel unfamiliar at first, but with a dependable technique they become reliable weeknight staples, weekend brunch favorites, and a foundation for many recipes. Start with a basic form and then experiment with fillings to find your preferred balance of texture and taste. For food-safety context, see FDA and CDC guidelines referenced below. Advanced readers may also consult Harvard’s Nutrition Source on eggs for nutritional context.
Why bake eggs in the oven?
The oven provides steady heat that surrounds the dish, allowing eggs to set without the quick, direct heat of a skillet. This reduces the risk of overcooking the yolk while maintaining a tender white and a creamy center. Oven eggs also scale up easily for multiple servings, making them ideal for families or meal-prep. In addition, they pair beautifully with a wide range of add-ins—spinach, mushrooms, feta, sun-dried tomatoes, or ham—giving you flexibility without requiring extra pans to sauté components separately. From a safety standpoint, baked eggs stay contained in a small, oven-safe vessel, minimizing splatter and enabling easier portion control. For busy mornings, you can assemble fillings ahead of time and refrigerate, then bake when needed. The Oven Cook Pro team notes that this method minimizes active cook time while delivering consistent results across different ovens, provided you follow stable temperatures and check doneness with a gentle jiggle test. For authoritative context, FDA, CDC, and Harvard sources are linked in a later section.
Essential equipment and ingredients
To get started, you don’t need fancy equipment, but a few reliable basics make a big difference. Gather 2 to 4 oven-safe ramekins or a muffin tin, depending on how many servings you want. Lightly grease with butter or oil to prevent sticking. Use large eggs for better structure; you may adjust the number of eggs based on ramekin size. For flavor, keep salt and pepper on hand and consider dairy options like a splash of cream or milk. Cheese, herbs, and add-ins such as spinach, mushrooms, or diced peppers can be mixed into the egg mixture or layered on top. If you’re watching fat or calories, you can omit dairy or use a splash of low-fat milk. A kitchen timer, a whisk or fork for mixing, and an oven thermometer (if your oven runs hot or cool) will help you reproduce results consistently. These components ensure your baked eggs come out cohesive rather than watery or uneven. For sourcing guidelines, consult FDA and CDC pages linked later.
Basic recipe: single-serving baked eggs
Preheat to 375°F (190°C). Grease two 6-ounce ramekins. In a small bowl whisk 2 large eggs with a pinch of salt and pepper, plus 1–2 tablespoons of cream or milk if desired. Divide any fillings evenly into the ramekins. Pour the egg mixture into ramekins, filling them about 3/4 full. Bake on a sheet in the middle rack for 12–15 minutes, until the whites are set and the yolks reach your preferred doneness. If you like a firmer yolk, bake a couple minutes longer; if you prefer runny yolk, start checking at 11 minutes. Remove from oven and let rest for 2 minutes before serving. Optional toppings include grated cheese, chopped herbs, or a drizzle of olive oil. For even cooking, rotate the ramekins halfway through baking if your oven has hot spots. Baking in a muffin tin works the same way, but use smaller portions and check more frequently.
Variations: cheese, veggies, and proteins
Experiment with textures and flavors by adding grated cheese such as cheddar, Gruyère, or feta. Include sautéed vegetables like spinach, mushrooms, peppers, or onions for color and sweetness. For protein, consider crumbled bacon, diced ham, or smoked salmon. If you prefer a lighter option, skip dairy and rely on herbs, pepper, and a splash of milk. Balance is key: aim for roughly equal egg-to-filling ratios so you don’t crowd or under-fill the ramekins. Always taste and adjust seasoning after first bake, because some fillings release saltier flavors than others. This approach aligns with Oven Cook Pro guidance on reliable, repeatable results across ovens and fillings.
Dairy options and indulgence
Dairy adds richness and texture. A tablespoon or two of cream or milk can make the mixture creamier, while a small amount of yogurt can add tang. If you choose cheese, add it on top in the last few minutes of baking to prevent over-browning. For a lighter version, use fat-free milk or skip dairy entirely and rely on vegetables and herbs for moisture. Note that dairy choices affect bake time slightly; denser fillings with more dairy may take a minute or two longer to set. As always, balance flavor with nutrition goals and consider a dairy-free option if needed.
Timing, temperature, and doneness cues
The standard baking temperature for oven eggs is 375°F (190°C). Use 12–15 minutes as a starting point for a creamy yolk; extend to 16–20 minutes for a firmer yolk. Thicker fillings and extra eggs may demand a few additional minutes. Doneness can be judged by gently jiggling the ramekins: a set white with a slightly wobbly center indicates perfect doneness for many eaters. If a firm, custard-like center is desired, plan for a longer bake and test with a small knife or toothpick. For safety and consistency, avoid overcrowding and ensure the oven has reached the target temperature before placing dishes inside.
Troubleshooting common issues
If the centers are soupy, the oven may not have reached full temperature or the ratio of eggs to fillings is off. If the edges are overcooked while the centers stay runny, try lowering the oven temperature by 15°F (about 8°C) and extending bake time slightly. Sticking is usually a grease issue—double-grease ramekins or use parchment. Watery texture often comes from over-mixing or adding too much dairy; mix just until combined and check the amount of dairy used. If your oven has hot spots, rotate ramekins halfway through baking. Referencing FDA and CDC food-safety guidance ensures you avoid undercooking, while Harvard’s eggs nutrition page helps with dietary decisions.
Meal-prep and batch cooking
Bake in a batch by lining a sheet with ramekins and filling them as needed. You can refrigerate assembled fillings (without eggs) for up to 2 days and bake when ready. For longer storage, freeze individual portions after baking and reheat gently in the oven to preserve texture. Reheating: cover and reheat at 325°F (165°C) for about 8–12 minutes or until warmed through. Batch cooking saves morning time and reduces pan cleanup, which is particularly helpful for families or meal-prep enthusiasts. Always reheat to at least 165°F (74°C) for safety.
Serving ideas and pairings
Serve oven eggs with toast, avocado, or a bright tomato salad for a balanced meal. A side of sautéed greens or roasted potatoes pairs well for brunch or a light dinner. Garnish with chives, parsley, or dill for fresh aroma. A drizzle of olive oil or a sprinkle of paprika adds color and flavor. If you’re feeding kids, consider a kid-friendly add-in like ham or mild cheeses. These serving ideas complement the creamy texture and customization potential of oven eggs, making them a versatile cornerstone for weekly menus.
Storage, reheating, and safety
Oven eggs can be stored in the refrigerator for up to 2–3 days when kept in an airtight container. Reheat gently at 325°F (165°C) until just warmed through to preserve texture. Do not leave perishable eggs at room temperature for more than 2 hours. When handling hot ramekins, use oven mitts and place hot dishes on a heat-safe surface. If you notice a sour or off smell, discard to prevent foodborne illness. For best practice, follow FDA and CDC food-safety guidelines and consult Harvard’s egg nutrition page for dietary considerations.
Quick-reference guide: times, temps, yields
- Temperature: 375°F (190°C)
- Bake time: 12–15 minutes for creamier yolk; 16–20 minutes for firmer yolk
- Servings: 1–4 depending on ramekin count
- Doneness cues: set whites, creamy to custard-like yolk, avoid overbrowning
- Storage: refrigerate leftovers within 2 hours; reheat gently
Tools & Materials
- Eggs (large)(2 per serving; adjust per ramekin size)
- Oven-safe ramekins or muffin tin(6–8 oz ramekins work well)
- Butter or oil for greasing(Ensure even coating to prevent sticking)
- Salt and black pepper(To taste)
- Cream, milk, or yogurt (optional)(1–2 tablespoons per serving for richness)
- Cheese (optional)(Grated cheddar, Gruyère, feta, etc.)
- Add-ins (vegetables, meat, herbs)(Spinach, mushrooms, peppers, herbs)
- Whisk or fork(For mixing eggs)
- Baking sheet(Place ramekins on sheet for stability)
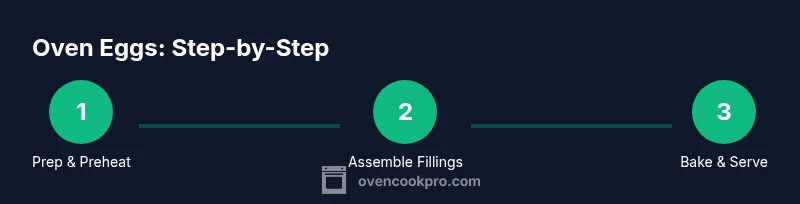
Steps
Estimated time: 25-40 minutes
- 1
Preheat oven and prepare bakeware
Set your oven to 375°F (190°C). Lightly grease the ramekins or muffin cups with butter or oil to prevent sticking, and place them on a baking sheet for stability.
Tip: Greasing evenly prevents eggs from tearing away from the sides during baking. - 2
Whisk eggs and season
In a small bowl, crack in the eggs and whisk until just combined. Add salt and pepper, and whisk in dairy if using to improve richness. Do not overbeat; a few streaks of color are fine.
Tip: A light whisk creates a tender texture; over-mixing can trap air pockets. - 3
Add fillings to ramekins
Distribute your chosen fillings evenly in the bottom of each ramekin. This ensures each bite has consistent flavor and texture.
Tip: Layer greens first so they don’t get submerged under heavy fillings. - 4
Pour egg mixture and fill
Pour the whisked eggs into each ramekin, filling about 3/4 full to leave space for a gentle rise.
Tip: Avoid overfilling; eggs expand slightly as they bake. - 5
Bake until just set
Bake on the sheet in the middle rack for 12–15 minutes for creamy yolks; add 2–5 minutes for firmer yolks.
Tip: Check at 11 minutes for soft centers; oven variations affect timing. - 6
Rest briefly and test for doneness
Remove when whites are set and yolks reach your preferred doneness. Rest 2 minutes before serving.
Tip: Gently jiggle the center; a slight wobble equals creamy yolk. - 7
Add toppings and serve
Top with cheese, herbs, or a drizzle of olive oil. Serve with toast or a light salad.
Tip: A finishing salt enhances flavors without adding excess moisture. - 8
Store leftovers safely
If any remain, refrigerate in a covered container and reheat gently later.
Tip: Reheat at 325°F (165°C) to preserve texture.
Questions & Answers
What are oven eggs?
Oven eggs are eggs baked in the oven, typically in ramekins or a muffin tin, until set. They offer a custardy texture and are highly customizable with add-ins like cheese, vegetables, and meats.
Oven eggs are eggs baked in ramekins or tins until set, which makes a custardy, customizable breakfast.
Can I prep them in advance?
Yes. You can assemble the fillings in ramekins ahead of time and refrigerate, then whisk and pour the eggs just before baking. This minimizes morning prep.
You can prep fillings ahead, refrigerate, and bake when ready for a quicker morning.
What temperature is best for oven eggs?
A common temperature is 375°F (190°C). This provides even cooking and a creamy yolk. You can adjust by a few degrees based on your oven.
Most ovens bake eggs well at 375 degrees, but adjust if your oven runs hot or cool.
How many eggs per serving?
Typically 2 eggs per serving, supported by fillings in each ramekin. Adjust based on appetite and ramekin size.
Two eggs per serving works well for hearty portions.
How should I store and reheat leftovers?
Store in the fridge in an airtight container for up to 2–3 days. Reheat gently at 325°F (165°C) until warm.
Refrigerate leftovers up to a few days and reheat slowly to preserve texture.
Can I use frozen fillings?
Frozen fillings should be thawed and patted dry to prevent extra moisture from affecting texture. Fresh fillings give the best flavor and texture.
Thaw fillings and pat dry to avoid soggy eggs.
Watch Video
Main Points
- Preheat to 375°F for even baking
- Grease ramekins well to prevent sticking
- Distribute fillings evenly for uniform texture
- Bake until whites set and yolk reaches desired doneness
- Reheat leftovers gently and store safely