Oven Door Replacement: Step-by-Step Guide for Home Cooks
Learn how to safely replace an oven door with a clear, step-by-step approach. This guide covers measuring, compatibility, installation, and safety tips from Oven Cook Pro.

Replace a worn or damaged oven door safely with a step-by-step approach. This guide covers how to measure for compatibility, select the right door model, and install it for a secure seal and even heat. You’ll learn safety checks, alignment tips, and common pitfalls to avoid, plus practical maintenance to extend the door’s life.
Why an oven door replacement matters
Replacing an oven door is a practical, economical project for homeowners and home cooks. A damaged door can compromise heat retention, create gaps that affect baking performance, and pose safety risks (sharp glass, loose hinges). The goal is a secure, properly sealed door that fits precisely and operates smoothly. According to Oven Cook Pro, starting with accurate measurements is half the battle. Before you order a replacement, confirm the door model and hinge type (bottom-hinged vs side-mounted) and check for glass integrity. If the outer frame is bent or misaligned, a replacement is often the safer path rather than trying to bend it back. For many models, the door is a modular component you can swap without tools beyond a screwdriver, but some ovens require service panels or hinge adapters. In this block we’ll cover the decision points, how to measure, and how to plan for installation, so you can approach the project with confidence.
Understanding whether you need a full door or just the inner panel is critical. If you see condensation between glass panes, cracks in the middle pane, or edge glass that looks loose, replace the entire door assembly. If the door seals poorly but hinges and frame are intact, replacing the door seal or glass insert might be sufficient; still, check the model's documentation. A replacement door restores baking performance, reduces heat loss, and improves safety by eliminating loose screws and jagged edges. In addition, a properly aligned door helps ensure even heat distribution, which is important for roasts, cookies, and casseroles. The rest of this guide walks you through choosing the right model, gathering tools, and performing a careful, measured swap. With patience, you’ll complete the upgrade in a single session.
Assessing the right replacement door
The first step is to determine the exact door you need. Most ovens use a door assembly that is model-specific, so begin by locating the model number on the interior frame or near the control panel. If you’ve replaced other parts before, you might know the hinge style (bottom or side hinges) and whether the door is a single pane or a double-gasket design. Based on Oven Cook Pro research, buyers save time by matching the replacement to model numbers, ensuring hinge type matches, and checking door dimensions. Don’t assume a universal door will fit; even small differences in width or mounting points can prevent a proper seal. Once you’ve confirmed compatibility, you can order and prepare for installation, including gathering the tools and verifying the door seals before mounting.
Preparing your workspace and safety foundation
A clean, organized workspace reduces mistakes and protects you during replacement. Start by unplugging the oven or turning off the circuit at the breaker, then let the appliance cool completely if it’s recently used. Lay down a soft cloth to protect surfaces, and have a flashlight handy in case you need a closer look at hinges or screws. Inspect the old door for hinge pins, mounting screws, and any decorative trim that will need reattachment on the new door. With a plan in mind and a clear space, you’ll proceed methodically rather than rushing, which minimizes risk and helps you preserve the oven’s finish during removal and reinstallation.
Understanding compatibility and ordering the right door
There’s value in double-checking the door’s compatibility before you order. Look for the oven’s model number and cross-reference it with the replacement door’s product page—manufacturers list compatible models and hinge types. Confirm the door’s width, height, and mounting hole spacing to ensure alignment with the oven cavity. If you’re unsure, contact the manufacturer’s support line or the retailer’s customer service for confirmation. Some replacements include gasket kits or hinge adapters; if yours doesn’t, you may need to purchase those separately. Planning ahead saves time and reduces the risk of receiving incompatible parts.
Step-by-step overview of the replacement process
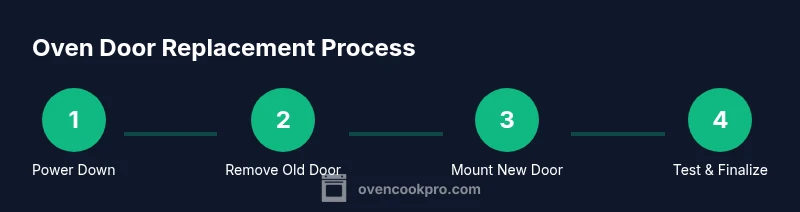
The following sequence tightens the plan from prep to test. Start by removing the old door to reveal the mounting points, then loosen and clear away screws, pins, or clamps. Next, attach the new door by aligning hinges with the oven frame, securing with the supplied fasteners, and reattaching trim pieces. Finally, test function by opening and closing slowly, checking for even gaps and a snug seal. If the door binds or sits awkwardly, back out screws slightly and re-check alignment. This overview maps the journey you’ll take in the detailed steps that follow.
Step-by-step overview of removing the old door safely
Safety begins with a cool oven and protected hands. Remove any heat-safe pads or mitts, then use a partner if the door is heavy. Open the door to a near-full angle and support it with a hand under the bottom edge. If hinges use removable pins, gently lift the pin(s) to release them, keeping track of their location. Set the door on a cushioned surface once free. Inspect the hinges for wear or damage; if they’re bent or stripped, replacement hinges may be necessary along with the door.
Step-by-step overview of installing the new door
Place the new door temporarily into position, align the hinges with the mounting points, and begin fastening with the appropriate screws. Use a driver with the correct bit to avoid stripping. Do not overtighten; you want a secure fit without warping the frame. If the door comes with a soften protective layer on the glass, remove it as directed by the manufacturer. Reattach any handles or trim in the exact order you removed them.
Step-by-step overview of aligning, testing, and sealing
After mounting, check the door’s alignment by closing it slowly and feeling for even pressure along the gasket. Look for uniform gaps around the weather strip and ensure the door seals when the oven is at operating temperature. If you notice misalignment, loosen the screws slightly to adjust the hinge position, then retighten. Test the seal with a quick heat-run, watching for able heat retention and minimizing drafts. Finish by cleaning fingerprints and touching up any nicked paint around the edge.
Maintenance, troubleshooting, and safety reminders
With the door installed, periodic maintenance helps extend its life. Wipe the seal and hinges with a damp cloth, avoiding harsh cleaners that can degrade gaskets. If you see a crack in the glass or a persistent misfit, replace promptly rather than attempting a makeshift fix. Keep a small toolkit handy for occasional hinge tightening or trim reattachment. If the door still feels loose after installation, consult a professional to verify the wiring and mounting integrity.
Tools & Materials
- Replacement oven door (compatible with your model)(Ensure model number matches; verify hinge type.)
- Screwdriver set (Phillips and flat-head)(Fit screws to avoid stripping heads.)
- Nut driver or socket wrench set(For hinge bolts or frame screws.)
- Tape measure(Confirm width, height, and hinge spacing.)
- Safety gloves(Protect hands from sharp edges.)
- Safety glasses(Eye protection during removal and mounting.)
- Soft cloth or towel(Protect surfaces and glass.)
- Level or square (optional)(Assist in perfect alignment.)
- Masking tape (optional)(Label screws and parts during disassembly.)
Steps
Estimated time: 45-75 minutes
- 1
Power down the oven
Turn off power at the circuit breaker or unplug the oven. Allow the appliance to cool completely to avoid burns or electric shock.
Tip: Double-check the breaker off position and test for power at the outlet before starting. - 2
Open and support the door
Open the door to a safe angle and have a partner support it to prevent accidental drops. This keeps the door stable while you access hinges.
Tip: Use a folded towel under the door edge to cushion the surface. - 3
Remove the old door hinges or pins
Gently lift or release hinge pins, keeping track of their orientation. Place the door on a padded surface once free.
Tip: Take a quick photo of hinge positions for reference during reassembly. - 4
Measure the old door
Measure width, height, and mounting hole spacing. Compare measurements to your replacement door to confirm fit.
Tip: Record measurements in a notebook or on your phone for easy comparison. - 5
Prepare the new door
Inspect the new door for any protective films, remove them if required, and confirm gasket condition before mounting.
Tip: Check that the hinge devices align with the oven frame precisely. - 6
Position the new door and align hinges
Hold the new door in place and align with the mounting points. Start with one hinge, then the other to ensure even alignment.
Tip: Loosen screws slightly if you need micro-adjustment; avoid forcing the door into place. - 7
Secure the door
Insert and tighten screws or bolts through the hinges into the frame. Make sure fasteners sit flush and do not protrude.
Tip: Tighten in a star pattern to balance loading on the hinges. - 8
Reattach handles and trim
Restore any handles, decorative trim, or brackets in the original order. Ensure each piece sits securely.
Tip: Refer to your photos to reattach components in the correct sequence. - 9
Test door function
Close the door slowly and verify a consistent seal around the gasket. Run a short heat test to confirm proper operation.
Tip: Check for binding or uneven gaps; adjust hinge screws if necessary. - 10
Cleanup and safety check
Wipe away fingerprints, cool surfaces, and store tools. Confirm there are no loose parts and the door remains secure.
Tip: Keep the area tidy; store extra screws in labeled containers.
Questions & Answers
Do I need to replace the entire door or just the glass?
Often you can replace the glass insert or seal, but many situations require a full door replacement for a secure seal and structural integrity. Always verify compatibility with your model before purchasing.
Usually the full door is needed for safety, but check your model’s guidance to be sure.
Can I replace an oven door myself or should I hire a pro?
If you have basic hand skills and follow manufacturer instructions, you can replace a door. Complex hinges or electrical connections may require professional service.
It’s doable for many homeowners, but don’t push beyond your comfort level.
How do I know which door fits my oven?
Check the oven’s model number and cross-check the replacement door’s compatibility list. Confirm hinge type and mounting dimensions before buying.
Model number and hinge style are your friends here.
Are there safety concerns when replacing the door?
Always disconnect power, wear protective gloves, and handle glass carefully. If unsure about wiring or mounting, consult a professional.
Safety first: power off, protect hands, and avoid forcing parts.
What should I do if the door leaks after replacement?
Inspect the gasket for damage, reseat the door, and ensure proper alignment. If leaks persist, replace the gasket or consult a technician.
Check the seal and alignment first; replace damaged gaskets if needed.
Watch Video
Main Points
- Measure carefully and match model and hinge type.
- Power off and work on a cool oven for safety.
- Align hinges precisely and avoid overtightening.
- Test the door seal after installation and clean up.