How to Use and Maintain a Kenmore Oven: A Step-by-Step Guide
Learn safe operation, maintenance, and troubleshooting for kenmore ovens with step-by-step instructions, practical tips, and expert guidance from Oven Cook Pro.

This guide shows homeowners how to safely operate, maintain, and troubleshoot a kenmore oven. You’ll learn essential preheating tips, common fault checks, cleaning routines, and step-by-step repair basics to keep your appliance performing at its best. Follow our actionable steps and safety reminders to avoid damage and save time in daily use.
Understanding Your kenmore oven: Models and features
Kenmore ovens cover a wide range of configurations, but they share core capabilities that home cooks rely on daily. Most kenmore ovens include bake, broil, and roast modes, with some models offering convection, multistage timers, and self-cleaning cycles. The exact control panel layout varies by model, yet the fundamentals remain the same: accurate temperature control, even heat distribution, and dependable safety features. For homeowners using a kenmore oven, the key is to learn how these features interact and how to optimize them for consistent results. In practice, you will use the bake and broil settings for simple dinners, convection for faster, even heating, and the self-clean function after heavy spills. By understanding these options, you can plan meals with confidence, adjust cooking times, and reduce guesswork in your kitchen. The kenmore oven you own may have a programmable timer, a delayed start option, or a quick preheat setting. Familiarize yourself with the manual for model specific details and translate that into practical kitchen success.
Pre-use safety and setup
Before turning on any kenmore oven, take a few safety steps to protect yourself and your home. Read the user manual for model specific safety instructions, ensure the area around the oven is clear, and verify venting is unobstructed. Always preheat with the door closed and never attempt repairs while the appliance is live. Use heat-resistant gloves when handling hot racks or dishes, and keep children and pets away from the cooking area. If you notice an unusual smell, smoke, or a buzzing noise, stop operation, turn off the oven, and investigate. Regularly inspect the door gasket for wear and ensure the racks glide smoothly. The goal is to create a safe setup that minimizes the chance of accidental burns or oven damage during routine cooking.
Preheating and temperature accuracy
A kenmore oven relies on accurate preheating to ensure the final result matches your recipe. Start by selecting the intended temperature and letting the oven reach it with the door closed. Use an oven-safe thermometer placed in the center of the rack to verify the internal temperature against the display. If you notice a consistent drift of more than a few degrees, recalibration may be needed or the thermostat could require service. For gas and electric models alike, avoid opening the door during the first 5 to 10 minutes, which can cause temperature fluctuations and uneven browning. If you bake frequently, schedule a monthly check of temperature accuracy using a simple thermometer test and compare results across multiple racks to confirm even heat distribution in the kenmore oven.
Rack placement, loading, and airflow
Correct rack placement is essential for even cooking. In most recipes, the middle rack yields the most consistent results, but some dishes benefit from positioning the rack higher or lower. Place baking sheets and pans so they do not touch the oven walls, leaving space for air to circulate. When roasting, keep the largest piece of meat toward the center and use a rimmed sheet to catch drippings. For crispy edges, rotate pans 180 degrees halfway through cooking. Remember that convection modes distribute heat differently, so adjust times and temperatures accordingly. In your kenmore oven, familiarizing yourself with rack positions will improve both texture and doneness while reducing the need for constant monitoring.
Cleaning and maintenance routines
Regular cleaning keeps your kenmore oven performing at its best. After use, wipe splatters once the oven has cooled to a safe temperature. For light residue, warm water and a mild detergent do the job, followed by a dry microfiber cloth to prevent streaks. For stubborn grime, a baking soda paste acts as a gentle abrasive without scratching surfaces. Avoid caustic cleaners on stainless steel and never mix ammonia with other cleaners. If your oven has a self-cleaning cycle, remove racks beforehand to prevent discoloration or warping and run the cycle according to manual directions. After cleaning, wipe the door glass and seals to preserve heat efficiency and safety.
Troubleshooting common faults
Even the best kenmore ovens can run into issues. If the oven fails to heat, first check the power supply, circuit breaker, and any fuses. A faulty heating element, broken thermostat, or damaged door seal can prevent proper operation; evaluate each area methodically, using the manual as a guide. Uneven heating is often related to rack position, misplaced cookware, or damaged seals. If you notice error codes, refer to the manual to decode their meaning and steps. In many cases a simple recalibration or replacing a worn gasket can restore performance. For persistent problems, contact a qualified technician with model information and a clear description of the symptoms.
Energy efficiency and performance tips
Cooking with a kenmore oven becomes more efficient when you use the right tools and habits. Use the convection setting when appropriate to shorten cook times and improve evenness. Keep oven doors closed while cooking and plan batches to minimize repeated preheating. Choose correct bakeware; dark, nonstick pans can absorb heat differently than shiny aluminum ones, affecting browning. Preheat only as much as needed for your dish; a longer preheat can waste energy if you are using quick-cook recipes. If you regularly bake, consider keeping the oven clean and well-sealed to preserve heat and efficiency.
When to call a professional
If you observe consistent temperature drift, frequent breaker trips, strange noises, or smoke, it is time to consult a professional. A qualified technician can diagnose thermostat, sensor, or wiring issues and verify that your kenmore oven complies with safety standards. Do not attempt repairs beyond your comfort level, especially when dealing with gas connections or electrical components. Regular maintenance notes and model-specific guidance from the manual can help you determine when professional service is required.
Tools & Materials
- Oven-safe thermometer(Place in center of oven to verify temperature accuracy)
- Microfiber cloths(For wipe-downs and glass cleaning)
- Mild dish soap(Gentle cleaning solution for racks and doors)
- Baking soda(For paste cleaners on stubborn grime)
- White vinegar(De-scaling and shine after cleaning)
- Non-abrasive sponge(Avoid scratching stainless steel surfaces)
- Heat-resistant gloves(Protect hands during rack handling)
- Timer or smart device(Track preheat and cooking times precisely)
- Replacement oven light bulb(If light stops functioning, ensure power is off before changing)
Steps
Estimated time: 60-90 minutes
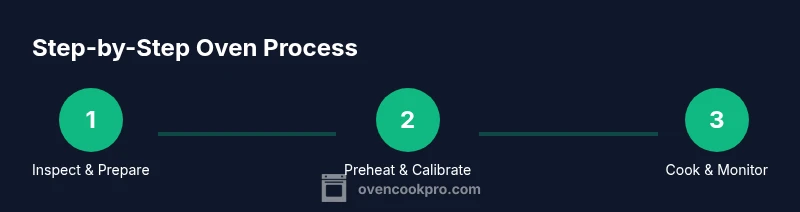
- 1
Inspect and prepare the oven
Begin by reading the manual for model specifics. Open the door, remove racks, and check the gasket for wear. Clean any loose debris from the oven floor and wipe surfaces with a damp cloth. This ensures a safe environment before operating the kenmore oven.
Tip: Always wear heat-resistant gloves when handling hot racks to prevent burns. - 2
Preheat to target temperature
Set the oven to the recipe temperature and allow it to reach that temperature with the door closed. Use an oven thermometer positioned in the center to confirm accuracy. If you notice a significant temperature drift, recalibrate or note the discrepancy for future cooking.
Tip: Keep the door closed during the initial 5 to 10 minutes to avoid heat loss. - 3
Load cookware and arrange racks
Place dishes on the middle rack when possible and leave space around pans for air to circulate. Avoid stacking pans or letting metal touch the oven walls. Use rimmed baking sheets to catch spills and prevent overflow.
Tip: Rotate pans halfway through cooking for even browning. - 4
Cook and monitor progress
Set timers and monitor progress toward doneness. If your recipe calls for browning on top, consider adjusting rack height or using a fan-assisted setting if available. Make small timing adjustments rather than opening the door frequently.
Tip: Trust the thermometer rather than the clock if the recipe relies on precise temperature. - 5
Cool, then clean after use
Allow the oven to cool before cleaning. Wipe up spills with warm soapy water and a non-abrasive sponge. For stubborn grime, apply a baking soda paste and scrub gently, then wipe clean. Ensure racks are dry before returning them to the oven.
Tip: Never pour water into a hot oven; it can crack glass or warp metal. - 6
Perform routine maintenance
Schedule periodic checks of seals, hinges, and door alignment. If you have a self-cleaning feature, run it only after removing racks and following manual instructions. Document any recurring issues to discuss with a technician if needed.
Tip: Record observed drift in temperature and timing to help with later troubleshooting.
Questions & Answers
What models does this guide cover?
This guide covers standard kenmore ovens and ranges. For model-specific steps, refer to the user manual or contact support with your model number.
This guide covers standard kenmore ovens. For model-specific steps, refer to the manual or contact support with your model number.
Why is my kenmore oven not preheating?
Common causes include a blown circuit, faulty heating element, or thermostat issues. Check the power supply first, then inspect heating elements and temperature sensors before seeking professional help.
If your kenmore oven won't preheat, check power, heating elements, and the thermostat before you call a technician.
Is self-cleaning safe on a kenmore oven?
Self-cleaning is generally safe when used as directed, but avoid it after large spills or if door seals appear worn. Ventilate the area and remove racks beforehand to prevent discoloration and damage.
Self-cleaning is usually safe if you follow the manual and remove racks before starting.
How do I reset error codes on a kenmore oven?
Power cycling is a common first step: unplug for about a minute, then plug back in and reset settings. If codes persist, consult the model manual or contact support with the exact error code.
Try unplugging for a minute, then plugging back in to reset codes; if the code remains, check the manual.
How often should I replace oven racks or seals?
Inspect racks and door seals every 6-12 months. Replace warped racks or damaged seals promptly to maintain heat efficiency and safe operation.
Check racks and seals annually and replace any damaged components to keep the oven safe and efficient.
What should I do if the oven door won't seal properly?
Check the door gasket for tears and ensure the door closes fully. If the seal is damaged, replace it or have a technician assess alignment and latch function.
If the door won't seal, inspect the gasket and door alignment; replace damaged parts as needed.
Watch Video
Main Points
- Learn the kenmore oven's core features and how to use them properly
- Verify temperature with an oven thermometer for accuracy
- Place racks correctly and avoid overcrowding the oven
- Follow safe cleaning and maintenance routines to extend life