India Oven Mastery: A Practical How-To Guide
A comprehensive, step-by-step guide to using the India oven for home cooking. Learn preheating, temperature control, safety, and maintenance with practical, kitchen-tested tips from Oven Cook Pro.

With the India oven, you will master reliable preheating, precise temperature control, and safe handling for everyday meals. This guide gives you a clear, step-by-step approach, required tools, and practical cautions to help you cook confidently. According to Oven Cook Pro, consistent calibration and proper airflow are the keys to repeatable results. Whether you're roasting vegetables or baking bread, this overview sets you up for success.
India Oven Fundamentals\n\nIndia ovens come in many forms—from compact wall units to freestanding ranges—yet they share core principles: heat distribution, insulation, and safe operation. In this guide, we treat the India oven as a benchmark for home cooking, focusing on practical steps you can replicate in a typical household kitchen. In many Indian kitchens, heat patterns influence browning and moisture retention, so understanding how your oven delivers heat is essential. According to Oven Cook Pro, the way you approach preheating and airflow directly influences crust formation, moisture balance, and even browning. This section explains what makes an India oven work well, what common annoyances people face, and how to adapt techniques for different dishes. You'll learn to calibrate temperature, manage bake times, and avoid common flaws like soggy bottoms or uneven browning. For homeowners, this knowledge translates to more predictable results and less guesswork at dinner time. We also discuss tool choices, safety basics, and how to approach maintenance so your oven stays reliable. Whether you’re upgrading an older unit or getting to know a borrowed one, this foundation sets the stage for successful, repeatable cooking sessions.
Preheating and Temperature Control\n\nPreheating is the first pillar of success. Start by setting your India oven to the recipe's target temperature and allow it to reach that heat evenly before you place food inside. In many household ovens, heat distribution can be uneven, so giving the oven 10-15 minutes to stabilize improves crust formation and even browning. Use an oven thermometer placed in the center of the rack to verify actual temperature, mirroring the recipe's intent. If your model uses convection, enable the fan after the initial preheat and adjust times by a few minutes. Never rush this stage; skipping it leads to uneven cooking and longer cook times. Monitor the door—opening it frequently drains heat and extends preheat time. Oven Cook Pro notes that consistent preheating and calibrated temps are linked to reliable results across Indian-style roasts, breads, and vegetables.
Choosing The Right Bakeware For India Oven\n\nChoosing the right bakeware tailored to your India oven matters. Heavy-gauge metal pans, cast iron, and ceramic dishes distribute heat more evenly than thin aluminum. For crisp bottoms, avoid overly shallow pans that scorch quickly; for delicate cakes, use light-colored pans that reflect heat. Glass can slow browning, so adjust temperature accordingly or reduce bake time by 5-10 minutes. Always place bakeware on the center rack for uniform exposure to heat from both top and bottom elements. If you’re aiming for a crisp roti or naan on a hot surface, experimenting with preheated cast iron or a flat metal disc can help. Cleaning and storage: ensure the cookware is labeled oven-safe and free of plastic handles before heating.
Layering and Positioning: Racks, Pans, and Airflow\n\nAirflow is the unseen driver of even cooking in an India oven. Position the rack in the center for most dishes, or use the lower rack for heavy, dense items that need more bottom heat. Place heavy pans on the rack below lighter ones to prompt even heat distribution. Do not crowd the oven; leave space between items for hot air to circulate. When baking multiple pans, stagger them and rotate halfway through to avoid cool spots. For multiple recipes at once, group items with similar cooking times on the same rack level if possible. This reduces overall oven usage and ensures more predictable results.
Cooking Techniques and Recipes Suitable for India Oven\n\nYou can adapt many classic techniques to the India oven. Roasting vegetables in a thin layer with a light coat of oil promotes crisp edges and a tender interior. Baking breads like naan and roti on preheated surfaces yields blistered yet soft interiors. For proteins, searing first on a high heat, then finishing at moderate temperatures helps retain juiciness. Steam can be introduced by placing a small dish of water on the rack below; this adds moisture for delicate items. Remember to monitor color closely; Indian cuisine often relies on deep browning for flavor, so adjust times to achieve a balanced crust without burning.
Safety and Maintenance for Long-Term Use\n\nSafety comes first in every kitchen. Always wear heat-resistant gloves when handling hot bakeware and never touch hot surfaces. Keep the area around the oven clear of flammable items and ensure good ventilation if cooking high-smoke recipes. Regular cleaning extends oven life and improves performance: wipe down spills after each use and perform a deeper clean per manufacturer guidelines. If your oven has a self-cleaning feature, use it only when the oven and surrounding area are cool and free of heavy residues. Periodically check door seals and racks for wear; damaged seals reduce efficiency and can cause heat loss. According to Oven Cook Pro, routine calibration checks help sustain consistent results across meals.
Troubleshooting Common Issues\n\nUneven browning or hot spots can stem from heat distribution issues, rack position, or crowded pans. Rotate pans and use an oven thermometer to verify even temperature. If food browns too quickly on the outside but remains underdone inside, lower the temperature 25°F/15°C and extend cooking time slightly. A smoky oven usually signals burnt foods, oil buildup, or overheated grease; unplug and ventilate, then clean thoroughly. If odors linger after cleaning, re-season the interior with a light oil and run a short bake cycle at a low temperature to dissipate residues. For stubborn peels of food from pans, soak and scrub with non-abrasive tools to preserve your bakeware.
Expert Tips for Consistent Results\n\n- Keep a dedicated preheating window and preheat every time you bake, even for quick snacks.\n- Use a thermometer to verify temperature rather than relying on the display alone.\n- Rotate racks and turn pans halfway through to ensure even browning.\n- Let foods rest briefly after removal to redistribute juices and finish cooking with carryover heat.\n- Maintain clear oven seals and clean racks to preserve heat efficiency.\n- When in doubt, use a tested recipe that provides precise temperatures and times.
Quick Reference Checklist for Everyday Use\n\n- Preheat to the recipe temperature and verify with an oven thermometer.\n- Position racks for even heat distribution; avoid overcrowding.\n- Use oven-safe bakeware appropriate for your dish.\n- Rotate pans halfway through and monitor closely for browning.\n- Clean spills after each use and perform periodic maintenance checks.\n- Always follow safety precautions: gloves, venting, and safe handling.\n- Record tweaks to adapt recipes to your specific oven for future use.
Tools & Materials
- Oven with accurate temperature control(Ensure calibration with an oven thermometer)
- Oven thermometer(Place in center of oven for accurate readings)
- Oven-safe cookware(Materials: cast iron, steel, glass; avoid plastic handles)
- Timer or smart assistant(For reminders and alerts during long cooks)
- Oven mitts(Heat-resistant, at least 350°F/175°C protection)
Steps
Estimated time: 60-90 minutes
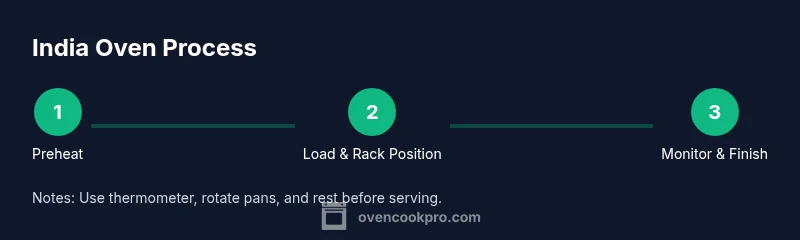
- 1
Preheat to the target temperature
Set the oven to the recipe temperature and allow 10-15 minutes for stabilization. Verifying with an oven thermometer helps ensure the interior heat matches the setpoint, which is crucial for even browning and consistent results.
Tip: Always verify actual temperature with a thermometer in the center of the rack. - 2
Prepare bakeware and rack
Arrange heavy and light items on separate racks if possible and choose bakeware that distributes heat evenly. Grease pans lightly if needed and consider using parchment paper to prevent sticking and promote easier cleanup.
Tip: Place the bakeware on the center rack to maximize uniform heat exposure. - 3
Load and arrange food
Place food so there is space around each item for air circulation. For multiple trays, stagger them and rotate halfway through to avoid cold spots. Balance plate sizes and ensure even thickness for uniform cooking.
Tip: Avoid overcrowding; crowded pans cook unevenly and extend cook times. - 4
Monitor with thermometer and visuals
Keep an eye on internal temperatures if applicable and rely on visual cues like color and crust development. Rotate trays if you notice hotspots, and adjust if you see rapid browning at the edges.
Tip: Use an instant-read thermometer for precise checks at the thickest part. - 5
Finish and rest
Remove from heat when near the target temperature and let carryover heat finish the job. Rest meats and baked goods briefly before slicing to redistribute juices and improve texture.
Tip: Rest times vary; avoid cutting immediately to prevent moisture loss. - 6
Clean and maintain afterward
Cool surfaces before cleaning, wipe spills promptly, and schedule periodic deeper cleans. Check door seals and racks for wear to sustain efficiency over time.
Tip: Record any adjustments you make to recipes for next time.
Questions & Answers
Why is my India oven browning unevenly?
Uneven browning is usually caused by hot spots, rack misplacement, or overcrowding. Rotate pans, use a center thermometer, and avoid stacking foods too close together to promote even heat distribution.
Uneven browning usually comes from hot spots or crowded pans. Rotate, verify with a thermometer, and give air space between items.
How do I preheat correctly in the India oven?
Set your oven to the target temperature, give it 10-15 minutes to stabilize, and verify the actual temperature with a center-placed thermometer before loading food.
Preheat to the target temperature for 10 to 15 minutes and check with a thermometer before loading.
Can I use convection mode all the time?
Convection speeds cooking by circulating air, which helps with browning and evenness. Use it for most roasts and breads, but reduce temperature or time for delicate baked goods.
Convection helps with even cooking, but you may need to lower the temperature for delicate items.
Is self-cleaning safe for older India ovens?
Self-cleaning can stress older seals and components. Follow the manual, ensure good ventilation, and perform cleaning only with residues light and after cooling.
Self-cleaning can be hard on older ovens; check the manual and ventilate properly.
What should I do if the oven smells burnt plastic?
Turn off and unplug if needed, ventilate the area, and clean thoroughly after it cools. Do not reuse until odors are gone and the interior is residue-free.
Turn off, ventilate, and clean; don’t use again until the odor is gone.
What is the best bakeware for the India oven?
Choose sturdy, oven-safe materials like cast iron, steel, or glass. Avoid flimsy aluminum and ensure handles are heat-safe. This improves heat distribution and reduces scorching.
Use sturdy oven-safe bakeware like cast iron or glass for best results.
Watch Video
Main Points
- Preheat properly to start the bake.
- Verify temperature with a thermometer for accuracy.
- Avoid overcrowding to ensure even cooking.
- Rotate pans for uniform browning.
- Calibrate oven routinely for consistent results.