How to Use an Oven Thermometer: A Complete Guide
Learn how to use oven thermometer to achieve perfect baking and roasting results. This guide covers types, calibration, placement, troubleshooting, and maintenance for home cooks.

This quick guide shows how to use oven thermometer to ensure you bake and roast at the right temperature every time. Start by choosing the thermometer type you prefer, calibrate if needed, and place it in the oven's center for accurate readings. Read the dial or digital display at preheat and adjust your oven settings to match the target temperature.
Why You Need an Oven Thermometer
An oven thermometer provides an independent reading of oven temperature, helping you bake and roast with confidence. Relying on the built-in dial can yield inconsistent results, especially as ovens age or when door seals wear. According to Oven Cook Pro, even small deviations between your dial and the actual heat can affect crust, rise, and juiciness. A dedicated thermometer acts as a truth-teller, revealing whether your oven runs hotter or cooler than its settings and giving you a reliable baseline for adjustments. For beginners, this simple tool turns guessing into measurable data, enabling better recipe results and fewer wasted ingredients. For seasoned cooks, a thermometer is a reproducible baseline you can trust across dozens of recipes and seasons. The upfront step is choosing the right type for your kitchen, then keeping it clean and calibrated. Keep the display visible from your cooking area, and plan a short preheat test to understand how your oven behaves in real life.
Types of Oven Thermometers: Dial, Digital, and Probes
There are three common types of oven thermometers. Dial thermometers use a small metal dial and a fixed pointer; they’re inexpensive, durable, and easy to read at a glance, though slower to reflect rapid temperature changes. Digital models display numeric readings and may offer alarms, memory, and calibration features, but rely on batteries and electronics. Probes (oven-safe thermometers) can stay in the food while it cooks, letting you monitor internal doneness without opening the oven door. Each type has trade-offs: choose a dial thermometer for everyday baking, a digital model for quick reads, and a probe system when you want ongoing, in-meal monitoring. If you’re unsure, start with a high-quality dial thermometer and add a probe later.
How to Calibrate an Oven Thermometer: Quick Methods
Calibration keeps your thermometer readings honest. A simple ice-water test checks for 32°F (0°C) accuracy; place the thermometer in a glass of ice and water, wait 2–3 minutes, and compare. If it reads differently, adjust the device according to its instructions, then re-test. Boiling-water calibration checks against 212°F (100°C) at sea level; altitude affects the exact value, so account for your altitude when interpreting results. Some models feature built-in calibration or a small adjustment screw. After calibration, recheck by running the oven to preheat and verifying the ambient reading is consistent with the adjusted target.
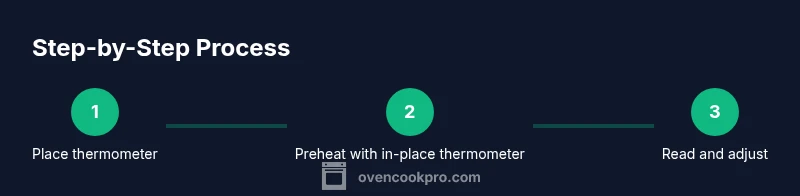
Step-by-Step: Reading and Acting on Oven Temperature
- Place the thermometer in the oven’s center, away from doors, racks, and food. This position minimizes drafts and hot spots that skew readings. 2) Preheat with the thermometer in place; allow 5–10 minutes for the ambient temperature to stabilize before cooking. 3) Read the ambient temperature and compare it to your recipe’s target; note any discrepancy. 4) If readings drift, adjust the oven knob by small increments and recheck after 10 minutes. 5) For longer cooks, re-check the ambient temperature midway to confirm stability. 6) Keep a simple log of readings and adjustments for future reference.
Common Mistakes and How to Fix Them
Avoid the most common errors: placing the thermometer on a rack near the door, using a thermometer that isn’t oven-safe, or relying on the oven light to gauge heat. Keep the thermometer away from fans or convection elements that skew readings. If you notice frequent drift, recalibrate or replace batteries in digital models. Also ensure the thermometer isn’t touching the food, shelves, or glass, which can give misleading values and throw off timing.
Practical Scenarios: Baked Goods vs Roasting
When baking delicate items like croissants or macarons, precise heat matters for texture and rise. For roasts, preheating with the thermometer ensures a steady start to the cooking process, which helps you lock in juiciness and caramelization. In both cases, use the thermometer to confirm a stable, mid-range oven temperature rather than relying solely on recipe timings. This approach reduces guesswork and improves repeatability.
Maintenance and Storage: Keep Readings Reliable
Clean the thermometer after use to remove oil and crumb buildup that can affect readings. Store digital models with fresh batteries and replace them as needed. For dial thermometers, a light oiling of contacts and occasional recalibration keeps performance steady. If you use a probe thermometer, inspect the probe for kinking or damage and replace if corroded or bent. Proper storage protects the device from impact and preserves its accuracy.
How to Interpret Readings and Adjust Your Oven Settings
Treat the thermometer as a guide to confirm whether the oven is within the recipe’s target range. If your reading is consistently high, reduce the oven knob setting by a small increment and recheck after 10 minutes. If readings are consistently low, increase slightly and recheck. With convection ovens, remember to factor in air movement and potential hot spots; you may need to move the thermometer or food to different shelves for even cooking.
Authority Sources and Practical Reference
For authoritative guidance on safe cooking temperatures and oven accuracy, consult trusted sources such as the USDA Food Safety and Inspection Service, NIST, and university extension programs. While measurements vary by altitude and equipment, these organizations provide frameworks for understanding how ambient oven temperature relates to food safety and doneness. See https://www.fsis.usda.gov, https://www.nist.gov, and https://extension.psu.edu for reference.
Tools & Materials
- Oven thermometer (dial or digital)(Choose a model with a wide temperature range and clear display)
- Kitchen timer or clock(For tracking warm-up and target read times)
- Oven mitts or heat-resistant gloves(Careful handling when hot)
- Pencil and notebook or digital note app(Record readings and adjustments)
- Baking sheet or heat-safe dish(Useful for keeping the thermometer off the oven floor)
Steps
Estimated time: Total time: 10-20 minutes
- 1
Place the thermometer in the center of the oven
Set the thermometer where it can read the general oven air, avoiding direct contact with racks or walls. This position minimizes interference from hot spots and airflow coming from the door.
Tip: Center placement reduces skewed readings caused by door drafts - 2
Preheat with the thermometer in place
Allow the oven to reach its target temperature, with the thermometer watching for a stable reading. Give it 5–10 minutes for a reliable ambient temperature before cooking.
Tip: Stability before cooking prevents misinterpretation of early readings - 3
Read the ambient temperature at preheat
Note the ambient reading once the oven stabilizes. Compare it to the recipe’s target temperature to decide if you need an adjustment.
Tip: Document any offset for future bakes - 4
Adjust settings if needed
If the oven runs hot or cold, offset the control knob by a small amount and recheck after 10 minutes. Convection ovens may require additional adjustments.
Tip: Make minimal changes and recheck to avoid overcorrecting - 5
Test mid-cook to confirm consistency
For longer bakes, recheck ambient temperature after 15–20 minutes to ensure the oven remains in range during cooking.
Tip: Mid-cook checks catch drift early - 6
Record your readings
Keep a simple log of readings and adjustments so future recipes can be more predictable.
Tip: A quick note saves time on repeat dinners
Questions & Answers
What is an oven thermometer and why do I need one?
An oven thermometer provides an independent reading of oven temperature, helping you bake and roast with confidence. It guards against inaccurate oven dials and improves consistency across recipes.
An oven thermometer shows the real oven temperature so you can bake with confidence and avoid surprises.
Can I rely on my oven's built-in thermometer?
Many ovens read inaccurately due to wear or calibration drift. An external thermometer gives you a true ambient temperature, letting you adjust settings for reliable results.
Relying on the built-in dial alone can be risky; use an external thermometer for accuracy.
How do I calibrate an oven thermometer?
Calibration methods vary by model. Ice-water calibration checks for 32°F (0°C) and boiling-water checks for 212°F (100°C) at sea level. Follow your device manual for precise steps and recheck after calibration.
Calibrate by checking readings with ice water and boiling water, then adjust per the manual.
How often should I check the oven temperature?
Check during preheat and periodically during long cooks to ensure the oven remains within range. Recheck after door openings or temperature changes.
Check during preheat and again during long cooks, especially after door openings.
Where is the best place to put the thermometer?
Place the thermometer in the center of the oven, away from doors and walls. Avoid contact with racks or food to prevent skewed readings.
Center of the oven, away from the door, gives the most accurate ambient reading.
Can I use a thermometer when cooking multiple dishes?
Yes. Use a thermometer in the center and monitor ambient temperature as foods cook. Rotate trays if you notice uneven heating.
Yes, place it in the center and watch readings across dishes.
Watch Video
Main Points
- Use a thermometer for true oven temps
- Calibrate regularly for accuracy
- Center placement yields reliable ambient readings
- Log readings to improve repeatability