How to Put GE Oven Door Back On: Step-by-Step Guide
Learn how to safely reinstall a GE oven door with our expert, step-by-step guide from Oven Cook Pro. Includes safety tips, required tools, and post-attachment checks.

This quick guide on how to put oven door back on ge covers safe alignment, hinge seating, and post-attachment checks so the door seals and operates smoothly. It highlights safety precautions and essential steps for GE ovens, delivering a clear, actionable plan you can follow with confidence.
Understanding GE oven door design and compatibility
According to Oven Cook Pro, GE ovens use a hinge-and-door system designed for precise alignment and secure seating. A typical GE door relies on a robust hinge assembly and hinge pins that guide the door onto the oven frame. While models vary, the core principles—proper seating, level alignment, and a fully engaged hinge—remain consistent. If you find the door sagging or not sealing evenly, you may be dealing with a misaligned hinge, worn pins, or a partially detached door. Knowing the general design helps you diagnose issues quickly and avoid unnecessary disassembly. The goal is to reattach the door so it sits flush with the gasket and the frame, ensuring an airtight seal and safe operation. Throughout this guide, you’ll learn the exact steps to regain proper function without compromising glass or coatings, while keeping safety as the top priority.
Safety and preparation steps
Before touching heated components, unplug the oven and allow it to cool for at least 15 minutes. Wear heat-resistant gloves to protect your hands from sharp edges and hot metal. Clear the workspace of any clutter, and lay a soft cloth or towel on the floor to cushion accidental drops. Remove any heavy dishes or racks from the door's path to prevent tipping. If your oven is freestanding, keep the door area accessible and steady. These precautions reduce the risk of burns, pinched fingers, or dropped parts during reattachment. Remember, patient, deliberate movements are safer than rushing the job.
Assessing hinge components and door condition
Inspect the hinge pins for bending, corrosion, or wear. Examine the door edge for cracks in the glass or frame that could affect seating. Check the gasket around the door; a damaged gasket can cause imperfect seals even after you realign the door. If you see damaged pins or a cracked door, replacement parts may be required rather than reattachment. Don’t overlook the hinge cover, screws, and any spring mechanisms—loose screws can lead to misalignment. Taking stock of these components helps you decide whether you can proceed safely or if professional service is warranted. In many cases, a simple tightening or reseating of the hinges resolves the issue.
When and how to remove the door safely
If the door is visibly misaligned or detached beyond the hinge frame, you may need to remove it temporarily to inspect pins and hinge plates. Start by releasing any safety brackets or screws that secure the hinge cover. Support the door with both hands and lift it straight off the hinges, avoiding any twisting. Place the door on a padded surface to prevent glass damage. Do not attempt to pry the door open or disassemble glass panes; doing so risks shattering the door and voiding warranties. This removal step should be deliberate and slow, with a helper if the door is heavy.
Reattaching the door: high-level sequencing
The reattachment sequence generally runs as follows: align the hinge pins with the hinge plates on the oven frame, lift the door into position, and slide the pins over the plates until the door seats evenly. Check that the door is parallel to the oven face and that the gasket sits flush around the entire perimeter. Do not force the door if you encounter resistance; back off and reassess alignment. After seating, gently swing the door to confirm smooth operation and ensure there is no binding. While this block outlines the flow, you’ll find step-by-step actions and tips in the dedicated STEP-BY-STEP section to guide you through each precise move.
Post-attachment checks and adjustments
With the door reattached, perform several test opens and closes to confirm smooth motion and a tight seal. Look for even gaps along the door edge and ensure no binding at the hinge area. If you notice a misalignment, slightly adjust the hinge screws or alignment shims if present. Check for uniform lighting along the gasket—any light showing through at the edges indicates gaps that need correction. Finally, wipe the door surface and seals to remove fingerprints and oils that can affect sealing. Regular visual checks help prevent future misalignment and extend door life.
Maintenance and prevention tips
Schedule periodic inspections of door hinges and gaskets to catch wear before it becomes a problem. Keep screws tight but not over-torqued to avoid strip damage. Avoid slamming the door; use a gentle, controlled motion to preserve hinge alignment. If you repeatedly experience misalignment after reattachment, consult GE support or a licensed technician to verify hinge wear or frame distortion. Keeping a spare set of the hinge pins and screws on hand can reduce downtime if replacements are needed. Regular maintenance will help your GE oven door stay reliable for years.
Tools & Materials
- Phillips head screwdriver (#2)(For screws on hinge covers or door frame)
- Flat-head screwdriver(Optional pry tool for minor adjustments)
- Nut driver or hex wrench (as needed)(For hinge bolts, if present)
- Pliers(Grip stubborn pins or springs)
- Heat-resistant gloves(Protect hands when handling edges)
- Soft towels or protective cloth( Cushion surfaces and catch drops)
- Cleaning cloth(Wipe surfaces and seals)
- Masking tape or wedges(Hold door in place temporarily during seating)
- Small level or ruler(Check door parallelism with the oven face)
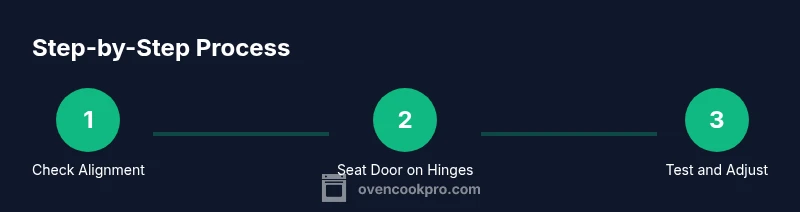
Steps
Estimated time: 30-45 minutes
- 1
Power down and prep workspace
Unplug the oven and allow it to cool completely. Clear the area, lay a soft cloth on the floor, and gather the tools you’ll use. Make sure the door and hinges are visible and accessible before you begin.
Tip: A cool oven reduces burn risk and makes handling the door safer. - 2
Inspect hinges and door hardware
Closely examine hinge pins, screws, and the hinge cover for wear or damage. Look for bent pins, loose screws, or corrosion, and note anything that might require replacement rather than repositioning.
Tip: If you see cracks or severe wear, replace parts instead of trying a fragile reattachment. - 3
Prepare the door for seating
If the door was removed, place it on a padded surface with the hinge side accessible. Ensure there is no grease or debris on the hinge pins or plates that could interfere with seating.
Tip: Keep a friend nearby to support the door during this step. - 4
Align hinge pins with the oven frame
Line up the hinge pins with the hinge plates on the oven body. Make sure the pins are vertical and not cross-threaded or bent. Do not force the pins; align first, then seat gently.
Tip: A slight wobble is normal as you begin alignment; steady pressure helps avoid damage. - 5
Seat the door onto the hinge pins
With the pins aligned, slide the door onto the hinges until it sits evenly against the frame. Verify that the door edge is parallel to the oven face and the gasket sits flush all around.
Tip: If the door binds, back off and re-check alignment rather than forcing it. - 6
Test operation and adjust as needed
Open and close the door several times to check for smooth movement and a tight seal. Listen for grinding or grinding sounds and watch for uneven gaps along the edge. If needed, tighten screws gradually and recheck alignment.
Tip: Repeat the test at least three times to confirm stability. - 7
Clean up and finalize
Wipe away fingerprints and any residue from the door and gasket. Return racks and cookware, and store tools. Keep an eye on door alignment over the next few uses to ensure it remains secure.
Tip: Document any parts replaced in case future service is required.
Questions & Answers
Is it safe to reattach the GE oven door by myself?
If you carefully follow the steps and the door or hinges show no signs of severe damage, you can reattach the door yourself. Always unplug the oven, use protective gloves, and avoid forcing parts. If you notice cracks, bent hinges, or a warped door, contact a professional.
Yes, with careful steps and safety precautions. If you spot damage, stop and call a pro.
What if the door won’t seat evenly after reattachment?
Re-check hinge alignment and ensure pins sit fully in the hinge plates. Tighten screws gradually, test again, and confirm the gasket sits flush. If issues persist, consider part replacement or professional service.
If seating is uneven, verify alignment, then test again; seek a pro if needed.
Do I need special tools for GE oven door reattachment?
Most reattachments require common tools like a screwdriver set and protective gloves. Some models may use a hex key or nut driver. Refer to your model’s manual for specific hardware.
Typically standard tools and gloves are enough; specific models may vary.
Can I reinstall without removing the door completely?
In many GE ovens you can reseat the door without fully removing it by aligning and sliding the hinge pins back into place. If the door is already detached, follow the full removal procedure carefully and reattach.
Often you can reseat without complete removal, but do it carefully.
How long should I expect the door to last after reattachment?
A properly reattached GE oven door should function reliably for several years, assuming no structural damage and periodic maintenance. If misalignment recurs, inspect hinges and frame for wear.
With proper care, expect years of reliable operation.
Should I call GE support if the door misaligns after reattachment?
If misalignment recurs after reattachment or you notice persistent binding, contact GE support or a certified technician. Repeated issues may indicate hinge wear or frame distortion that needs professional attention.
Yes, professional help is advised for recurrent misalignment.
Watch Video
Main Points
- Plan and prep before touching the door
- Check hinges, pins, and gasket for wear
- Align pins before seating the door
- Test open/close for smooth operation
- Maintain and inspect regularly to prevent misalignment