How to Get a Pizza Oven Started: A Step-by-Step Guide
Learn how to safely start your pizza oven with clear, expert guidance. From fuel choice to preheating and first bake, this how-to covers setup, safety, and maintenance for crisp crusts every time.

You're aiming to start a pizza oven safely and reliably. Begin by confirming fuel type (wood, gas, or electric), inspecting the ignition and chimney, and ensuring the oven is clean and dry. Light the fuel per manufacturer guidance, then bring the oven to your target pizza temperature (typically 450–500°F / 230–260°C) while monitoring heat with a thermometer.
Understanding Your Pizza Oven: Fuel Types and Safety
The first crucial decision when starting a pizza oven is choosing the right fuel and understanding the safety implications. Wood-fired ovens rely on dry, seasoned hardwoods for a steady flame and flavorful results, and you should store wood in a dry, well-ventilated area away from flammable materials. Gas ovens use regulated burners and a built-in safety valve; ensure the gas supply is connected, the regulator is functioning, and the ignition system is clean. Electric ovens typically heat with coils or elements and often require a preheated stone or baking surface. Regardless of fuel type, never block vents, keep a clear area around the oven, and have a fire extinguisher or baking soda handy in case of flare-ups. Safety also means proper ventilation to avoid smoke buildup in enclosed spaces, and following manufacturer instructions for ignition sequence and preheat times.
Key takeaway: knowing your oven’s fuel type and safety features reduces the chance of mishaps and helps you plan a smoother startup.
Pre-Launch Prep: Cleaning, Drying, and Setup
Before you ignite anything, prepare the space and the oven itself. Remove debris from the interior and the door gaskets, check for moisture or condensation, and ensure the baking surface (stone or steel) is dry. Clear the surrounding area of clutter and flammables, and position a heat-resistant mat or tray under the oven if it sits on a wooden or combustible surface. If your oven includes a chimney or flue damper, verify it opens freely and is not obstructed. Gather your essential tools in a single place: gloves, a thermometer, fire-safe tongs, and a brush for ash. This preparation minimizes sudden flare-ups during startup and extends oven life.
Pro tip: Dryness is critical—moisture inside the oven can create steam that cracks stones or delays ignition.
Lighting the Oven: Ignition and Initial Bright Flame
Begin the ignition according to your oven’s design. For wood-fired models, stack dry logs with kindling to form a small, controllable fire and light from a corner to promote an even burn. Gas ovens require turning on the gas at the regulator and using the built-in igniter; avoid standing directly over the burner when lighting. Electric ovens usually have a preheat button or setting; activate it and wait for a stable heat signal. Once ignition starts, observe the flame pattern, ensure there’s no gas or smoke odor, and adjust vents to encourage a steady, controlled burn. If you notice incomplete combustion or unusual smells, pause and inspect the fuel source and air supply before proceeding.
Tip: Keep a metal heat-safe shield handy if your oven uses wood and tends to flare up during ignition.
Heating to Pizza Temperature: Achieving 450–500°F
Reaching optimal pizza temperature requires controlled preheating. Set your target for 450–500°F (230–260°C) and monitor with a high-heat thermometer placed near the baking surface. If your oven has a stone, allow extra time for the stone to heat to its core; a cold stone can crack under thermal stress. For gas or electric ovens, maintain a steady flame or coil heat while keeping the door ajar briefly at the start to prime airflow. Once the interior reaches the target range, reduce any draft by adjusting dampers gradually to stabilize the temperature. Expect a few minutes of adjustment as the heat settles.
Caution: Avoid rapid temperature swings that stress stone and oven components.
Managing the Fire and Temperature Control
Sustainability of heat depends on continuous fuel management and airflow. For wood-fired units, add small amounts of dry wood as the flame settles and rotate logs to maintain even heat. In gas ovens, fine-tune the burner output to keep a consistent flame height and watch for hot spots near corners or the edges. Electric ovens typically require less manual adjustment, but you should monitor temperature accuracy with an ambient thermometer since heat can differ from the dial reading. Use the oven’s built-in vents or dampers to redirect airflow away from the baking surface for even crust development. Remember that crust quality improves with even heat across the baking stone.
Pro tip: Periodic stone rotation can improve even browning across the crust.
Achieving the Right Oven Floor Temperature for Crispy Crust
The crust benefits from a very hot, evenly heated floor. If you’re using a baking stone, preheat it at the target temperature for at least 45–60 minutes before baking. A properly heated stone delivers a quick sear on the dough, reduces moisture migration, and yields a blistered, blistering crust. If your setup includes a steel deck, it can heat more rapidly than stone and may require shorter preheat times. Test the crust by placing a small dough disc or a water droplet on the surface; the dough should sizzle and set quickly. Adjust your approach based on results: thinner dough requires higher surface contact and hotter floors; thicker dough needs longer preheat.
Tip: Use parchment when loading dough to protect the surface and simplify cleanup.
Troubleshooting Common Start-Up Issues
If ignition fails, verify fuel supply, vent clearance, and the ignition system’s condition. For wood-fired ovens, check that the wood is dry and large enough to sustain a steady flame; switch to smaller pieces if the flame dies quickly. If the oven won’t reach temperature, inspect for air leaks around gaskets, loose fasteners, or blocked vents. In gas ovens, a misfiring burner or regulator issue may require professional service. For electric ovens, verify element continuity and wiring connections. Always pause and reassess if you smell gas, hear hissing sounds, or encounter sudden smoke; safety first means stopping the process and ensuring no hazards.
Warning: Do not operate with damaged gaskets, vents blocked, or an unsealed door.
Post-Run Care: Cleaning and Maintenance
After cooking, allow the oven to cool safely before cleaning. Remove ash and debris from the interior, wipe down surfaces with a damp cloth, and inspect the stone or deck for cracks. Regularly inspect the door seals, vents, and ignition components for wear. Keep the oven dry to prevent rust and lubrication-free movement of dampers. Schedule periodic maintenance checks if you notice unusual noises, uneven heating, or flaking stone.
Note: Regular maintenance extends oven life and ensures consistent performance for wood, gas, or electric ovens.
Tools & Materials
- Oven manual(Have the exact model manual on hand (printed or digital) for ignition steps and safety clearances.)
- Thermometer or infrared thermometer(Place near the baking surface to monitor surface temperature.)
- Long matches or barbecue lighter(For wood-fired ignition; keep away from flammable objects.)
- Heat-resistant gloves(Protect hands from high heat when handling embers or stones.)
- Brush for ash and debris(Keep the interior clean and free of ash build-up.)
- Smoke-friendly airflow aids(Optional: a small fan or air deflector if ventilation is weak.)
Steps
Estimated time: Total time: 45-60 minutes
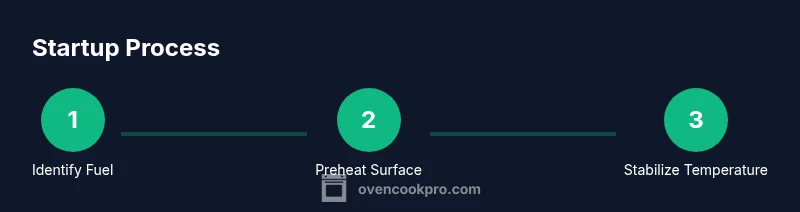
- 1
Identify fuel type and read the manual
Before lighting, confirm whether your oven uses wood, gas, or electric heating. Read the manufacturer instructions for ignition steps, safety clearances, and preheat times. Confirm that the oven is in a well-ventilated area and that you have the required tools ready.
Tip: Have the manual handy or a digital copy accessible on your phone. - 2
Inspect ignition system and vents
Check the ignition system, vents, and chimney for obstructions. Clear any debris and ensure dampers move freely. A clean start prevents poor ignition and uneven heating.
Tip: If you notice ash buildup, clean it before lighting. - 3
Prepare the interior and stone surface
Remove loose debris, lay a dry stone or steel deck if needed, and verify the interior is dry. A dry surface heats more evenly and reduces moisture that can affect crust quality.
Tip: Drying out the interior prevents cracks and steam buildup. - 4
Light the fuel and establish an initial flame
Light the wood with small kindling and gradually add larger pieces to achieve a steady flame, or ignite gas/electric elements according to the manual. Monitor flame behavior and air intake to avoid sudden flare-ups.
Tip: Start with a small, controllable flame and increase gradually. - 5
Preheat to target temperature
Set the oven to 450–500°F (230–260°C) and monitor closely. For stone baking, allow 45–60 minutes for the stone to reach its core temperature.
Tip: Use the ambient thermometer near the surface to confirm real heat. - 6
Stabilize heat and manage airflow
If your oven runs hot, adjust vents in small increments to reduce heat near the crust. For wood ovens, rotate logs and maintain even flame. For gas/electric, adjust burners as needed.
Tip: Small adjustments prevent crust scorching. - 7
Test bake before guests arrive
Perform a quick test bake with a small dough disc or a thin cracker to confirm heat distribution and baking speed. Assess crust browning and bake time.
Tip: Fine-tune stone position if needed for even browning. - 8
Cool and clean after use
Allow the oven to cool safely, then clean ash, wipe surfaces, and inspect the stone for cracks. Store tools and ensure vents are closed properly for next use.
Tip: Cooling time prevents warping and prolongs life.
Questions & Answers
What is the best temperature to start a pizza oven?
Most home pizza ovens perform well around 450–500°F (230–260°C). Start there and adjust based on crust browning and bake time.
Aim for about four hundred fifty to five hundred degrees, then tweak based on crust color and dough thickness.
Should I use a pizza stone during startup?
Using a preheated stone helps achieve a crisp bottom crust. Let the stone heat fully before loading dough to prevent sticking and uneven cooking.
Yes, a hot stone is key for crispy crust; preheat it well before baking.
Can I speed up startup with shortcuts like charcoal?
Shortcuts can create uneven heat and smoke. It’s best to follow the manufacturer’s ignition steps for consistent results and safety.
Avoid shortcuts that compromise safety; follow the manual for best results.
What safety precautions should I take when starting the oven?
Keep a fire extinguisher handy, ventilate the area, wear gloves, and never leave the oven unattended during ignition and preheating.
Stay safe by monitoring the ignition area and keeping flammables away.
How long does preheating typically take?
Preheating times vary by oven type and stone: plan for 30–60 minutes to reach the right internal temperature and stone heat.
Plan for half an hour to an hour to reach stable heat, depending on your oven.
Watch Video
Main Points
- Preheat to 450–500°F for best crust
- Monitor temperature with a thermometer near the surface
- Maintain clean vents and dry interior for safety
- Use a test bake to validate heat distribution