Clayoven: How to Build and Use a Traditional Clay Oven
Learn to plan, build, cure, and cook with a clayoven at home. This expert guide from Oven Cook Pro covers materials, safety, firing, maintenance, and troubleshooting.

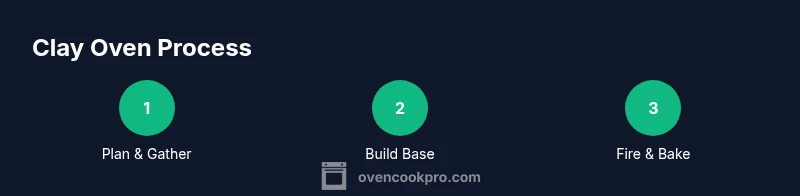
Clayoven basics: plan, build, cure, and cook with a traditional clay oven. This concise, step-by-step guide gives you the essential actions, safety cautions, and practical tips to start baking with clay heat today.
What is a clayoven and why home cooks love it
A clayoven, often called a traditional clay oven, uses thick earthen walls to store heat and radiate it evenly for cooking. The result is distinctive crusts on bread, succulent roasts, and a moist interior that metal ovens sometimes struggle to achieve. For homeowners and amateur chefs, a clayoven is more than a cooking tool—it’s a hands-on learning project in heat management, airflow, and patience. According to Oven Cook Pro, the right materials and a careful curing process make all the difference between a kitchen curiosity and a reliable workhorse.
In practice, a clayoven blends ancient technique with modern safety. Builders often start with locally sourced clay, sand, straw, and kiln bricks, then layer insulation to minimize heat loss. Firing occurs in stages, allowing moisture to escape slowly. The payoff is a durable chamber capable of searing at high heat and then sustaining warmth for hours. The key is respecting the material: slow curing, controlled firing, and mindful maintenance. With the right approach, a clayoven becomes a versatile centerpiece for family meals and weekend projects.
Core physics: heat, insulation, and moisture in a clayoven
Heat in a clayoven is a combination of radiant warmth and slow conduction through thick, porous walls. The insulating layer—often a clay-sand-straw mix—reduces heat loss and helps prevent surface cracking during firing. Because moisture must escape gradually, a controlled firing schedule is essential. Proper insulation keeps exterior temps manageable and protects the shell during long cooks. When firing, convection currents around the chamber promote even heat distribution, helping with browning and crust formation. The oven cools slowly, allowing repeated uses in a single cooking session. Understanding these principles makes it easier to predict how your foods will respond and how long they’ll stay hot after the fire dies.
Safety and workspace setup for clayoven projects
Safety should be your first consideration when building or using a clayoven. Work in a well-ventilated area and keep flammable materials away from the oven shell. Wear heat-resistant gloves, eye protection, and a dust mask when handling dry clays or mixing compounds. Have water or a spray bottle on hand to manage cracks and adjust humidity inside the chamber. Use a sturdy, non-slip work surface and keep a metal door or shield ready to control airflow during firing. A small extinguisher or a fire blanket should be within reach, and you should never leave a hot oven unattended. Establish a clear safety perimeter for kids and pets and discuss exit routes in case of emergency. Following local codes and using fireproof materials reinforces long-term safety.
Practical cooking with a clayoven: recipes and techniques
Clayoven shines with bread, pizzas, roasted vegetables, and braised dishes. For bread, preheat gradually to a high but controlled temperature, then bake on a flat stone or metal pan to promote bottom browning. Pizzas develop blistered, fragrant crusts when placed directly on the oven floor during the final phase of cooking. Root vegetables and potatoes caramelize beautifully in the radiant heat, while meats benefit from the gentle convection that a clayoven provides. Adjust humidity with a spray bottle or damp cloth as needed to prevent surface cracking, and use longer cooking times to leverage the oven’s heat retention. With practice, you’ll learn to balance heat, moisture, and airflow to produce consistent results across cuisines.
Common mistakes and how to avoid them
New builders frequently rush curing or ignore proper insulation. Overheating on the initial burns can cause surface cracks to deepen. Uneven dome thickness invites hot spots and structural stress. Skipping gradual preheats leads to thermal shock when you load food. Always begin with a small fire, increase slowly, and monitor the oven’s behavior. Cracking is common early on; keep the walls moist during the first days of curing and avoid abrupt temperature changes. Lastly, never use painted surfaces or non-fireproof coatings inside the oven—stick to earth-friendly materials designed for high heat.
Tools & Materials
- Heat-resistant bricks (kiln bricks)(Form oven walls and dome; choose dense bricks for stability)
- Clay-sand-straw insulating mix(Core insulating layer; adjust ratio for moisture control)
- Fireproof mortar or high-temperature cement(Joints and base foundation)
- Shovel or trowel(Mixing, shaping, and scooping materials)
- Water bucket and spray bottle(Curing control and moisture management)
- Heat-resistant gloves(Protect hands during shaping and firing)
- Safety goggles(Eye protection from dust and debris)
- Dust mask(Limit inhalation of clay particles)
- Metal oven door or door plate(Seal the chamber and control airflow)
- Infrared thermometer(Optional for surface temperature checks)
- Long-handled tongs or tools(Load/adjust coals and hot elements safely)
- Fireproof sealant (optional)(Seals joints; use only fireproof products)
Steps
Estimated time: 2-4 days
- 1
Choose a site and clear space
Select a flat, stable area away from walls, vegetation, and indoor clutter. Remove debris and ensure good ventilation. A clean, open site reduces contamination of materials and simplifies construction.
Tip: Position the oven where smoke can exit freely and isn’t nearby flammable materials. - 2
Lay the base and foundation
Construct a level foundation using kiln bricks and fireproof mortar. The base must bear the oven’s weight and resist shifting as it heats and cools.
Tip: Use a long straightedge to verify level; small tilts create future cracks. - 3
Form the oven dome
Build the curved dome with your clay-sand-straw mix, maintaining consistent thickness throughout. Smooth joints to maximize strength and heat transfer control.
Tip: Keep dome thickness around 2-3 inches for sturdy performance. - 4
Seal with insulating layer
Apply an insulating layer around the dome to minimize heat loss and improve heat retention. Ensure seams are tight and free of gaps that could crack under heat.
Tip: Damp the surface slightly before adding insulation to reduce cracking. - 5
Cure the oven gradually
Let the structure dry slowly for 24-72 hours before any firing. Gradual curing reduces stress and cracks that can form with rapid drying.
Tip: Cover with a damp cloth during the first 24 hours to maintain moisture. - 6
Fire for first use and season
Light small fires and increase gradually to the target temperature. Allow the oven to cycle through heat and cool-down slowly for seasoning.
Tip: Vent smoke away from living spaces and never rush the firing process.
Questions & Answers
What is a clayoven, and how does it work?
A clayoven is an earthen oven that stores heat in thick walls and radiates warmth for cooking. It requires proper insulation, curing, and controlled firing to work safely and effectively. The result is versatile heat suitable for bread, roasting, and slow-cooked dishes.
A clay oven is an earthen oven that uses thick walls to store heat and cook food slowly and evenly.
Is a clay oven safe for indoor use?
Indoor use is possible with proper clearance, ventilation, and heat-resistant materials. Always follow local codes, keep a fire extinguisher nearby, and ensure there is adequate exhaust to prevent smoke buildup.
Yes, with the right venting and materials, but follow safety rules and local codes.
What materials do I need to build a clay oven?
You need heat-resistant bricks, clay-sand-straw insulation, fireproof mortar, a base, a metal door, gloves, goggles, a mask, and basic tools. Water and patience are essential for curing and shaping.
Essential materials include bricks, clay mix, mortar, and safety gear.
How long does curing take before the first use?
Curing typically takes 24 to 72 hours of slow drying, depending on climate and material thickness. Avoid aggressive heating during this period to prevent cracking.
Expect a day or two for slow curing before lighting the first small fire.
Can I bake bread or pizza in a clay oven?
Yes. A clay oven excels at baking bread and pizzas due to its radiant heat and moisture retention. Start with simple loaves or pies to learn heat management before attempting complex recipes.
Bread and pizza bake beautifully in a clay oven with proper preheating.
What safety practices should I follow during firing?
Fire in a well-ventilated area, use heat-protective gear, monitor the fire closely, and never leave a lit oven unattended. Have a plan for safely extinguishing a fire if needed.
Always supervise the firing process and keep safety equipment ready.
Watch Video
Main Points
- Plan materials and space before starting
- Insulate well to maximize heat retention
- Cure gradually and fire slowly for best results
- Prioritize safety and ventilation at every stage
- Practice with simple recipes to build confidence