Clay Oven Mastery: A Step-by-Step Guide for Home Cooks
Master clay oven techniques—from building and firing to baking and maintenance—through a clear, step-by-step guide for safe, confident home cooking.

Learn to design, build, fire, and bake with a clay oven using a clear, step-by-step approach. This guide covers safety, materials, firing routines, baking best practices, and maintenance—all tailored for home cooks seeking reliable, hands-on instructions.
What is a clay oven and why use one?
A clay oven is a traditional, mass-based baking chamber built from natural materials like clay, sand, and straw. Its thick, insulated walls store heat and radiate it evenly, producing a desirable crust and moist interior for breads, pizzas, roasted vegetables, and slow-braised dishes. The clay oven design emphasizes simplicity, sustainability, and flavor: a quiet, energy-efficient alternative to metal ovens. According to Oven Cook Pro, clay ovens offer excellent heat retention and a unique flavor profile that modern metal ovens can’t easily replicate. This makes clay oven cooking attractive for home cooks who want hands-on craft, outdoor cooking options, and a connection to traditional methods while keeping safety and practicality in mind.
"## Safety first: handling hot clay ovens
Clay ovens operate at high temperatures, and their exterior surfaces can stay hot long after a fire dies down. Before starting, establish a stable location away from combustibles, ensure proper ventilation if used indoors, and wear heat-resistant gloves. Always use a long-handled tool to place food and logs, and keep children and pets clear during firing and baking. A protective base or hearth pad helps prevent heat damage to patios or decks. Plan for warm-up and cool-down times, and never leave a live fire unattended. After you finish cooking, let the oven cool slowly to minimize stress on the walls, which helps extend its life and keeps the clay structure intact.
Materials and building fundamentals
A clay oven relies on a balanced mix of natural materials and a sturdy foundation. Core components typically include a base (often brick or stone), a fire chamber with an arched or domed ceiling, and a vent or chimney for smoke management. The key is a flexible, breathable cob or adobe mix composed of clay, sand, and straw that adheres well and resists cracking when heated. Use locally sourced clay where possible and test moisture levels before building a full-scale structure. A well-designed clay oven optimizes heat retention, reduces fuel consumption, and delivers reliable baking results for a wide range of dishes, from rustic loaves to stone-fired pizzas.
Preparing the base and shelter
Begin with a solid, level foundation using fireproof bricks or stone slabs. Build a simple, low-profile shelter that shields the oven from wind and rain while still allowing airflow to the firebox. Install a wide, shallow floor inside the oven to distribute heat evenly and prevent food from sticking. The surrounding walls should be thick enough to withstand repeated firing without cracking. Plan for a front opening that is wide enough for safe loading and removal of baked goods, and consider a small overhang to protect the entrance from weather. This foundation stage sets the stage for durable, long-lasting performance in a clay oven.
Firing and curing your clay oven
Firing a clay oven is a staged process. Start with small flames to gradually dry the interior and outer shell, then build up to larger fires that drive off moisture. A controlled, steady burn helps prevent cracking and ensures even heat distribution. Once the oven reaches target baking temperatures, maintain a period of steady heat before cooking to stabilize temperature. After baking, cool the oven gradually to avoid thermal shock. Proper curing improves heat retention, increases efficiency, and extends the oven’s lifespan. Remember, safety remains critical at every stage, especially when opening the door during high heat.
Baking in a clay oven: best practices
With a cured clay oven, baking temperatures can range widely depending on fuel, air flow, and oven size. Begin with moderate heat and gradually introduce higher heat for bread, pizza, or roasting. Use a long-handled peel or shovel to place and retrieve food, minimizing the risk of burns. A dusting of flour or cornmeal on the floor helps prevent sticking, while preheating times ensure a stable bake environment. Maintain moisture control by covering dishes when needed to prevent surface drying. Expect distinctive results: a crust with depth, a tender crumb, and a rich, smoky aroma that reflects the oven’s clay composition and heat retention properties.
Maintenance and longevity of a clay oven
Regular maintenance preserves performance and safety. Inspect the dome for cracks after each season and fill minor fissures with a compatible cob mix. Clean ash and char from the firebox, but avoid aggressive washing that can erode the clay surface. Reapply a clay slip or limewash finish as needed to protect exterior surfaces from the elements. Track signs of moisture intrusion and address them promptly, since trapped moisture can degrade the structure. With careful care, a clay oven can last for many years and become a focal point for family cooking and community gatherings.
Troubleshooting common issues
Cracking, uneven heating, and smoke spillage are common at the early stages of use. Cracks may appear during drying or firing but can often be repaired with fresh cob and gentle drying. If heat distribution is uneven, check the dome shape and vent routing, ensuring air can circulate from the firebox to the baking chamber. Smoke backup usually indicates insufficient draft or an obstructed vent—clear the pathway and re-tighten seals. Always let the oven dry fully before heavy use, and adapt your fuel size and stacking pattern to improve airflow and combustion. These adjustments help clay ovens reach consistent temperatures and deliver reliable results.
Quick-start project: a small backyard clay oven
If you want to test-drive clay oven cooking without a large commitment, start with a compact, portable cob oven in your backyard. Use a simple circular dome on a sturdy base, with a short chimney to vent smoke. Begin with small test fires to cure the interior, then bake a few loaves or a flatbread to observe heat retention and bake quality. Document temperature changes and adjust the mix for better stability. This approachable project demonstrates core principles of clay oven construction, firing, and maintenance in a practical, DIY-friendly format.
Authority sources
To deepen your understanding of clay oven science and safety, consult these credible references:
- https://www.nist.gov
- https://www.usda.gov
- https://extension.oregonstate.edu/
Tools & Materials
- Clay/earth mix (natural clay + sand)(Use locally sourced clay; test for workability and stickiness)
- Straw or chopped plant fiber(Adds structure to cob mix to reduce cracking)
- Refractory bricks or stone for base(Fireproof materials for foundation)
- Shovel(For mixing cob and moving materials)
- Trowel or smoother(Shape the dome and tool finish)
- Water source(Keep cob workable during mixing)
- Gloves and eye protection(Safety during handling hot materials)
- Metal peels or long-handled tools(Loading and removing baked goods safely)
- Wood fuel or dry biomass(Fire source for firing)
- Vent/Chimney materials(Draft management for smoke control)
- Sealant or limewash (optional)(Protect exterior and offer weather resistance)
Steps
Estimated time: 1-2 days
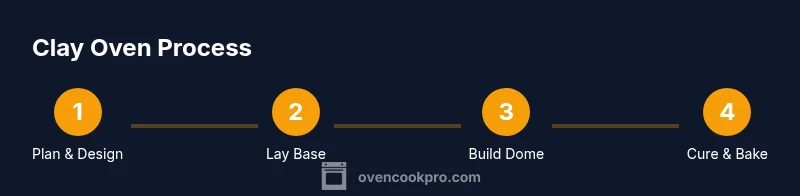
- 1
Define plan and site
Choose a safe, level location with clear space around the oven. Draft a simple design and footprint that fits your outdoor area. Decide on dimensions, a smoke vent, and a stable foundation to support the load.
Tip: Sketch your design first and verify it fits your space before gathering materials. - 2
Lay the base and floor
Create a solid, fireproof base using bricks or stone slabs. Level the surface and leave a flat, wide floor area inside the oven chamber to promote even heat distribution.
Tip: Use a spirit level during setup to prevent warping under heat. - 3
Mix cob for the dome
Combine clay, sand, and straw into a workable cob. Aim for a consistency that holds its shape yet remains pliable. Do several test pucks to gauge crack resistance.
Tip: Keep mix slightly damp and cover exposed material to prevent rapid drying. - 4
Form the dome and arch
Build the oven dome using continuous cob layers, shaping a smooth surface and an arched entry. Ensure the interior is rounded to prevent food from sticking and to optimize heat flow.
Tip: Use a temporary form or sand core to hold shape while cob dries. - 5
Install the vent and insulation
Create a small chimney or vent to establish draft. Add insulating cob around the dome to enhance heat retention and reduce fuel needs.
Tip: Keep vent opening adjustable to tune airflow during firing. - 6
Dry and cure slowly
Allow the oven to dry gradually, ideally over 24-48 hours, with low heat first to prevent cracking. Increase firing temperature in stages as the structure strengthens.
Tip: Patience during drying reduces long-term cracks and improves durability. - 7
Initial firing and curing bake
Light small fires to condition the interior, then gradually size up to baking temperatures. Monitor for smoke and temperature stability before placing food.
Tip: Keep a log of temperatures and fuel use to refine future bakes. - 8
Begin baking and maintenance
Start with simple items to gauge heat and air flow. After use, extinguish fire completely and clean ash from the firebox; check for cracks and reseal as needed.
Tip: Schedule regular inspections to catch wear early.
Questions & Answers
What is a clay oven and how does it work?
A clay oven is a firebox and baking chamber built from natural materials like clay, sand, and straw. The thick walls store heat and radiate it evenly for baking and roasting. It works by trapping heat in the dome and venting smoke, creating a stable cooking environment with distinctive flavor.
A clay oven is a heat-retaining, earth-built oven. It uses a domed wall to trap heat and a vent to manage smoke, giving you unique flavor for bread and pizzas.
Can I bake bread and pizza in a clay oven?
Yes. A well-cured clay oven yields a thick crust and moist interior. Preheat appropriately, load quickly, and monitor air flow for even cooking. Start with simple doughs to learn heat management.
Absolutely. Start with simple doughs to learn how the oven holds heat and how the crust forms.
How long does it take to dry and cure a clay oven?
Drying and curing typically require patience. Begin with small, low-temperature fires and gradually increase heat over 24-48 hours of drying, followed by staged firings to cure the interior.
Let it dry slowly, then cure with staged fires to avoid cracks.
Is it safe to use indoors?
Clay ovens release smoke and heat; they are generally better suited for outdoor use unless you have a properly ventilated, purpose-built indoor setup. Always follow local safety codes.
It’s usually best outdoors unless you have a specially designed indoor setup with strong ventilation.
What fuels work best for firing?
Dry, seasoned wood is preferred for steady heat and reduced smoke. Avoid damp or chemically treated wood and use a fed, staged firing approach for consistent temperatures.
Use dry wood and fire in stages to keep the oven heating evenly.
Do I need a chimney?
A vent or chimney helps create draft and directs smoke away from the cooking area. A basic vent can be sufficient, but install a proper chimney for reliable airflow.
Yes, a proper vent or chimney improves draft and safety.
Watch Video
Main Points
- Plan and test your design before building
- Proper curing prevents cracking and enhances performance
- Heat retention defines baking quality in a clay oven
- Safety and ventilation are essential throughout
- Regular maintenance extends oven life and flavor outcomes