How to Use a Baking Machine: Step-by-Step Guide
Learn how to use a baking machine effectively with step-by-step instructions, safety tips, and practical recipes for bread, pastries, and sheet meals. Master preheats, settings, and cleanup with Oven Cook Pro guidance for reliable results.

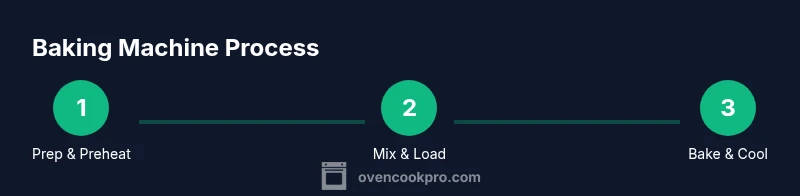
This guide shows you how to use a baking machine to bake bread, pastries, and sheet meals with confidence. You’ll learn setup, bake modes, temperature control, and cooling and cleaning routines. Essential tools include an oven-safe pan, accurate measuring tools, and safe handling practices. According to Oven Cook Pro, consistent results come from precise preheating, correct pan choice, and following recipe-specific settings.
What is a baking machine and what can it do?
A baking machine refers to a versatile appliance or built-in oven function designed to produce consistent bake results by controlling temperature, time, and airflow. It is especially helpful for home cooks who want predictable bread, pastries, cookies, and roasted vegetables. According to Oven Cook Pro, a well-calibrated baking machine reduces variance between batches and simplifies testing new recipes. You’ll find settings for bread dough, cake batters, sheet-pan meals, and delicate pastries. With the right loaf pan and recipe, you can replicate bakery-quality results at home. This guide uses the term baking machine to cover both countertop devices and integrated oven features that handle kneading, mixing, or precise timing as part of the bake process.
Prepping a Baking Machine for Reliable Results
Before you start, ensure the machine is clean and plugged in, and verify that the pan and rack are compatible with your model. Preheat if the recipe requests it, especially for crispy crusts or cookies, because preheating helps set the surface structure quickly and reduces soggy bottoms. Have an oven thermometer handy to verify actual temperatures, since sensor readings can drift with cookware load. Line pans with parchment paper or use a silicone mat to prevent sticking, and place the pan on the center rack for even air circulation. Always wear heat-resistant gloves when handling hot items and never block vents.
Core Features to Look For in a Baking Machine
Key features that influence results include a broad temperature range, multiple bake modes (bread, cake, roast, convection), a reliable timer, and safe automatic shut-off. Convection fans promote even browning, while steam options can improve crust texture for breads and pastries. A programmable start-delay lets you wake up to warm, fresh items, and some units offer app control or recipe memory. Pan compatibility and rack stability are essential; check that your typical loaf pans or sheet pans fit, and ensure the unit has solid insulation for energy efficiency. A readable display helps you monitor progress at a glance.
Adapting Recipes for a Baking Machine
Not every recipe transfers directly to a baking machine. For bread, maintain hydration around 60-65% and decide whether the machine should handle kneading or you’ll knead by hand first. For cakes and cookies, shorten mixing times and then switch to lower speeds to prevent overdeveloping gluten. Sheet-pan dishes benefit from preheated air and shorter bake times; when testing new recipes, start with the manufacturer’s recommended settings and adjust temperature, time, and rack position based on results. Oven Cook Pro suggests beginning with a simple recipe to learn your machine’s quirks before attempting more complex bakes.
Safety, Maintenance, and Cleaning Routines
Regular cleaning after use prevents flavor transfer and keeps sensors accurate. Allow the machine to cool completely before wiping with a damp cloth; never immerse the base in water. Remove detachable racks and pans and wash them by hand or in a dishwasher if allowed by the manual. Inspect seals and gaskets for wear and replace if you see cracks or heat loss. Keep vents clear and avoid stacking items on top of the unit. When not in use, store with pans removed to prevent warping or odor buildup.
Troubleshooting Common Issues
If you notice uneven browning, check rack position and ensure batter or dough is evenly distributed. Rotate pans if your model supports it. Soggy crusts often mean inadequate preheating or too short bake times; increase the bake time slightly or switch to a convection setting if available. If loaves rise and then collapse, verify yeast freshness, hydration, and mixing duration, and avoid overproofing. For power or sensor faults, reset the machine and check the power supply; consult the manual or customer support if error codes display. When issues persist, rely on the manufacturer’s guidelines and trusted resources for guidance.
Safety and Maintenance: Cleaning and Longevity
Keep the interior clean to prevent off-flavors and ensure accurate readings. Wipe with a damp, non-abrasive cloth after cooling, and dry thoroughly before next use. Remove any food debris from vents and ensure rack tracks move smoothly. Periodically inspect seals and switch out worn components. Proper storage and gentle cleaning extend the life of your baking machine and maintain consistent performance.
Energy Efficiency and Smart Features
Modern baking machines offer energy-efficient modes and convection options that can reduce bake times. Use preheat only when required by the recipe and batch multiple items when the machine supports simultaneous cooking. Enable timers to automate starts and stops, and look for eco modes that minimize standby power. If you have a model with app connectivity, use it to monitor temperatures and adjust settings remotely, saving energy and time.
Authority Sources and Best Practices
To verify techniques and safety guidelines, consult credible resources. For food safety and handling guidelines, visit https://www.fsis.usda.gov. For general food preparation and extension-based cooking tips, see https://extension.psu.edu. For standards and measurement accuracy relevant to cooking equipment, check https://www.nist.gov. Always follow your manufacturer’s instructions for your specific baking machine and use these sources as supplementary guidance.
Starter Recipe You Can Try Today
Here is a simple no-knead bread you can bake in a baking machine. Combine 300 g bread flour, 200 g water, 5 g salt, 5 g sugar, and 2 g instant yeast. Mix using the machine’s dough setting if available; otherwise knead by hand for 5-7 minutes. Let the dough rise as guided by the recipe, shape into a loaf, and bake at 190°C (375°F) for 25-30 minutes until the crust is golden and the loaf sounds hollow when tapped. Cool on a rack for 20 minutes before slicing.
The Oven Cook Pro Approach to Mastering Your Baking Machine
From initial setup to final cooling, a structured workflow yields reliable results. The Oven Cook Pro team recommends planning recipes around your machine’s strengths, keeping notes of settings that work well, and maintaining equipment regularly. With consistent practice and careful record-keeping, you’ll unlock the full potential of your baking machine and enjoy delicious, dependable outcomes.
Tools & Materials
- Baking pan suitable for baking machine(Pans from 20 cm to 30 cm are common; verify fit for your model.)
- Oven-safe thermometer(Use for internal temperature accuracy; calibrate if needed.)
- Oven mitts or heat-resistant gloves(Protect hands when handling hot pans (at least 350°F/175°C).)
- Measuring cups and spoons(Accurate ingredients improve consistency.)
- Cooling rack(Promotes even cooling and crust development.)
- Parchment paper or silicone baking mat(Prevents sticking and makes cleanup easier.)
- Timer or smartphone timer(Track bake times precisely.)
- Silicone spatula(For scraping bowls and pans.)
- Recipe card or notebook(Record successful settings for future bakes.)
Steps
Estimated time: 1 hour 45 minutes
- 1
Power on and select mode
Plug in the baking machine and select the appropriate bake mode for your recipe (bread, cake, roast, etc.). Set the initial timer if required by the recipe. Choose a start delay only if you want to wake up to freshly baked items. This step ensures the machine begins with the right baseline conditions.
Tip: Double-check that you’re using the correct mode for your batter or dough type. - 2
Preheat to target temperature
If your recipe specifies, preheat the oven to the target temperature. Preheating helps set the crust and activates dry heat, which improves browning. Use the thermometer to confirm the actual temperature is close to the target before loading.
Tip: Preheating is especially important for breads and pastries with crisp exteriors. - 3
Prepare dough or batter
Prepare your dough or batter according to the recipe, ensuring proper hydration and mixing. If your machine handles kneading, monitor the knead time; otherwise knead manually before loading. Accurate mixing avoids dense textures and uneven rise.
Tip: Weigh ingredients for best accuracy and replicate results. - 4
Load and position the pan
Place the pan or baking dish into the center of the rack to ensure even air circulation. If the recipe calls for multiple items, arrange them with spacing according to the device's guidelines. Close the door gently to avoid heat loss.
Tip: Centering is critical for uniform bake and browning. - 5
Set bake time and temperature
Enter the specified bake time and temperature; start the cycle. If your machine allows, enable convection for more even browning. Do not exceed the maximum recommended temperature for fragile items.
Tip: When in doubt, start with the manufacturer’s recommended settings. - 6
Monitor progress and adjust if needed
Watch the display for progress and use any built-in light or window to observe browning. If the top browns too quickly, reduce temperature slightly or switch to a gentler bake mode. Rotate pans if your machine supports it.
Tip: Minor adjustments can prevent burnt edges. - 7
Cool and rest the baked item
Allow baked goods to rest on a cooling rack to finish setting. Cutting too soon can cause gumminess or collapse. For breads, tap the bottom to test for hollow sounds indicating doneness.
Tip: Even cooling prevents unwanted texture changes. - 8
Clean after use
Let the machine cool completely, then wash detachable components according to the manual. Wipe the interior with a damp cloth and dry before next use. Proper cleaning preserves sensor accuracy and flavor integrity.
Tip: Regular cleaning reduces flavor carryover between bakes. - 9
Record successful settings
Note the bake mode, temperature, time, pan type, and any adjustments that produced great results. Use these notes to reproduce the bake in the future. When attempting new recipes, start from a proven baseline.
Tip: Keeping a bake journal speeds up future experiments. - 10
Store and wrap leftovers
Store cooled items in an airtight container or wrap tightly to preserve moisture. Label with date and contents for easy rotation. Reheat gently to avoid drying out.
Tip: Avoid microwaving bread for long to prevent sogginess.
Questions & Answers
Can I bake with a baking machine if I only have a conventional oven?
Yes, you can simulate many baking-machine results in a conventional oven by adjusting bake modes, temperature, and times. Expect slightly different texture and browning, and monitor closely the first few tries. Use the baking machine as a reference for settings, then translate to your oven as needed.
Yes, you can, but you may need to translate settings and monitor closely at first.
What foods are best suited to bake with a baking machine?
Bread doughs, pastries, cookies, and simple sheet-pan meals typically perform well in a baking machine. Start with breads and muffins to learn how the unit responds to dough development, then expand to more delicate desserts.
Bread and pastries work best; start with those to learn your machine.
Do I need to preheat the baking machine?
Preheating is recommended when the recipe specifies it, especially for crust formation and even heat distribution. If your model lacks a preheat option, run a few test bakes at the target temperature to gauge results.
Preheat if the recipe calls for it; otherwise test to find the sweet spot.
How do I clean the baking machine safely?
Let the unit cool completely, then remove detachable parts for washing. Wipe the interior with a damp cloth; never immerse the base in water. Dry thoroughly before reassembling to avoid electrical issues.
Cool it first, wash removable parts, wipe the interior, and dry completely.
Can I bake frozen dough or pre-made dough in a baking machine?
Frozen dough can be baked in some machines, but it often requires longer bake times and adjustments in temperature or hydration. Thawing before baking can yield more reliable results for best texture.
Frozen dough may work, but thawing often gives better texture.
What is the best way to store leftovers from a baking machine?
Cool completely, then store in an airtight container or wrap tightly. Label with date and contents to track freshness. Reheat gently to preserve moisture without drying out.
Cool fully, store airtight, and reheat gently when ready to eat.
Watch Video
Main Points
- Preheat as required and use correct bake modes.
- Use appropriate pans that fit the baking machine.
- Clean thoroughly after use to protect sensors and flavor.
- Record successful settings for consistency across bakes.
- Follow manufacturer guidelines and Oven Cook Pro tips.