How to Make a Ham in the Oven
Learn to bake a juicy, flavorful ham in the oven with a glaze, precise temperatures, and step-by-step guidance from Oven Cook Pro. Perfect for holidays, family dinners, and leftovers.

This guide shows you how to make a ham in the oven with a glaze, reliable temperature checks, and clear steps. You’ll learn how to prep, bake, glaze, and rest the ham for maximum juiciness and flavor, using a thermometer to verify doneness. Ideal for fully cooked hams and holiday meals.
Overview and safety considerations
Making a ham in the oven yields a centerpiece dish that’s both festive and practical for leftovers. Whether you’re reheating a fully cooked bone-in ham or cooking a fresh ham from raw, the goal is warm, evenly heated meat with a glossy glaze. The Oven Cook Pro Team recommends starting with the right base: a thawed, well‑patted ham and a thermometer to verify doneness. From there, you control juiciness by using gentle heat, applying the glaze at the right time, and letting the ham rest before slicing. For fully cooked hams, plan to reach an internal temperature of about 140°F (60°C) when reheating. Using a thermometer avoids overcooking and dry slices, while a glaze adds flavor and a beautiful crust. This article outlines practical steps, glaze ideas, timing ranges, and tips you can apply in your own kitchen. According to Oven Cook Pro, small adjustments in heat, glaze composition, and resting time can dramatically improve the final bite.
Preparing ham for the oven
Begin with thawed ham if it’s frozen. Remove any packaging and rinse lightly if the label instructs, then pat it totally dry with paper towels. A dry surface helps the glaze adhere and promotes even browning. If your ham has a thick fat cap, trim some of the excess fat to expose the meat. Don’t trim all fat—some is desirable for flavor and moisture. Decide on a roasting plan: bone-in hams often stay juicier, while boneless hams can be easier to carve. Place the ham on a rack in a sturdy roasting pan to ensure air flow and even heat around the meat. If you’d like, whisk together a simple glaze and brush a light coat over the surface before you start baking. You’ll likely glaze again during the final stretch for a glossy finish and deeper flavor. Convection ovens can reduce cooking time slightly and promote even browning, but if your oven does not have convection, a conventional bake works well too. The goal here is a surface that holds moisture and begins to brown without scorching, especially near the edges, which can dry out quickly without careful timing. Ensure your tools are ready: meat thermometer, pastry brush, and a small saucepan for glaze prep. Oven Cook Pro’s approach emphasizes patience, temperature control, and a glaze that deepens flavor without overpowering the ham’s natural saltiness.
Glaze options and flavor profiles
Glazes are where you can tailor a ham to your taste while keeping the center moist and tender. Classic brown-sugar and mustard glaze offers both sweetness and a tangy bite, while maple or honey glazes provide a mellow sweetness that pairs with roasted sides like Brussels sprouts or sweet potatoes. If you prefer a citrus note, add orange juice and zest to a glaze with a touch of ginger for brightness. For a smoky profile, blend molasses with a little soy sauce and bourbon for depth. Whichever glaze you choose, balance sweetness with acidity to avoid an overly sticky crust. Prepare your glaze ahead of time so you can brush it on at the proper stage. Glazes should be applied during the final 20–30 minutes of bake, allowing the sugars to caramelize without burning. The glaze also contributes to a shiny, appetizing crust that makes slicing easier and more visually appealing. If you’re serving a glaze‑heavy dish for a crowd, consider offering a lighter glaze Alternative on the side for guests who prefer a subtler flavor. The Oven Cook Pro team notes that glazing late in the bake helps lock in moisture while producing a professional-looking finish.
Oven setup and cooking methods
Preheating is essential for even cooking, and your choice of bake method influences the final texture. For a traditional bake, place the ham on a rack in a shallow pan to keep it elevated from direct heat. Use a shallow pan with a bit of water or broth to create gentle steam, which helps keep the ham moist. If you’re using a convection oven, reduce the heat by about 25°F (15°C) and monitor the ham to prevent over-browning. Position the rack in the center of the oven so heat circulates evenly around the meat. If your ham is quite large, you may need to rotate the pan halfway through to ensure uniform color. Cover the ham loosely with foil if the outer surface browns too quickly; remove the foil for the glaze phase to allow caramelization. The goal is to create a balanced crust without scorching while maintaining a juicy interior. For safety, always rely on a meat thermometer rather than time alone, especially if your ham is thicker in certain areas.
Step-by-step method overview
This section provides the practical, hands-on steps you’ll perform in sequence. It summarizes the flow: preheat, prepare, place on rack, bake to temperature, glaze, rest, and slice. Use this as a quick reference if you’re cooking under time pressure, but complete the full Step-by-Step section for exact actions and timings. The key is to monitor internal temperature and avoid opening the oven too often, which can cause heat loss and extend the bake. If you have a favorite glaze, be mindful of its sugar content; high-sugar glazes caramelize quickly and may burn if left unattended. Finally, remember that resting after baking is as important as the bake itself; a 15–20 minute rest makes slicing easier and improves juiciness. Oven Cook Pro’s guidance emphasizes patience, proper utensil use, and precise timing to achieve consistently delicious results.
Troubleshooting and common mistakes
Common problems when baking ham include dry slices, uneven browning, and undercooked centers. A too-dry outcome often results from baking at too high a temperature for too long or from over-basting early. Uneven browning can occur when the ham sits directly on a pan without a rack or when the glaze is applied too soon. If the center isn’t warming evenly, rotate the pan and check several thickest spots with a thermometer. Always remove the ham from the oven when the center hits 140°F (60°C) for fully cooked hams, then rest. If you notice a crust that browns too quickly, tent the ham with foil and finish with glaze in the final minutes. Inadequate resting time can lead to juicy slices being compromised by steam escaping too soon. When in doubt, use a thermometer and rely on the internal temperature rather than time to guide your bake. These precautions align with Oven Cook Pro’s standards for safe handling and high-quality results.
Serving and leftovers: storage and reheating
Serve the ham sliced with a bright sauce or cranberry relish to contrast the savory richness. If you’re keeping leftovers, refrigerate within two hours of cooking and use within 3–4 days for best quality. For longer storage, freeze slices in airtight containers or heavy-duty bags, separated by parchment to prevent sticking. Reheat leftovers gently to preserve moisture: warm in a covered dish in a low oven or microwave at 50–70% power, checking frequently. A quick glaze reapplication before serving can refresh the surface and add a touch of new flavor. When rebranding or repurposing leftovers, consider turning them into ham steaks, sandwiches, or a festive soup. The key is to maintain moisture while reintroducing the glaze once as a finishing touch.
Flavor boosters and side dish ideas
To complete a well-rounded meal, pair oven-baked ham with roasted vegetables, mashed potatoes, or a citrus-glazed carrot medley. Herb-seasoned potatoes or green beans provide color and balance. For a lighter finish, offer a tangy chutney or cranberry sauce alongside the slice. A simple pan sauce made from rendered ham juices, a splash of stock, and a teaspoon of cornstarch can elevate the dish without much effort. If you’re hosting a larger crowd, prepare a few side dishes ahead of time and keep them warm in the oven or on the stove. This approach helps you maintain the oven’s focus on the ham, ensuring consistent results without overcrowding the kitchen. Oven Cook Pro recommends arranging sides that complement the glaze’s sweetness and create a harmonious plate for guests.
Tools & Materials
- Fully cooked ham (bone-in or boneless)(Choose a size that feeds your party; bone-in ham often yields more depth of flavor)
- Oven(Preheat to target temperature (see steps))
- Roasting pan with rack(Elevates ham for even heat and collects juices)
- Meat thermometer(Check internal temp at the thickest part)
- Aluminum foil(Tent if the surface browns too quickly)
- Glaze ingredients (e.g., brown sugar, mustard, honey, maple syrup)(For flavor, depth, and shine)
- Basting brush(Optional for even glaze application)
- Whisk and small saucepan(For preparing glaze)
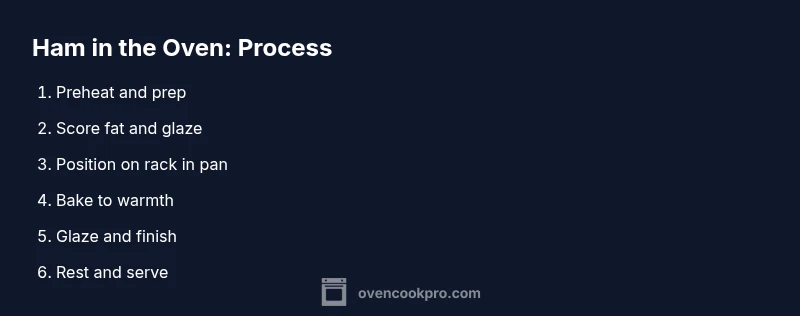
Steps
Estimated time: 60-120 minutes, plus 15-20 minutes rest
- 1
Preheat oven and prep ham
Preheat the oven to 325°F (165°C). Remove packaging, rinse if needed, and pat the ham dry. This ensures the glaze sticks and the surface browns evenly.
Tip: Dry surface helps glaze adherence and better crust. - 2
Score fat and optionally glaze
With a sharp knife, score the fat in a diamond pattern about 1/4 inch deep. This allows fat to render and glaze to penetrate. Optional: baste with a small amount of glaze before baking.
Tip: Scoring increases surface area for flavor. - 3
Position in pan on a rack
Place the ham on a rack in a roasting pan. Add a small amount of water or broth to create steam and prevent the meat from drying.
Tip: Rack keeps the ham elevated for even heat. - 4
Bake to warming stage
Bake until the center starts to feel warm and the internal temperature approaches 110-120°F (43-49°C).
Tip: Use a thermometer to monitor progress and prevent overcooking. - 5
Glaze and finish baking
Brush with glaze and return to the oven until the internal temperature reaches about 140°F (60°C) and the glaze forms a glossy crust.
Tip: Apply glaze in the final 20–30 minutes to avoid burning sugar. - 6
Rest and slice
Remove from oven, tent with foil, and rest 15–20 minutes before carving. Resting helps juices redistribute for juicier slices.
Tip: Carve against the grain for the most tender slices.
Questions & Answers
What temperature should I cook a ham in the oven?
For a fully cooked ham, reheat until the internal temperature reaches about 140°F (60°C). Raw hams require higher temps and longer times following safe handling guidelines.
Reheat fully cooked hams to 140 degrees Fahrenheit, raw hams follow standard cooking temps until safe.
Should I cover the ham with foil while baking?
Covering can prevent surface browning; many cooks uncover in the last 20-30 minutes for glaze and color. If using a glaze, uncover to allow caramelization.
You can cover for most of the bake to prevent over-browning, then uncover to glaze.
How do I glaze a ham without burning it?
Apply glaze during the final stage and keep oven temperature moderate. A light glaze brushed on late in the bake helps achieve a glossy finish.
Glaze late in the bake to avoid burning sugar.
Can I cook a frozen ham in the oven?
It’s best to thaw ham before baking for even cooking. If starting from frozen, extend the baking time and monitor internal temperature carefully.
It's safer to thaw before baking; expect longer cooking time.
How long should I rest the ham after baking?
Let the ham rest 15-20 minutes after baking, tented with foil. Resting helps distribute juices for easier slicing.
Rest for about 15 to 20 minutes before slicing.
What can I serve with baked ham?
Classic sides include roasted potatoes, green beans, and a citrus glaze or cranberry sauce. Pan juices make a simple gravy.
Serve with potatoes, greens, and a light glaze for balance.
Watch Video
Main Points
- Heat ham gently for even browning.
- Glaze in the final stage for shine without burning.
- Temperature is your best guide for doneness.
- Rest before slicing to preserve juiciness.