How to Cook Wings in the Oven: A Step-by-Step Guide
Learn how to cook wings in the oven for crispy, juicy results with a simple, reliable method—dry, bake, and finish with a quick broil for perfect wings every time.

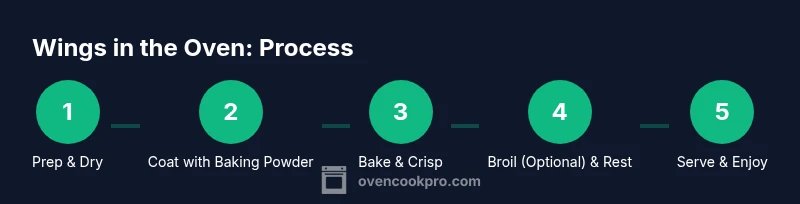
Here's how to cook wings in the oven: a reliable method for crispy, juicy results without frying. You'll dry the wings, coat with baking powder and seasonings, bake at high heat, then finish with a quick broil or high-heat blast. Gather wings, baking powder, salt, pepper, oil, and your oven preheated to 425°F for about 35-45 minutes.
Why Oven-Baked Wings Are a Crowd-Pleasing Option
When it comes to game day, a snack that delivers bold flavor with a crisp, meat-on-the-bone bite is hard to beat. Oven-baked wings strike a perfect balance between texture, flavor, and ease of preparation. The key to successful oven wings is a method that promotes dryness and even heat, which allows the surface to crisp up without turning the meat dry. According to Oven Cook Pro, the oven-fried-like texture you crave starts with good prep and a high-heat bake. The process is straightforward: pat the wings dry, use a light coating to aid browning, and give the wings ample space on a rack so air can circulate around every piece. This approach not only yields a satisfying crunch but also keeps the meat juicy inside. Understanding the science behind the crisp helps you consistently reproduce restaurant-quality wings in your own kitchen.
In this guide, you’ll learn a reliable technique for how to cook wings in the oven that works with or without sauce, and you’ll discover how small adjustments—like using a rack, applying baking powder, and choosing the right oven setting—can make a big difference in texture and flavor. You’ll also find practical tips for timing, safety, and serving ideas that suit casual weeknights or weekend parties. By the end, you’ll feel confident preparing wings that taste like they came from a fryer, but with the cleaner, simpler method you can repeat any night of the week.
note2n/a
Tools & Materials
- Wings (drumettes and flats)(Thawed, patted dry for best crispness; 2–4 pounds works for a crowd)
- Baking powder(Use aluminum-free baking powder for best browning and crisping; avoid baking soda unless you know your formula)
- Kosher salt(Seasoning base; adjust to taste)
- Ground black pepper(Even distribution of heat flavor)
- Smoked paprika or garlic powder (optional)(Adds depth; can substitute with chili powder for heat)
- Neutral oil (like canola or grapeseed)(Light coating helps browning; avoid heavy oils that glaze the surface)
- Baking sheet and wire rack(Elevates wings for air circulation; use parchment for easy cleanup)
- Parchment paper or aluminum foil(Keeps cleanup minimal; optional if you prefer a rack directly on sheet)
Steps
Estimated time: Total time: 40-60 minutes
- 1
Preheat and Prep Wings
Begin by preheating your oven to 425°F (218°C). While it heats, pat the wings dry with paper towels to remove surface moisture, which helps browning. Place wings on a sheet pan lined with parchment or a rack, keeping them spaced so air can circulate.
Tip: Dry surface moisture is the key to crisp skin; don’t skip this step. - 2
Dry Coat with Baking Powder and Seasoning
Sprinkle a light coating of baking powder and salt over the wings, then add pepper and any optional spices. The baking powder raises the skin’s pH, promoting browning and a crisper texture as the fat renders. Toss to ensure even coverage.
Tip: A light dusting is enough—too much baking powder can taste soapy. - 3
Arrange on Rack with Space
Spread wings in a single layer on the wire rack set above the baking sheet. Leave space between pieces to maximize air contact. This setup allows hot air to reach all surfaces, creating even browning.
Tip: Avoid stacking wings; crowding steams rather than roasts. - 4
Bake Until Crispy After First Pass
Bake for 20–25 minutes until the underside is browned and the skin looks dry. If you’re using a convection oven, you can reduce time slightly or set the oven to 400°F (205°C) for a similar result.
Tip: Keep an eye on color; you want deep golden, not burnt. - 5
Flip and Crisp the Other Side
Carefully flip wings with tongs and bake for another 10–15 minutes to ensure both sides crisp and the meat cooks through. The internal temperature should approach 165°F (74°C) for safe consumption.
Tip: Flipping ensures uniform crispness on all surfaces. - 6
Optional Broil Finish for Extra Crisp
If you crave extra blistering and color, broil on high for 1–3 minutes, watching closely to prevent burning. This step is especially effective for traditional buffalo sauces or dry rubs.
Tip: Watch closely; broiling happens fast and can go from perfect to burnt. - 7
Rest and Sauce (If Desired)
Remove wings from the oven and let them rest on the rack for 5 minutes. If using sauce, toss the wings in your sauce of choice during the rest to minimize soggy texture.
Tip: Resting helps juices redistribute and keeps the exterior crisp. - 8
Serve and Enjoy
Plate the wings with celery sticks and a dip of choice. If you’re making a sauce, serve on the side so diners can adjust heat and sweetness.
Tip: Nice balance of textures—crisp skin with juicy meat shines when served fresh. - 9
Total Time
Prepare, bake, and rest for a total of roughly 40–60 minutes depending on wing size and oven efficiency. If using sauce, add a few extra minutes for coating after the bake.
Tip: Estimate may vary with wing size and equipment; adjust accordingly.
Questions & Answers
Can I cook frozen wings in the oven or do I need to thaw first?
You can cook frozen wings, but you’ll need more time. Thawing them first yields crisper skin and more even cooking. If you cook from frozen, add 10–15 minutes to the bake time and check for an internal temperature of 165°F.
You can cook frozen wings, but thawing gives you crispier skin. If frozen, expect longer bake time and verify doneness with a thermometer.
What oven temperature is best for crispy wings—conventional or convection?
Conventional ovens are commonly set around 425°F for crispy results; if you’re using convection, you can reduce the temperature to about 400°F and still achieve a crisp finish due to better air circulation.
Conventional around 425 is common; convection can be a bit cooler at 400. Air circulation helps crisp up the skin.
Do I need to thaw wings before baking if I plan to sauce them after?
Thawing helps even cooking and skin crispness, but you can bake from frozen with adjusted times. For saucing after, a dry surface helps sauce adhere better without making the skin soggy.
Thawing is better for even cooking and crisp skin, but you can bake from frozen with longer times. Sauce after baking for best texture.
What’s the safe internal temperature for cooked chicken wings?
Cooked chicken wings should reach an internal temperature of 165°F (74°C) to ensure safety. Use a calibrated meat thermometer inserted into the thickest part of the wing.
165 degrees Fahrenheit is the safe target for cooked wings.
Can I add sauce to wings during baking to save time?
Saucing during baking can create soggy skin. It’s usually better to bake dry, then toss with sauce immediately after removing from the oven for best texture.
Sauce after baking for crisper skin; saucing during baking tends to make the skin softer.
How can I keep leftovers safe and tasty?
Cool wings quickly, store in airtight containers in the fridge for up to 3–4 days. Reheat in a 350°F oven or air fryer to restore crispiness.
Cool, store in the fridge for a few days, then reheat in a hot oven or air fryer to regain crispness.
Watch Video
Main Points
- Dry wings thoroughly before baking for crisp skin
- Use a light baking powder coating to promote browning
- Space wings on a rack to maximize air circulation
- Bake hot, then finish with a brief broil for extra color
- Aim for 165°F internal temperature for safety
- Sauce after baking to maintain texture and flavor