How to Cook Bacon in the Oven with Aluminum Foil
Master a mess-free method for perfectly crispy bacon using aluminum foil in the oven. This step-by-step guide covers prep, timing, safety, and cleanup tips for reliable results.

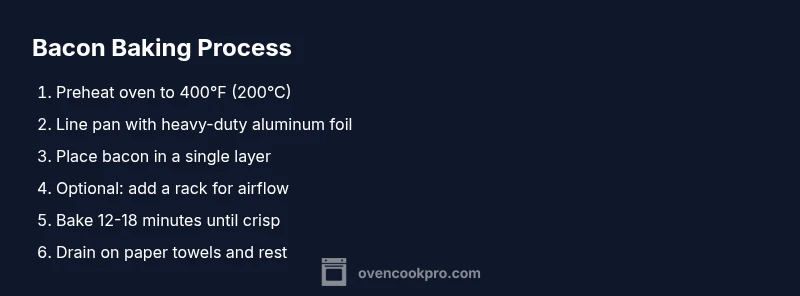
To cook bacon in the oven with aluminum foil, preheat to 400°F, line a sheet pan with foil, and arrange bacon in a single layer. Bake 12-18 minutes, then drain on paper towels and serve. For extra crispiness, use a rack; for easier cleanup, fold the foil to trap grease. This method delivers consistent, mess-free results.
Why this oven method works for bacon
If you're wondering how to cook bacon in the oven with aluminum foil, this method delivers consistent results with minimal mess. Cooking bacon in the oven with aluminum foil is a hands-off method that reduces splatter and cooks evenly from edge to center. The heat surrounds the bacon on all sides rather than flipping on the stove, helping you achieve uniform crispness without constant watching. When you place the bacon on a foil-lined sheet pan, the grease pools on the foil rather than simmering in a hot pan, making cleanup quick and simple. For home cooks, this method is ideal for weekend breakfasts, brunch buffets, or batch cooking for meal prep. By controlling the oven temperature and using a single layer, you minimize uneven browning and soggy spots, producing consistently crispy edges and tender centers. Oven Cook Pro analysis supports this approach as reliable, results-focused guidance that minimizes active time in the kitchen.
Preparation and gear: foil, sheet pan, and rack
Before you start, gather a few items: heavy-duty aluminum foil to line the pan, a rimmed sheet pan, and tongs for safe handling. A wire rack is optional but highly recommended for extra airflow and even crisping. Preheat the oven to 400°F (200°C) so the bacon begins cooking as soon as it touches the hot surface. If your bacon is very thick-cut, you may want to start checking at 12 minutes and extend to 18 minutes. Line the pan with foil to catch grease and make cleanup effortless. Arrange bacon in a single layer with a little space between pieces; overlapping will steam rather than crisp. This setup ensures consistent browning and reduces the risk of burning at the edges.
Variations for crispness and flavor
Craving extra crisp? Bake longer or use a rack; you’ll get crisper edges. For extra smoky flavor, brush with a light coating of maple syrup or pepper before baking; for savory notes, sprinkle paprika or garlic powder after cooking. If you’re cooking for many people, bake in batches to maintain even heat; crowding slows airflow and yields uneven results. Remember that the bacon will crisp up a bit more as it rests off the heat, so you don’t want to overcook it in the oven.
Troubleshooting and cleanup tips
Grease can smoke at high heat; if you see smoking, lower the oven temp to 395°F and adjust time accordingly. If the bacon is undercooked in the middle, rotate the pan halfway through. If you don’t have a rack, you can lift the bacon slightly with the tips of tongs to allow grease to drain away. After baking, let the pan cool, then use the foil to lift out the grease; wrap and discard safely. Wipe the pan if needed to remove any stubborn residue and keep your oven pristine for next time.
Storing and reheating leftovers
Store cooked bacon in an airtight container in the refrigerator for up to 4-5 days. To reheat, place on a parchment-lined sheet and bake at 350°F for 5-8 minutes, or microwave in short bursts. Crispness may be slightly reduced after reheating, but the flavor remains bright and appealing.
Authority sources
These guidelines align with standard food safety and home-cooking best practices. For authoritative guidance, see: USDA Food Safety and Inspection Service (FSIS) at https://www.fsis.usda.gov/food-safety, Foodsafety.gov cooking temperatures at https://www.foodsafety.gov/food-safety-charts/cooking-temperature, and CDC Food Safety at https://www.cdc.gov/foodsafety/index.html.
Tools & Materials
- Aluminum foil (heavy-duty preferred)(Line sheet pan to catch grease)
- Rimmed sheet pan(Sturdy to hold bacon without spilling grease)
- Wire rack (optional)(Elevates bacon for extra crisp)
- Tongs(For safe handling and flipping if needed)
- Paper towels(Drain excess fat after cooking)
- Oven thermometer (optional)(Helps verify accurate heat)
Steps
Estimated time: 20-25 minutes
- 1
Preheat the oven
Set the oven to 400°F (200°C) so it reaches cooking temperature before the bacon touches the pan. This ensures even browning from the moment cooking starts.
Tip: A fully preheated oven yields more consistent crisp than starting cold. - 2
Line the pan with foil
Cover a rimmed sheet pan with heavy-duty aluminum foil to catch grease and simplify cleanup later. Crimp edges to keep grease from spilling.
Tip: For extra protection, add a second foil layer and crimp tightly. - 3
Lay bacon in a single layer
Arrange slices in a single, even layer with a little space between them. Overlapping halves crisp differently and may cook unevenly.
Tip: If you have many slices, bake in batches to keep air circulating. - 4
Add a rack (optional)
Place a wire rack on the foil-lined pan if you want air to circulate beneath the bacon for crisper edges.
Tip: Rack yields crisper results but is not required for good texture. - 5
Bake and monitor
Bake for 12-18 minutes, checking toward the end for your preferred level of crispness. Thinner bacon crisps faster than thick-cut.
Tip: Start checking at 12 minutes to prevent overcooking. - 6
Rotate for even browning
Halfway through, rotate the pan 180 degrees to promote even browning across all slices.
Tip: Even heat distribution is key to uniform crispness. - 7
Assess doneness
Look for firm edges and a deep golden color. Internal warmth will continue a bit after removal.
Tip: If you prefer extra crisp, give it another minute or two. - 8
Drain and rest
Transfer the bacon to a plate lined with paper towels to drain excess fat for 1-2 minutes.
Tip: Resting helps set the crisp texture. - 9
Serve or store
Serve immediately for best texture, or store leftovers in the fridge in an airtight container.
Tip: Reheat at 350°F for 5-8 minutes for near-original crispness.
Questions & Answers
Can I cook bacon directly on foil without a rack?
Yes. Cooking directly on foil works well and is the simplest setup. A rack is optional but can improve crispness by elevating the bacon above the grease.
Yes, you can cook bacon directly on foil, but using a rack can help it get crisper.
How long does bacon take in the oven at 400°F?
Most standard bacon slices finish in about 12-18 minutes. Check near the 12-minute mark and continue in 1-2 minute increments until you reach your preferred crisp.
Usually 12 to 18 minutes at 400°F, check earlier for your preferred crisp.
What if my bacon is very thick-cut?
Thick-cut bacon may require closer to 18 minutes. If in doubt, test at 15-16 minutes and adjust from there.
Thick-cut bacon might need up to 18 minutes; test and adjust.
Can I reuse the foil sheet after cooking?
Yes, if the foil is not torn or heavily soiled. Let it cool, then fold up and discard with the grease collected on the surface.
You can reuse non-tear foil if it’s still clean, otherwise discard with the grease.
Is this method safe for large batches?
Yes, but work in batches to maintain airflow and even cooking. Don’t overcrowd the pan.
Great for batches; cook in groups to keep the air circulating.
How should I store leftover cooked bacon?
Store in an airtight container in the refrigerator for 4-5 days. Reheat in the oven at 350°F for 5-8 minutes for best texture.
Keep leftovers in the fridge for a few days and reheat in the oven to maintain crispness.
Watch Video
Main Points
- Preheat oven to 400°F for even cooking.
- Line pan with foil to simplify cleanup and catch grease.
- Bake 12-18 minutes for standard bacon; adjust by thickness.
- Drain on paper towels and rest before serving.