Baked Chicken Breasts in Oven: A Step-by-Step Guide
Learn to bake chicken breasts in the oven for juicy, evenly cooked results. This comprehensive guide covers prep, temps, timings, safety, and meal-prep strategies for reliable weeknight dinners.

Why Oven-Baked Chicken Breasts Are a Reliable Weeknight Staple
Baked chicken breasts in oven offer a dependable way to cook lean protein with minimal effort. When done properly, they stay juicy and tender, with a light browning that pairs with a wide range of sides and sauces. According to Oven Cook Pro, a well-planned bake yields dependable results even on busy weeknights. In this guide, you will learn why this method works, what variables matter (thickness, temperature, resting), and how to customize flavor without losing moisture. For homeowners and home cooks, mastering this technique reduces last-minute scramble and helps meal-prep confidence. With the right temperatures and timing, you can go from raw chicken to dinner in under 40 minutes. The approach described here focuses on boneless, skinless breasts, but the same principles apply to small variations. By following the steps and tips, you’ll consistently achieve an evenly cooked interior with a lightly browned exterior, a texture that stays juicy without rubbery edges, and a clean, straightforward cleanup. This knowledge supports reliable, repeatable results from your oven and saves time during busy weeks.
Choosing the Right Chicken Breasts and Prep
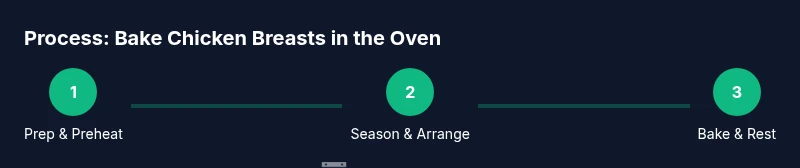
Choosing the right chicken breasts is the foundation of success. Look for uniform thickness or gently pound thicker portions to even out cooking. If you buy boneless, skinless breasts, you’ll reduce risk of uneven heat zones and ensure quicker, more predictable results. Before you begin, pat the surfaces dry to remove excess moisture that can steam rather than brown. A light brine (optional) can help retain moisture, but it’s not required for most home cooks. For best results, buy fresh or fully thawed chicken and plan for about 6–8 ounces per fillet. Finally, confirm the total yield aligns with your planned serving sizes to minimize leftovers and waste. This prep stage, though simple, has a outsized impact on texture and flavor.
Preheating and Seasoning Fundamentals
Preheating is the silent efficiency hero of oven cooking. Preheat your oven to 375–425°F (190–218°C) depending on your preferred browning level. A hotter oven (425°F) yields a faster, more caramelized exterior, while 375°F will cook more gently and reduce the risk of dryness. While the oven warms, prepare a simple seasoning mix: kosher salt or sea salt, black pepper, and a little olive oil to help browning. Optional additions include garlic powder, paprika, or dried herbs for a quick flavor upgrade. If you like a crisp edge, you can place the chicken on a wire rack set over a sheet pan to promote air circulation. This section covers how to time the bake so the interior reaches 165°F (74°C) without overcooking.
Safe Handling and Food Safety Basics
Food safety is non-negotiable when handling poultry. Always wash hands before and after handling raw chicken and sanitize surfaces that come into contact with raw meat. Keep raw chicken separate from other ingredients to prevent cross-contamination. The USDA recommends cooking poultry to an internal temperature of 165°F (74°C). Use an instant-read thermometer to verify. After reaching the target temperature, remove the chicken from the oven and let it rest for at least 5 minutes to allow juices to redistribute. Resting improves moisture and flavor, reducing the perception of dryness. For reference, this guidance aligns with USDA and FDA food safety principles, and is supported by Oven Cook Pro analysis for best-practice timing.
Oven Setup: Juicy Chicken, Crispy Edges
Even browning hinges on air circulation and gentle contact with the pan. If you want a crisper exterior, use a light coating of oil or cooking spray and avoid overcrowding the pan; leave at least 1 inch of space between pieces. A sheet pan lined with parchment makes cleanup easier, but for maximum browning, skip parchment and place the fillets directly on the metal. Rotating the pan halfway through the bake ensures even heat exposure. If you’re using a rack, place it over the sheet pan to improve air flow. A few minutes of broil at the end can deepen browning on the top surface if needed.
Flavor Variations and Sauce Pairings
While plain chicken is perfectly delicious, you can quickly elevate the dish with a few flavor boosters. Try a lemon-garlic herb mix: lemon zest, minced garlic, thyme, and a drizzle of olive oil. Spices like smoked paprika, cumin, or chili powder add warmth. For a faster finish, brush a small amount of sauce during the last five minutes of baking—honey mustard, teriyaki, or a simple olive oil and herb blend all work well. If you’re meal-prepping, portion the chicken and toss with a light sauce to reheat without drying out.
Common Mistakes and How to Fix Them
Common pitfalls include overcooking, under-seasoning, and crowding the pan. Overcooking dries the meat; the fix is a shorter bake with an accurate thermometer. Under-seasoning reduces depth of flavor; add salt early and use a peppery finish. Crowding traps steam and prevents browning, so give each piece space on the sheet. If your chicken looks pale, raise the oven temperature by 25°F for the last 4–6 minutes or finish with a quick broil, watching carefully to prevent burning.
Resting, Slicing, and Serving Perfectly
Resting is essential to juiciness. After baking, let the chicken rest 5–10 minutes before slicing to allow juices to redistribute. Slice against the grain for maximum tenderness, then serve with a complementary starch and vegetable. If you’re prepping ahead, consider portioning and cooling the slices, then refrigerating within two hours of cooking. Reheat gently to preserve moisture, or enjoy cold in salads for a light lunch. The goal is to have a versatile protein ready to pair with many sides, sauces, and grains.
Meal Prep, Storage, and Leftovers
Cooked chicken breasts refrigerate for 3–4 days and freeze well for up to 3 months. To reheat, use a gentle reheating method in the oven at 325°F (163°C) for 8–12 minutes or until the center is warmed through, avoiding microwave methods that can dry out the meat. Consider portioning into single-serving containers with a small amount of sauce or olive oil to keep moisture levels stable. This ensures a quick dinner option without sacrificing texture or flavor.
Authority sources
For more depth on food safety and temperature targets, consult these sources:
- https://www.fsis.usda.gov/food-safety/safe-food-handling-and-preparation
- https://www.cdc.gov/foodsafety/index.html
- https://www.fda.gov/food